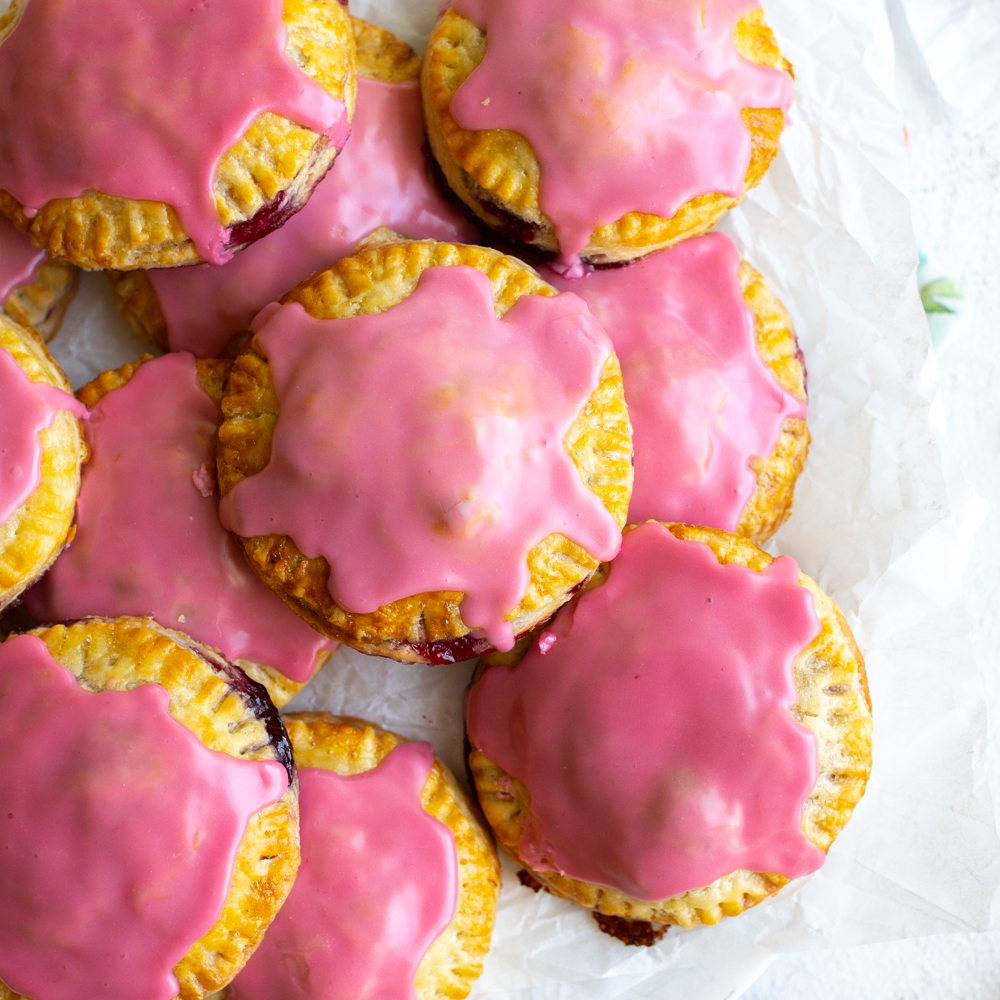
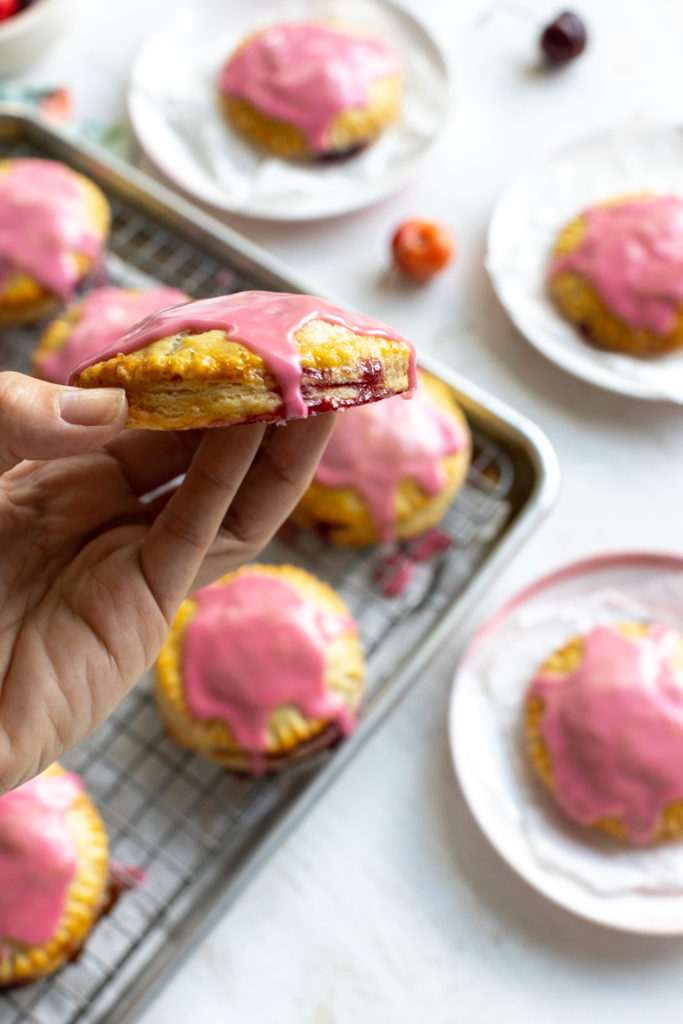
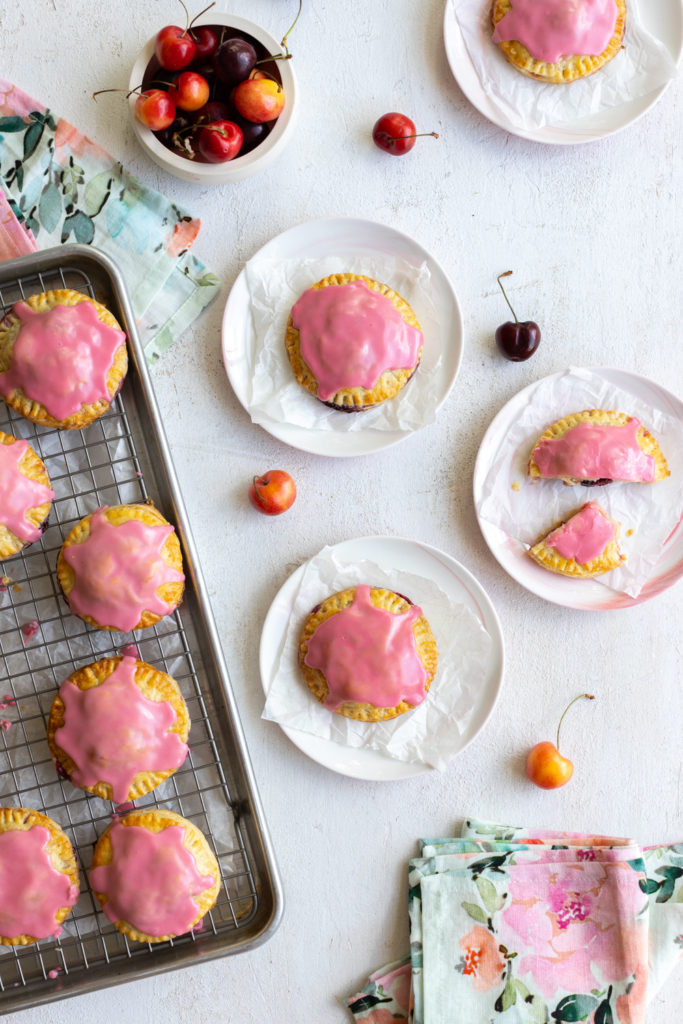
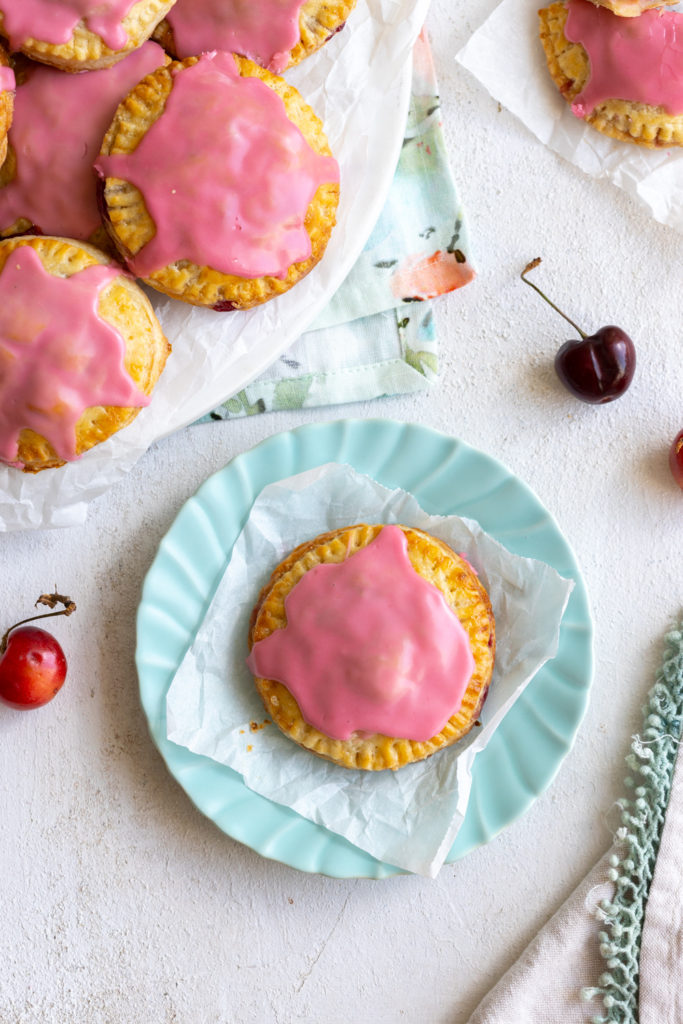
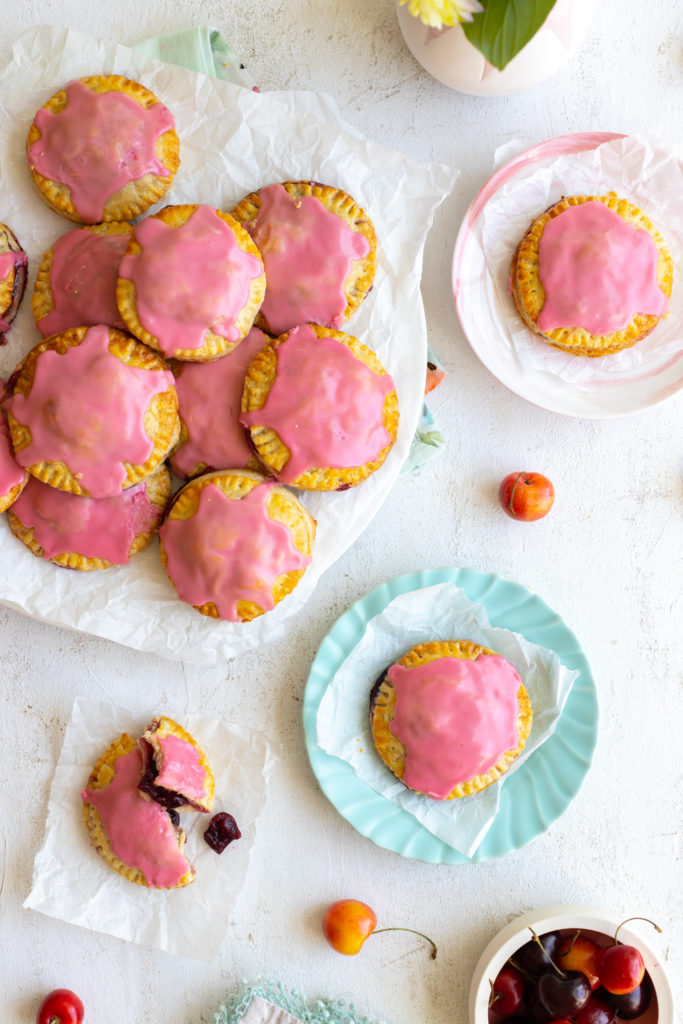
These cheery Cherry Hand Pies with Cream Cheese Crust feature a rich and tangy, tender pie crust made with cream cheese. Fresh seasonal cherries fill the hand pies and then they are topped with a vibrant pink cherry glaze.
Apparently cherries are a polarizing subject. I had no idea. I kind of assumed everyone loves cherries, I mean they're iconic, right? Cherries are sweet and juicy, they taste of summer and sunshine. What's not to love? But, many people equate the actual fruit to the sickeningly artificial flavor of cough syrup. What a bummer for those folks. That's a travesty and I aim to combat that artificial association with these fresh and sweet Cherry Hand Pies with Cream Cheese Crust.
I don't want to live in an artificially flavored world where even the thought of cherries evokes memories of staying home from school in bed with a cough and binging Wheel of Fortune. Maraschino cherry memories are a little better. But while we all loved them in our Shirley Temples as kids, they taste nothing like actual cherries. Weighing all of that, I can see how one might snub cherries in adulthood. However, I assure you, these Cherry Hand Pies with Cream Cheese Crust taste nothing like Luden's.
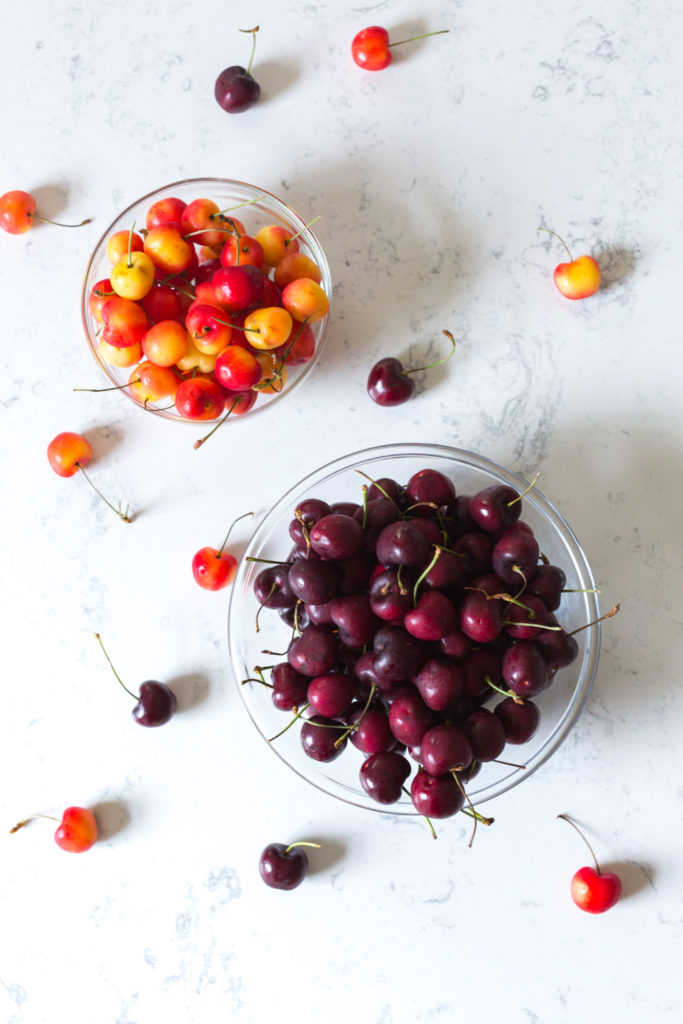
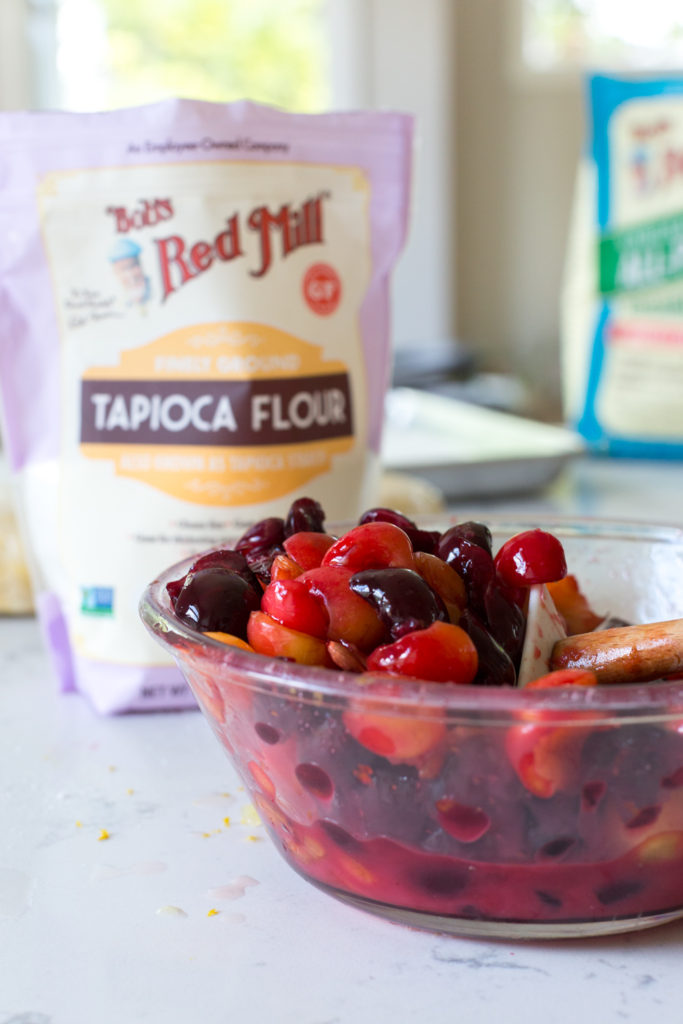
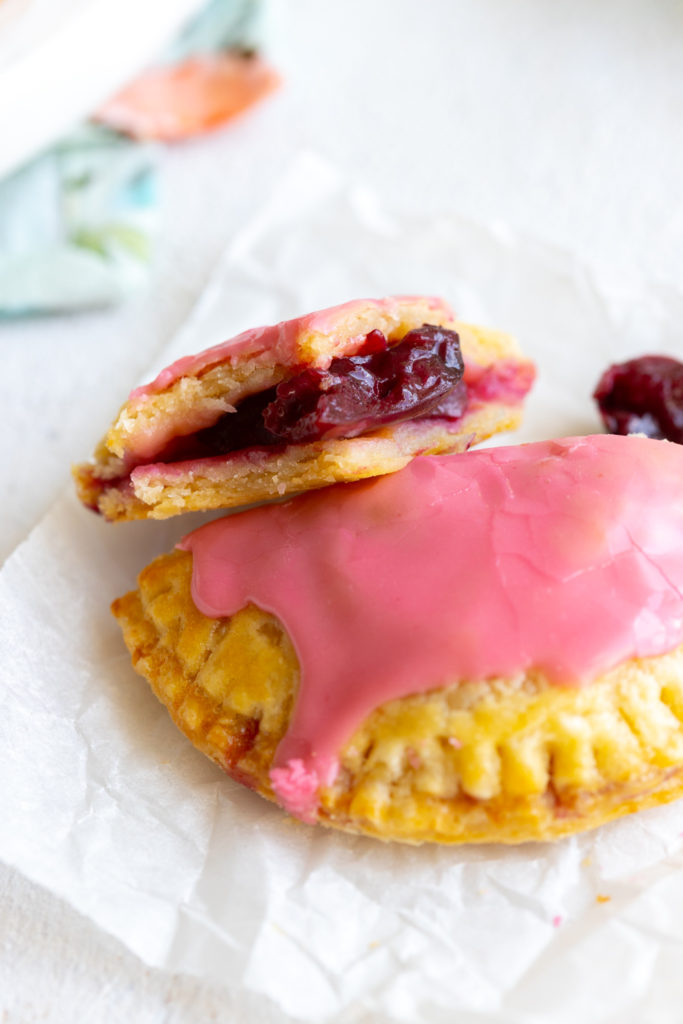
The cherry filling is a simple mix of pitted and split fresh cherries. In this recipe I used a mix of slightly tart Sweet Dark Cherries and delicately sweet Rainier Cherries. You can use whatever you like or whatever cherries grow best near you. Then I only add a little sugar and some lemon zest and juice for brightness to round out the sweetness. A bit of tapioca flour helps thicken the filling. That's it. No overly sweet syrupy situations going on here.
Now let's discuss the crust because that's really what makes these Cherry Hand Pies with Cream Cheese Crust so special. It's the Cream Cheese Pie Dough. I adapted my classic All Butter Vodka Pie Dough by adding in cream cheese and pulling back on hydration a bit. The result is an angelically tender yet flaky crust with a richness and slight tang that compliments the sweet cherries delightfully.
Cream Cheese Pie Dough adds elegant texture and flavor
Now, let’s break down what the cream cheese brings to the table:
- Taste: The cream cheese adds a richer, tangy undertone that brings depth to the crust and balances both sweet and savory fillings.
- Texture: The cream cheese gives the pie dough an almost velvety texture. It feels more luxurious and tender. The edges don’t have quite the same crisp breakage in the bite as my traditional pie dough. But, the flakiness is still there and the crust is unbelievably tender.
- Workability: I’d say this Cream Cheese Pie Dough is actually a bit easier to work with than my traditional pie dough. The cream cheese lends a pliability that makes it roll out smoother and more easily.
The interplay between the cream cheese and cherries in these hand pies is an elegant experience. Even if you are personally cherry averse due to the trauma of cold syrup, I highly recommend giving this combo a go. The creamy tang of the flaky crust wrapped around the fresh, bright cherries and the vibrant pink cherry glaze is basically a pocketful of happiness. Don't deny yourself this happiness.
These Cherry Hand Pies with Cream Cheese Crust are a pocketful of happiness
You deserve to be happy. You deserve to leave your negative imitation cherry flavored memories in the past. And, you most definitely deserve a handful of Cherry Hand Pies with Cream Cheese Crust!
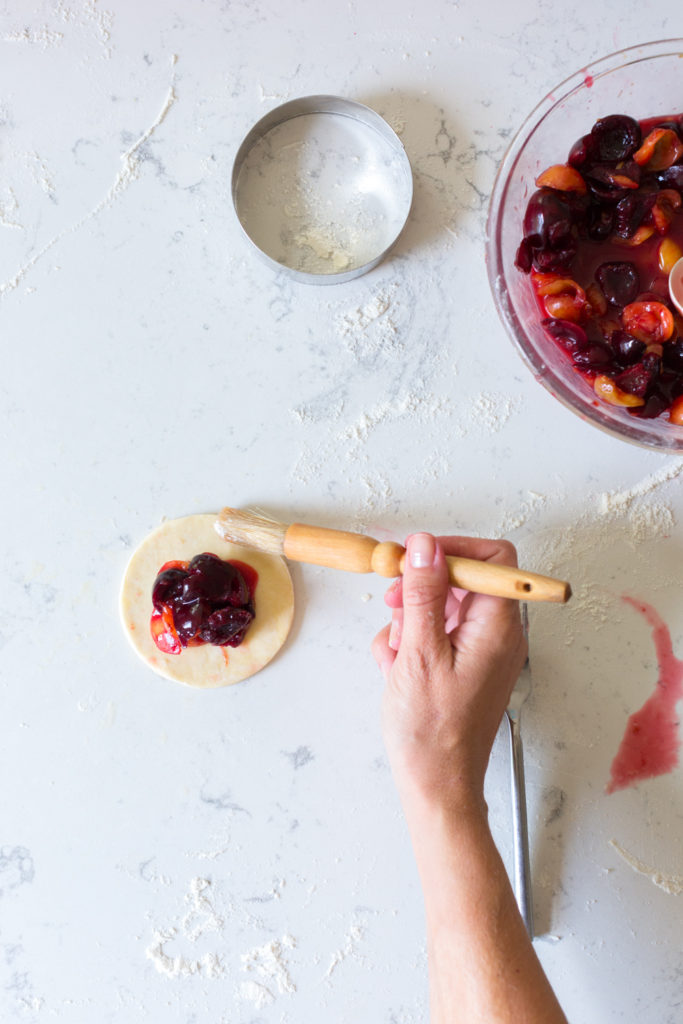
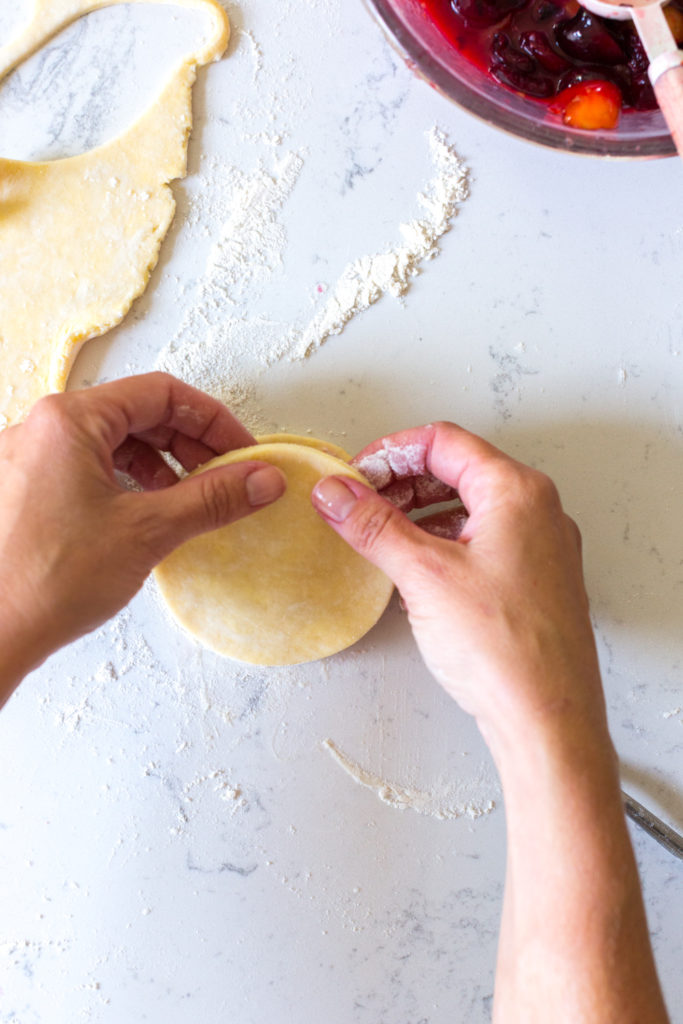
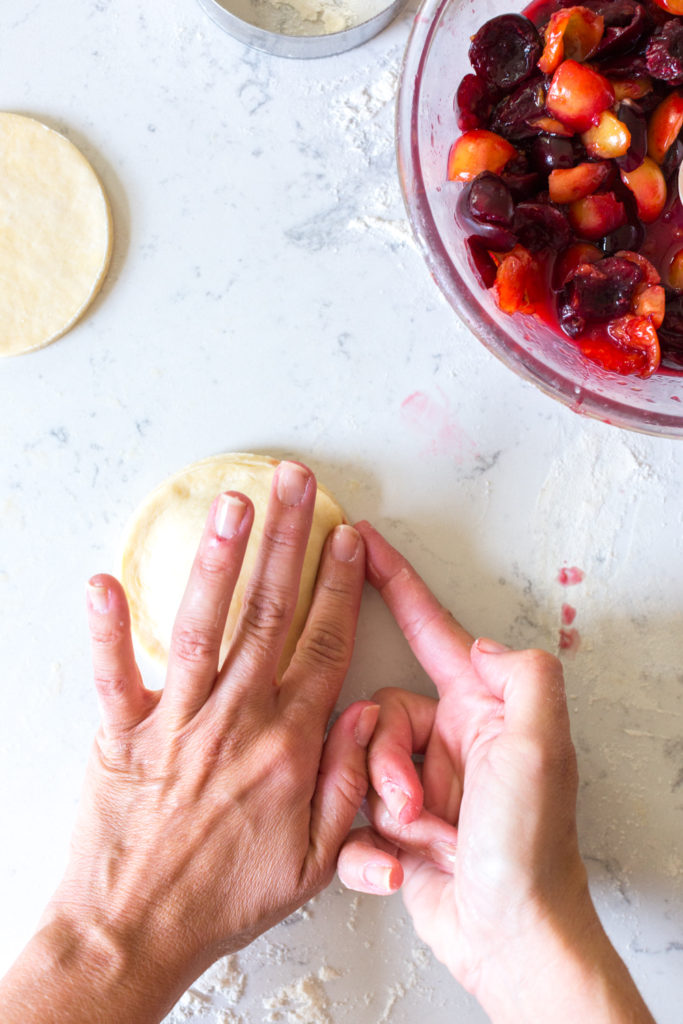
How to make and shape Cherry Hand Pies with Cream Cheese Crust

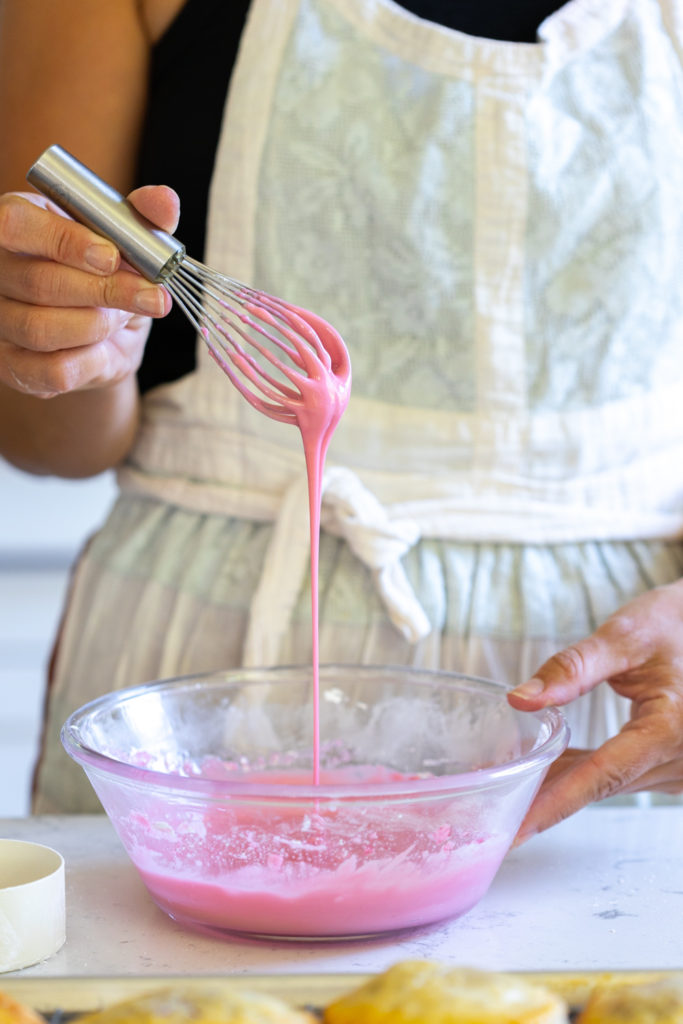
How to make the simple cherry glaze for the hand pies

Recipe

Cherry Hand Pies with Cream Cheese Crust
- Total Time: 1 hour 55 minutes
- Yield: 15 hand pies 1x
Description
These Cherry Hand Pies with Cream Cheese Crust have an elegantly creamy, tangy & tender crust filled with fresh, bright cherries, topped with a vibrant pink cherry glaze.
Ingredients
- 2 disks cream cheese pie dough (https://bakingthegoods.com/2020/07/21/cream-cheese-pie-dough/)
- 3 cups fresh cherries (- pitted and split)
- 1 medium lemon or lime (- zested and juiced)
- ½ cup granulated sugar
- 1 tablespoon tapioca flour
- 1 ¼ cups powdered sugar
- 1 large egg
Instructions
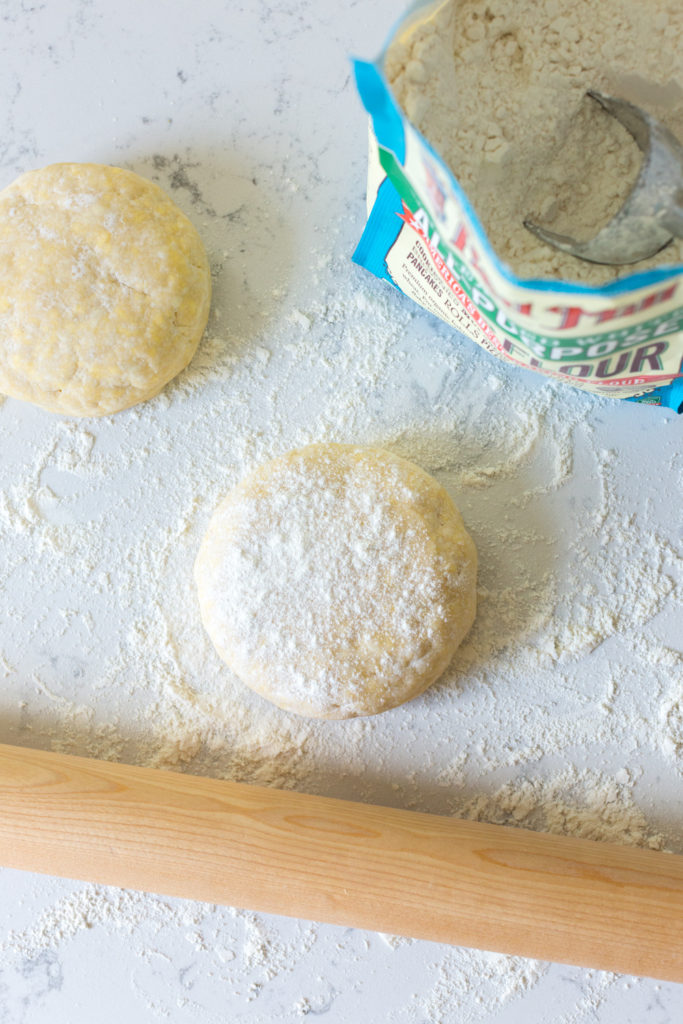
- If Cream Cheese Pie Dough is frozen, defrost overnight in the refrigerator or allow to thaw on the counter at room temperature for 1-2 hours.
If your dough is chilled in the refrigerator, allow it to sit at room temperature for about 10-15 minutes before rolling it out.
CHERRY FILLING
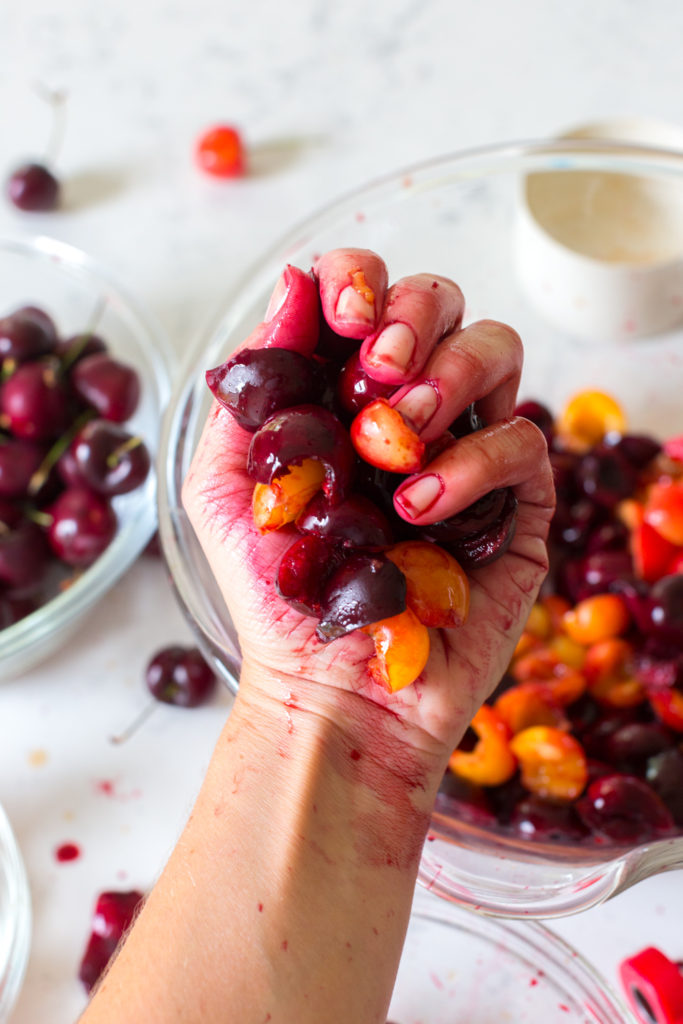
- Pit the cherries. Then split them by either tearing them in half and squeezing them in your hands or by giving them a good rough chop.
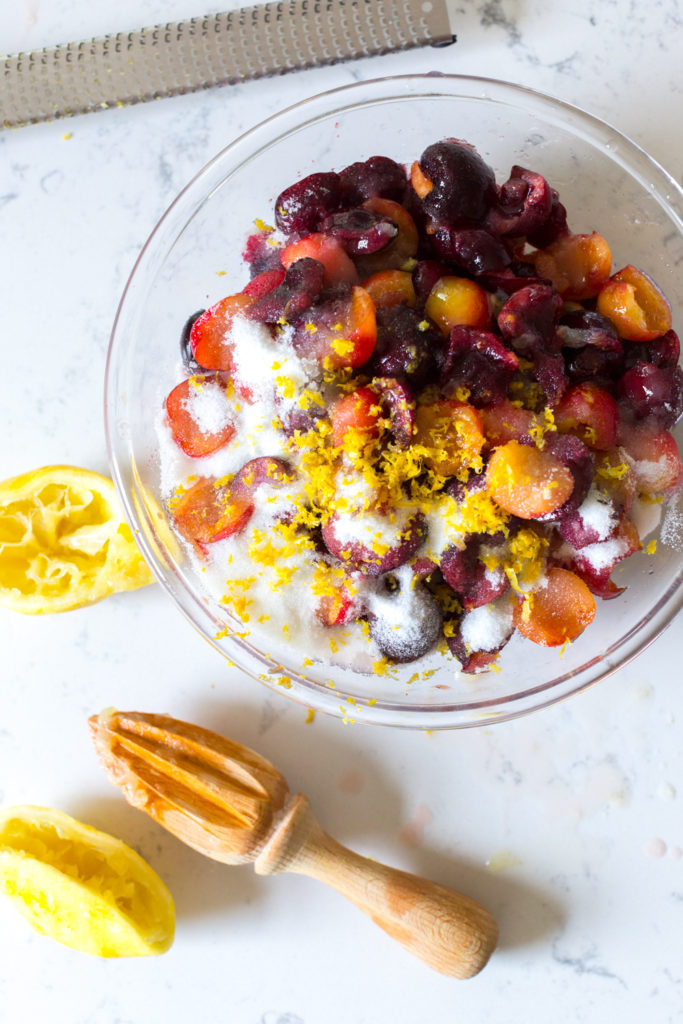
- In a mixing bowl, combine the pitted and split cherries with the granulated sugar and zest and juice of a lemon or lime. Stir to combine and allow to sit for 15 minutes until the juices naturally release from the cherries.
- Strain most of the juice from the cherries into a small bowl and reserve for icing.
- Combine about 2 tablespoons of the cherry juice with the tapioca flour and whisk together to make a slurry. Pour the slurry back in with the cherries and stir to combine. Set aside while you roll out the pie dough.
FORMING THE HAND PIES
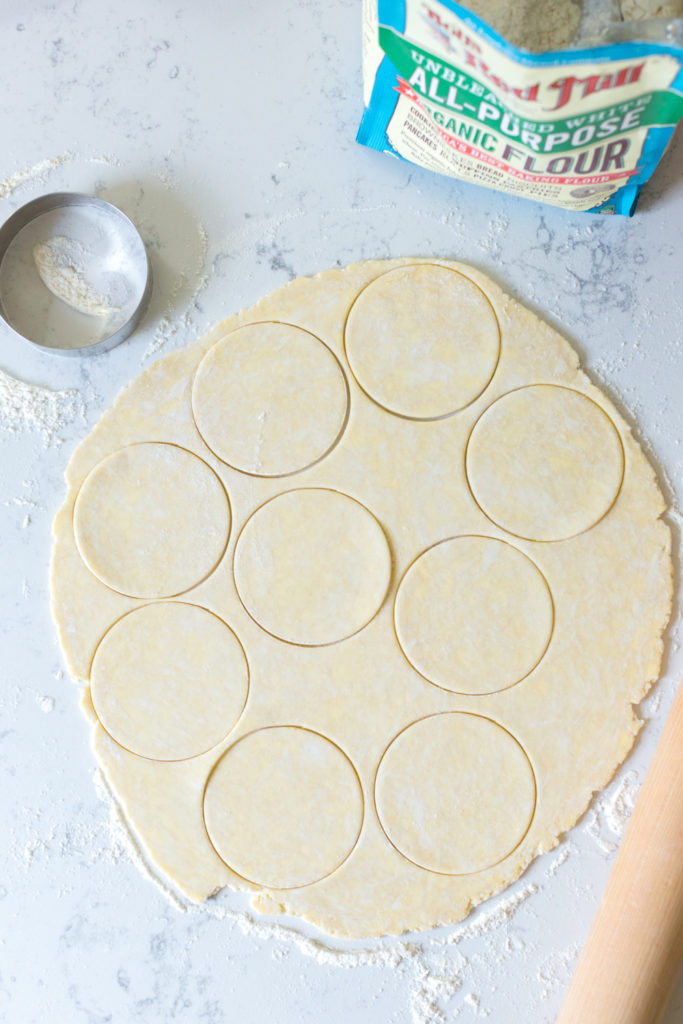
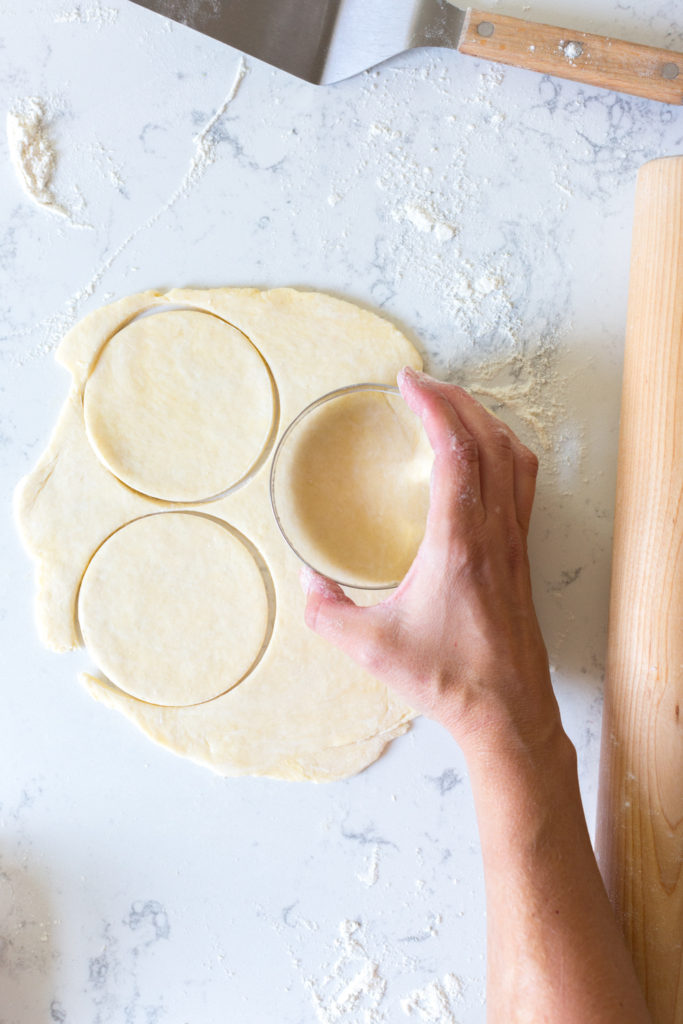
- On a lightly floured surface, roll out the first disk into a 11" – 12" round, about ⅛" thick. Using a 3.5" - 4" round cookie cutter, cut out as many rounds as you can. Gather the scraps together and re-roll and cut again.
Repeat the process with the second dough disk.
*If the dough starts to get too warm and sticky, shape into a disk, wrap and place back in the fridge to chill for a few minutes before rolling out again.
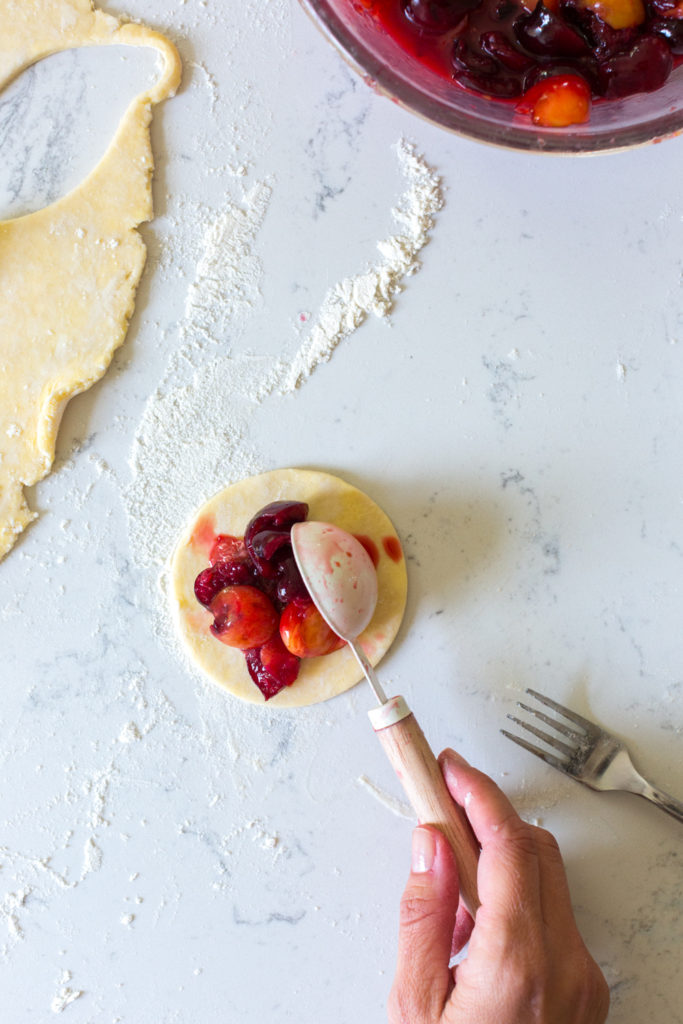
*You may want to transfer the dough rounds to a lined baking sheet and chill them in the refrigerator while you roll out and cut the dough so they don't get too warm. It depends on how quickly you can move and how warm it is in your kitchen. - If you chilled the dough rounds, remove them from the refrigerator. Spoon about 2 tablespoons of the cherry filling onto a round. Lightly brush a small amount of cold water around the edges of the of the filled dough round, then carefully lay another round over the top of the filled round. Gently press and seal the edges together around the perimeter. Create a decorative edge by pressing the edges of the dough together with the back of a fork all the way around the hand pies. Repeat with remaining rounds.
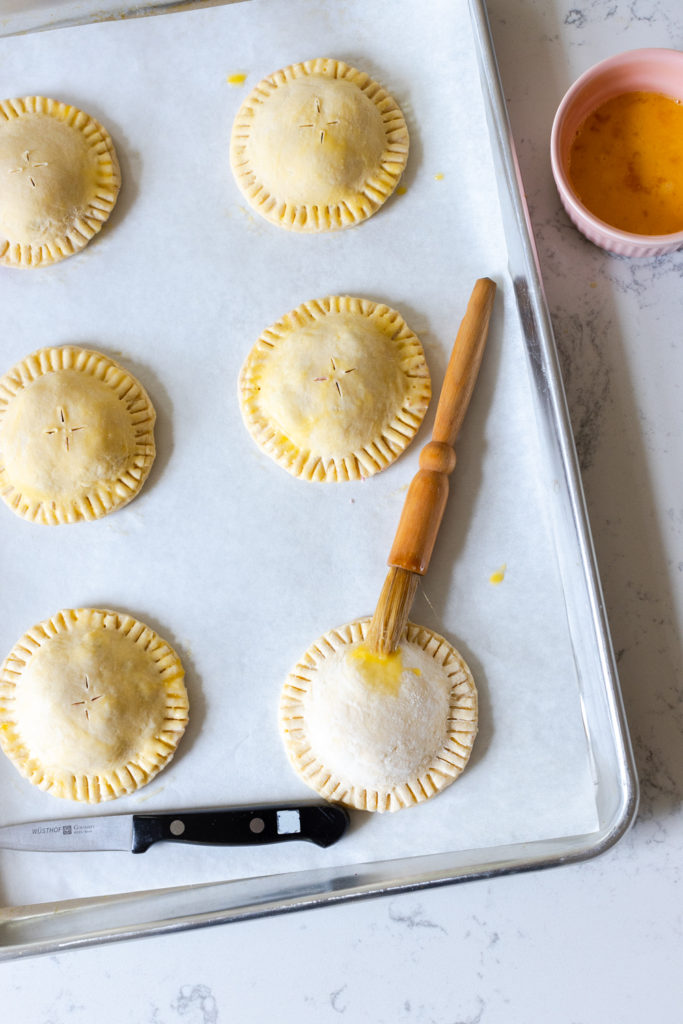
Transfer the rounds close together on 1 -2 lined baking sheets and chill in the fridge for at least 1 hour or the freeze for at least 30 minutes to firm up. *This will help them keep their shape when they bake. I prefer freezing my hand pies. - Preheat oven to 375° F.
- Whisk 1 egg and a dash of water together in a small bowl. Using a pastry brush, lightly brush the hand pies with the egg wash just before baking. Use a sharp knife to cut three small vents in the top of each hand pie.
- Bake until the hand pies are golden brown, about 20 - 25 minutes, rotating the pans halfway through. Allow to cool slightly on the baking sheets, then transfer to a cooling rack to finish cooling.
GLAZE THE HAND PIES
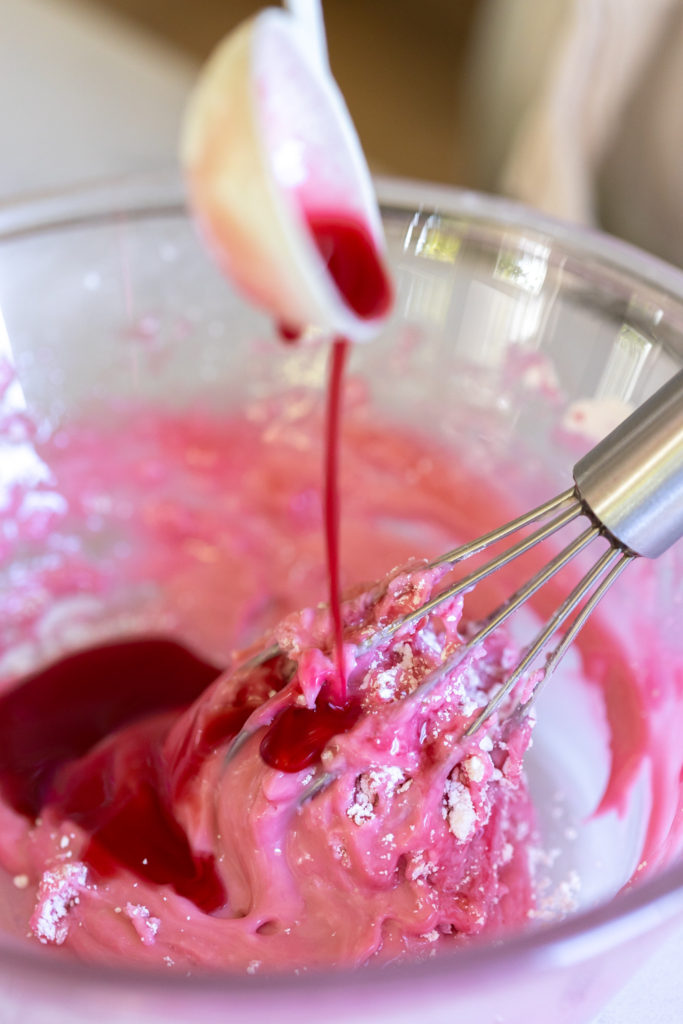
- Sift the powdered sugar into a medium bowl. Slowly whisk in 1-2 tablespoon of the reserved cherry juice, until the mixture is smooth and runs off the whisk like molasses.
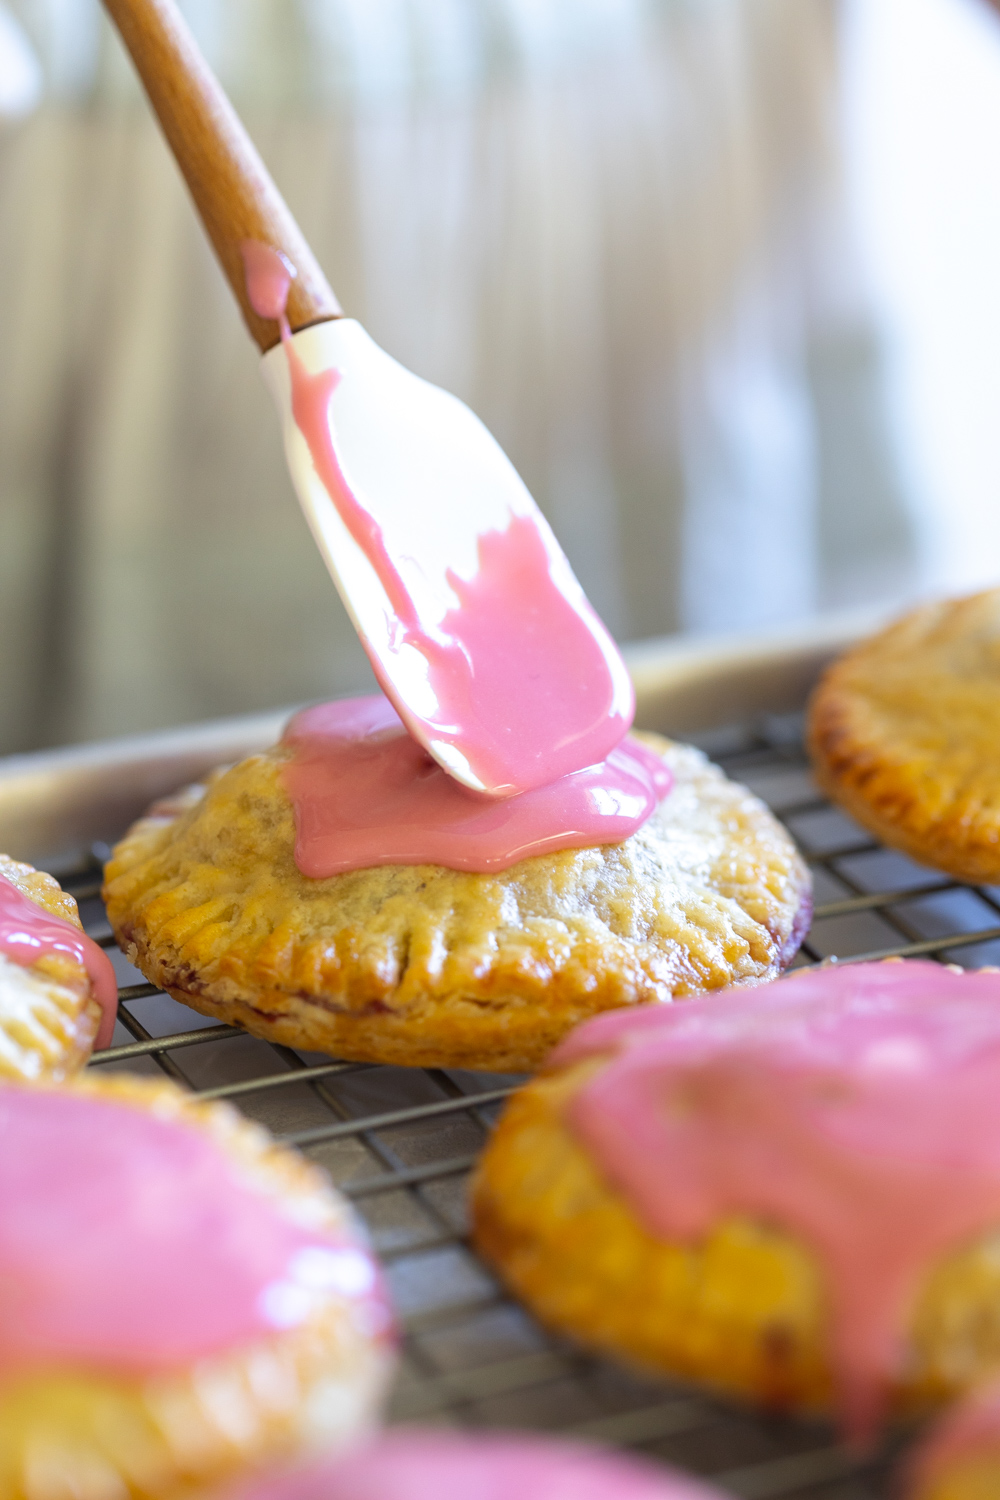
- Spoon about 1 tablespoon of glaze onto each hand pie, smoothing the glaze to the crimped edges with the back of the spoon or a small spatula. Allow the glaze to set before serving.
- Prep Time: 1 hour 30 minutes
- Cook Time: 25 minutes
- Category: Dessert
- Cuisine: hand pies