These Holiday Butter Cookies are an ode to that iconic blue tin of nostalgia we all know and love. A simple vanilla and almond scented butter cookie dough takes on 4 classic cookie shapes. Each unique shape has a flair of individuality with buttery ridges that give way to a delicate interior. These festive, melt-in-your-mouth cookies are just sweet enough, with the rich and buttery essence of the beloved original.
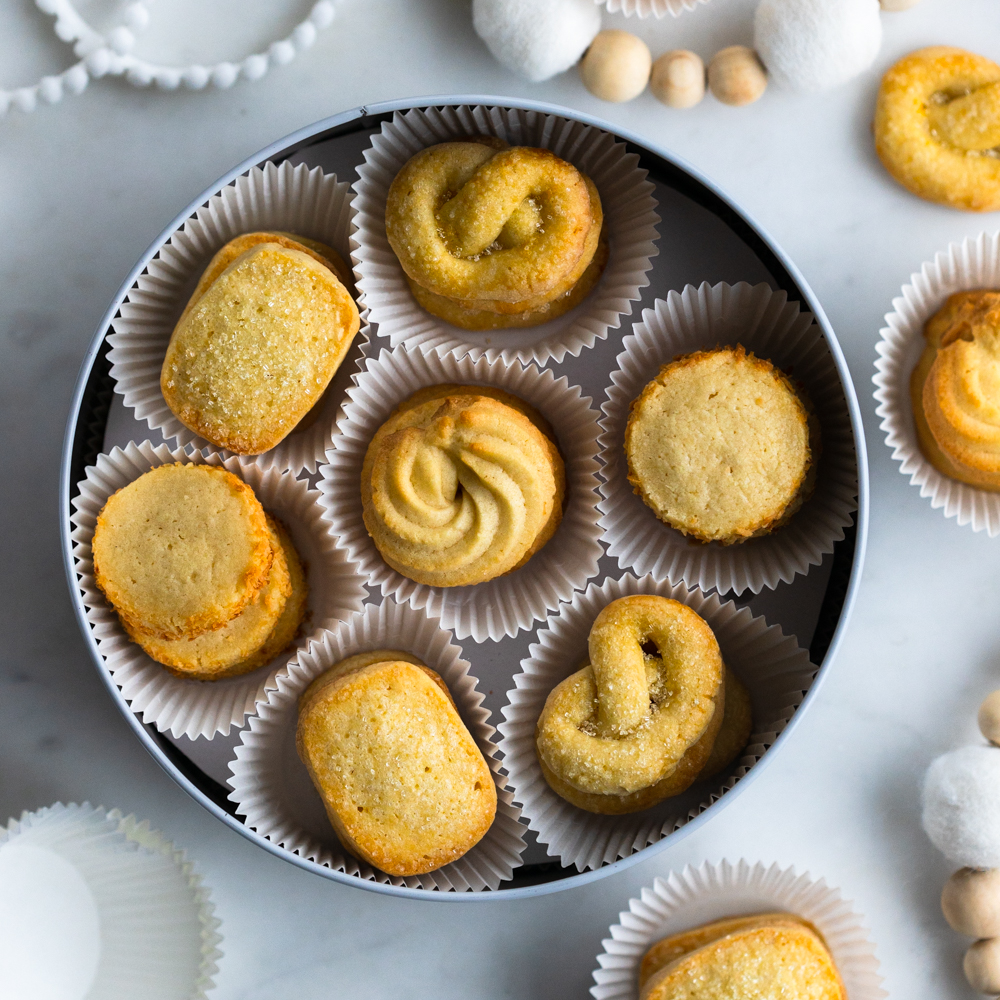
When my friends from New Seasons Market asked me to share a family recipe or holiday tradition that shaped me, I struggled to come up with a holiday centric family recipe. While my Apple Bottom Hootenanny Pancakes and Apple Cheddar Pie are both rooted in family memories. These Holiday Butter Cookies stir up deep holiday memories for so many of us.
Jump to:
- An ode to the classic blue tin of Danish Butter Cookies
- 5 styles of Danish Holiday Butter Cookies
- 1 butter cookie dough 4 ways
- How to shape ring-style holiday butter cookies
- How to shape round holiday coconut cookies
- How to shape rectangle-style holiday cookies
- How to shape pretzel-style holiday cookies
- More cheerful cookie recipes to get you in the holiday spirit
- Recipe
- Comments
An ode to the classic blue tin of Danish Butter Cookies
I grew up in the 80s and 90s. Back when Kid Cuisine and Bagel Bites were the pinnacle of at-home eating for kids. Our family led busy lives, so cooking and baking together was as rare as finding a star on your Tootsie Pop wrapper.
When it came to the holidays, we followed the same way of life, convenience foods were king. Store bought holiday goodies always made their way into our stockings and holiday memories. There was one treat in particular that made an appearance every holiday season; a classic blue tin of Danish Butter Cookies. You know the one. This recipe for Holiday Butter Cookies is my ode to that tin of nostalgia.
While our family may not have baked sugar cookies and decorated them by the tree. We had plenty of our own, less traditional, traditions. Every Christmas Eve, snow or no, we’d pile in our maroon velvet upholstered Chrysler New Yorker. Then we'd head out to drive by the houses with the biggest and brightest displays. We’d hit a fast food drive-thru, then roll past every house on the nice list.
That search for the most creative and captivating light displays remains one of my most treasured holiday traditions to this day. I’d always sneak a cupcake liner full of the Holiday Butter Cookies to keep me happy between each Griswold homage.
Those Holiday Butter Cookies made an appearance in many of our collective holiday memories
There were plenty of other flashy treats that surfaced in December, but that blue tin of Danish Butter Cookies always called to me. It's something about that snappy bite and melt in your mouth buttery flavor. They are just sweet enough to feel like a treat. However, they light enough to snag a couple every time you pass by the tin.
Classic Butter Cookies are a subtle holiday fixture that linger on the behind the cheery glow of decorative sugar cookies. That’s what made them so special. They don’t steal the show. Each year, the Christmas Butter Cookies quietly show up with their simple shapes, comfortably nestled in that iconic tin.
5 styles of Danish Holiday Butter Cookies
- Vanilla ring
- Coconut style round
- Finnish bread (rectangle)
- Pretzel style
- Country style round
As a child I could never really distinguish the difference in flavor of each individual cookie. Though I had an affinity for the sugared pretzel shape. They still all have a very similar taste to me. Therefore, when developing this Holiday Butter Cookie recipe, I decided to keep it simple by creating one buttery cookie base, scented with vanilla and a hint of almond.
Iconic crisp cookies with a delicate buttery interior
Butter Cookies seem to land somewhere between the crisp sturdiness of a shortbread cookie and a soft and chewy, classic sugar cookie. These Holiday Butter Cookies are the best of both worlds, with buttery ridges that give way to a delicate interior. They seem to melt like snow the moment you bite into one. The individuality of each cookie comes mostly from its shape. I streamlined things a bit and went with just four shapes.
1 butter cookie dough 4 ways
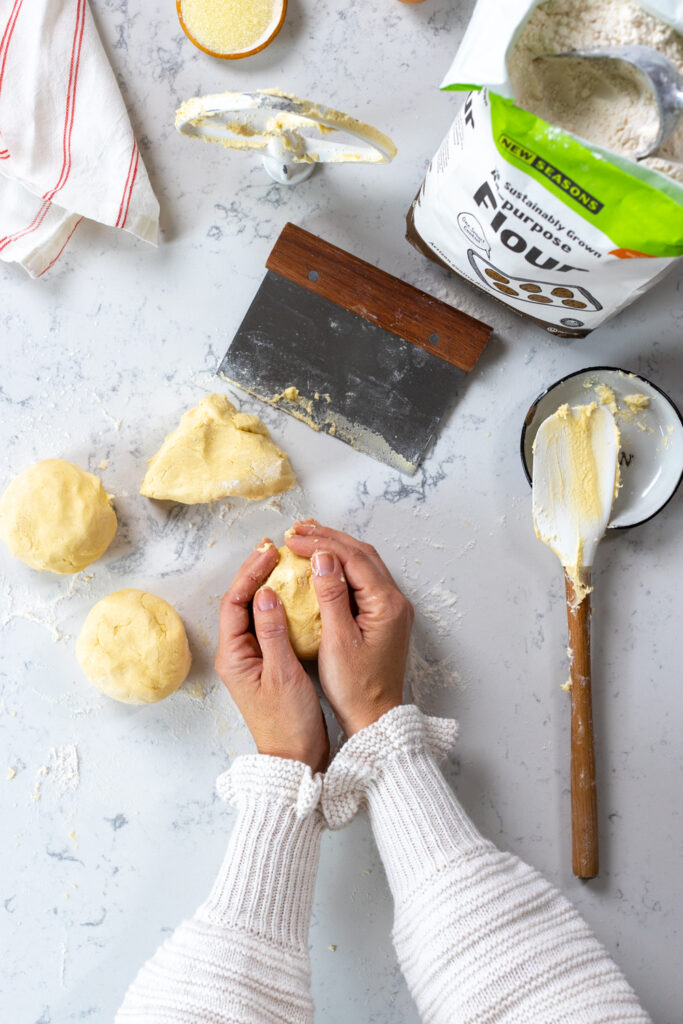
Each vanilla butter cookie has a unique personality, but remains true to its Holiday Butter Cookie roots
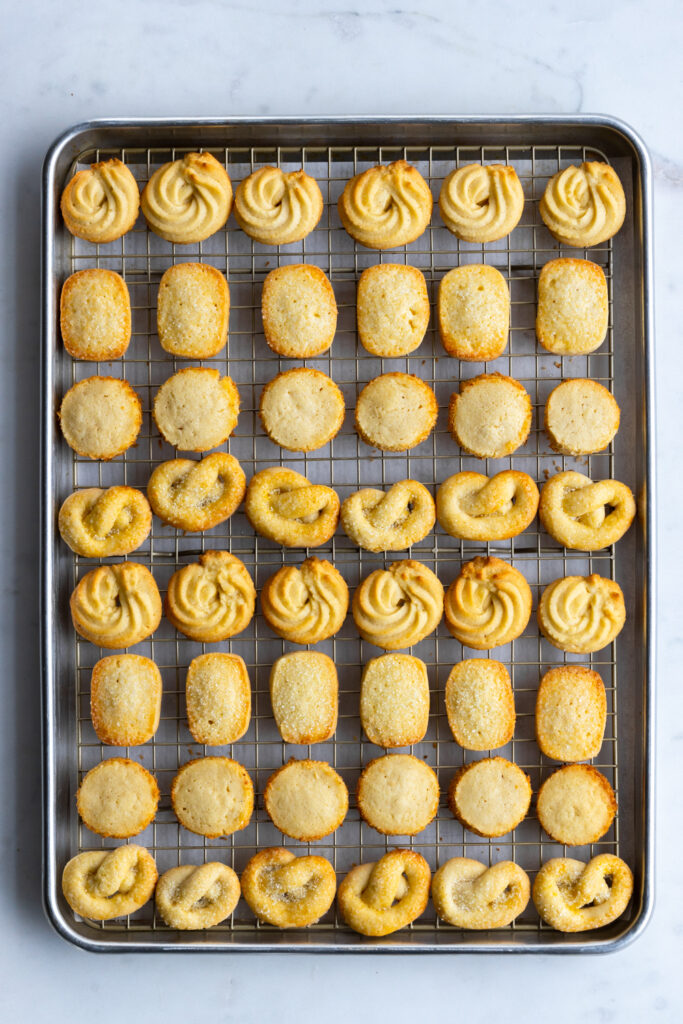
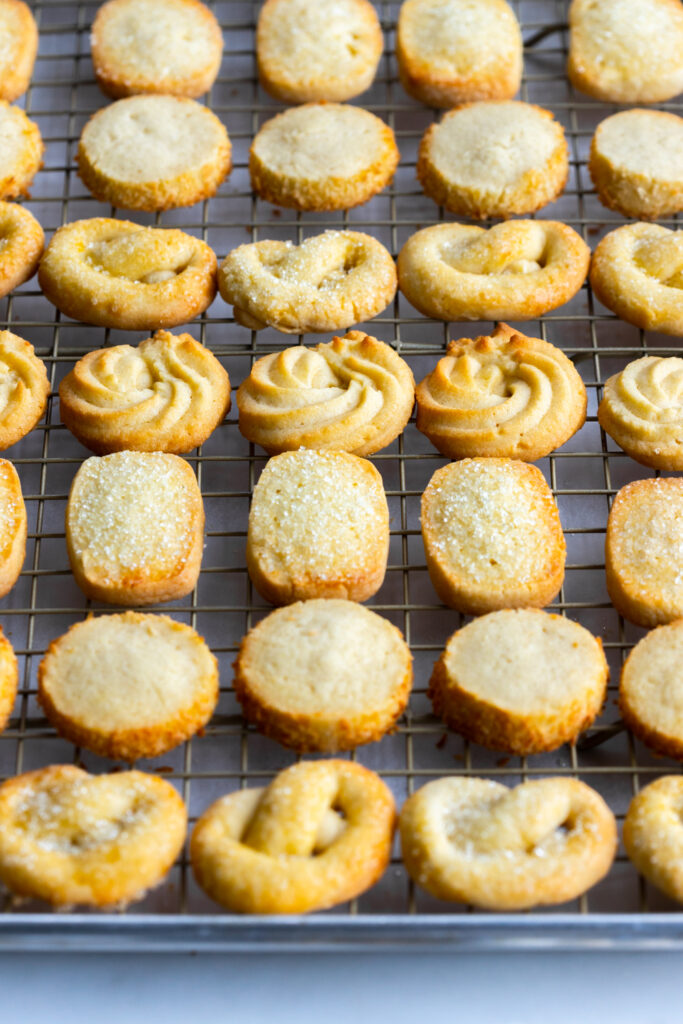
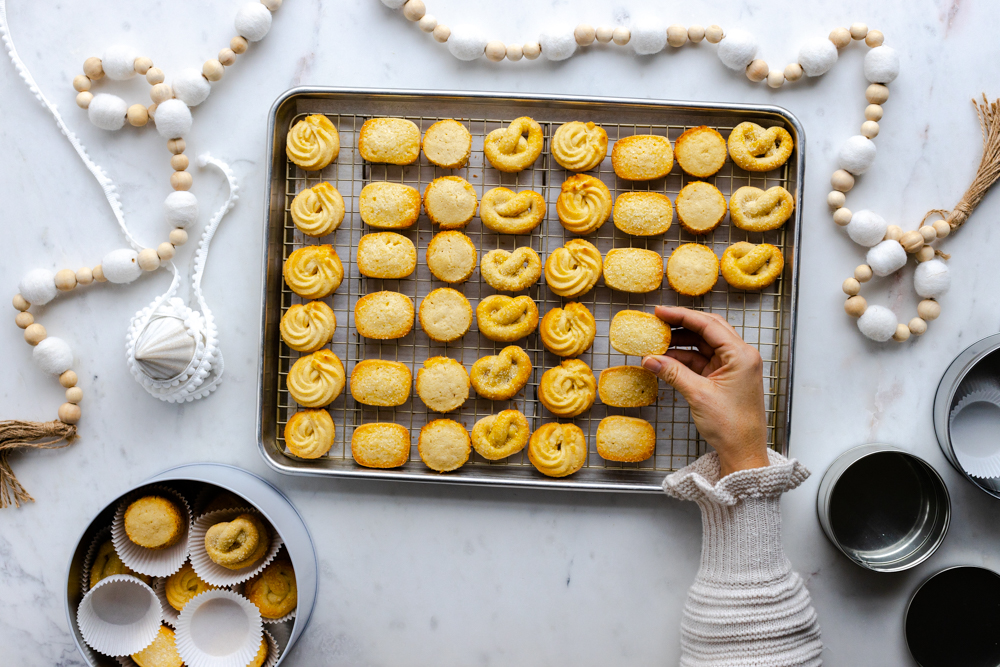
Classic Danish Butter Cookies come in multiple, iconic shapes and flavors. When developing this recipe, I kept it simple with 4 basic cookie shapes. The Ring Cookie, the Round Coconut Cookie, the Rectangle Cookie and the Pretzel Cookie. Each shape is a nod to the original.
How to shape ring-style holiday butter cookies
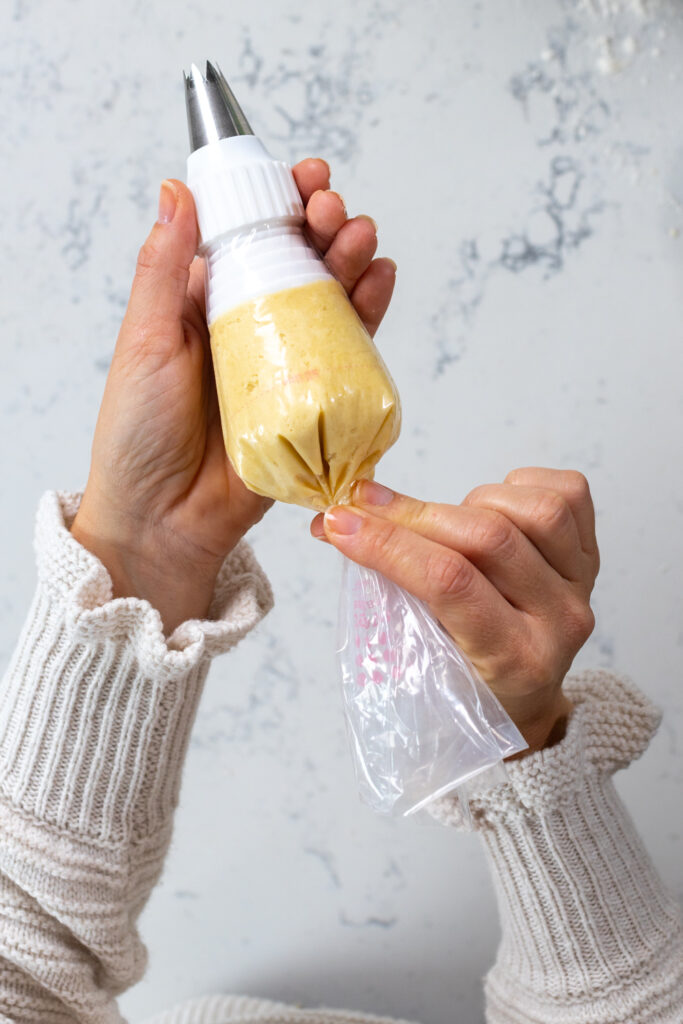
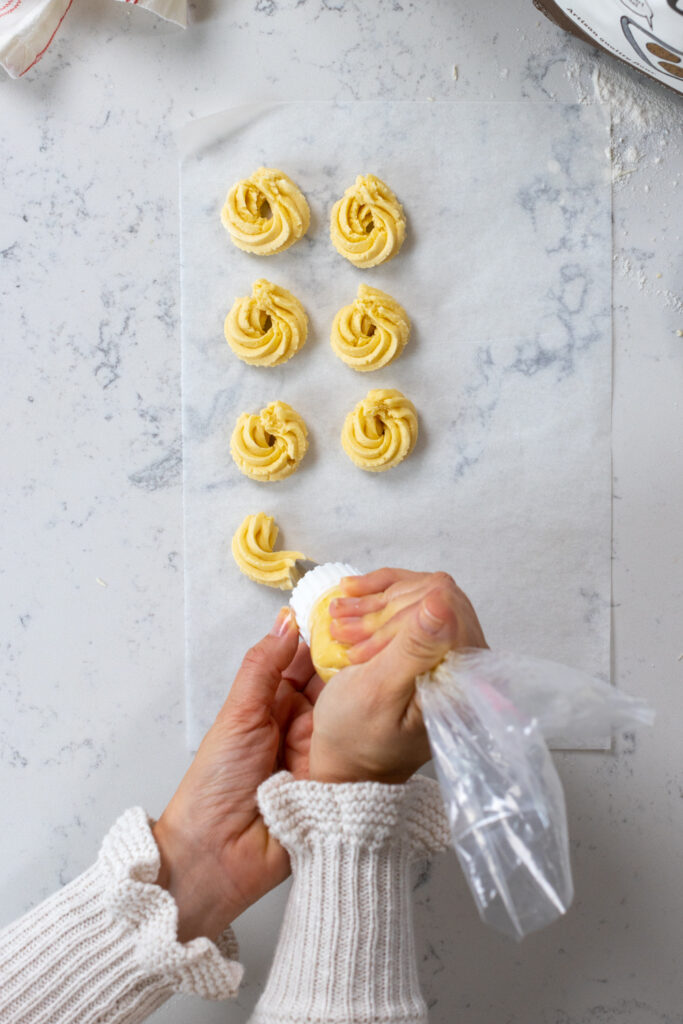
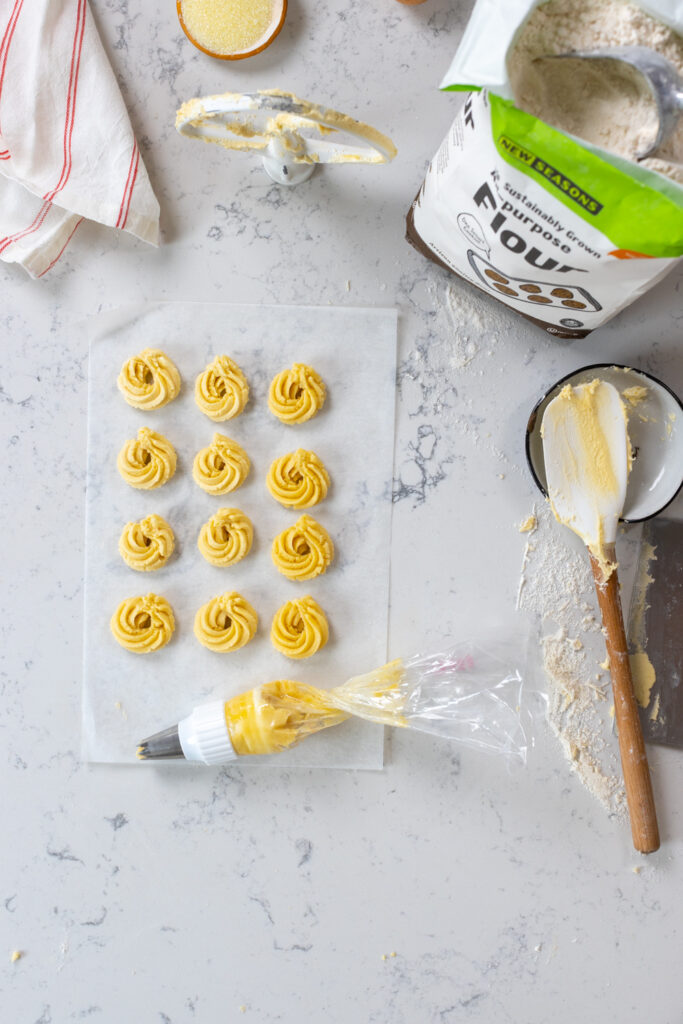
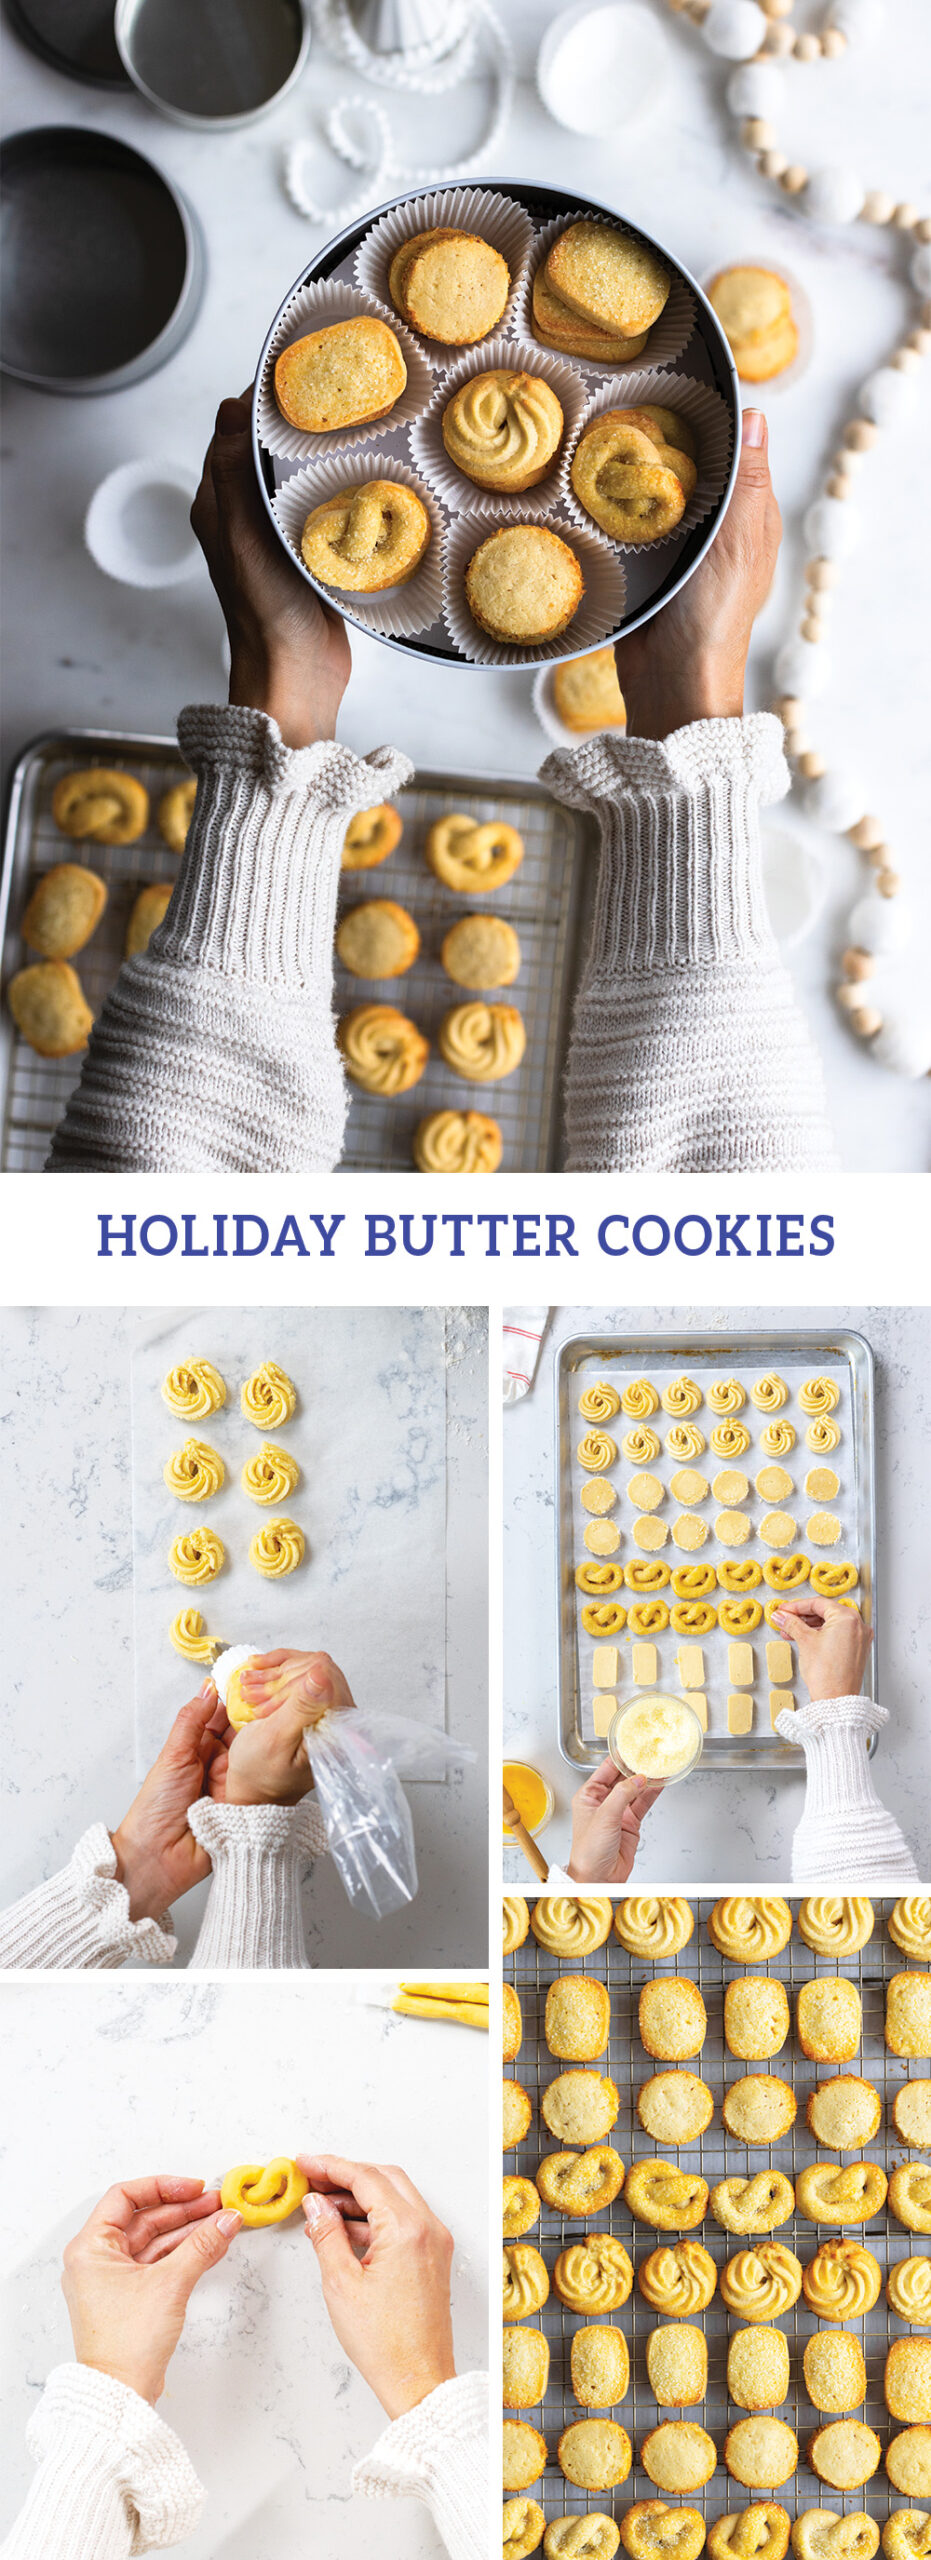
This Ring Cookie may look fancy but it’s actually the simplest of them all. I use a #825 (7/16”) Open Star Pastry Tip to pipe a little horseshoe shaped ring, about 1 ½” in diameter. The Ring Cookies don’t get any sugar, they are just plain piped dough that bakes up with true buttery, vanilla scented flavor.
How to shape round holiday coconut cookies
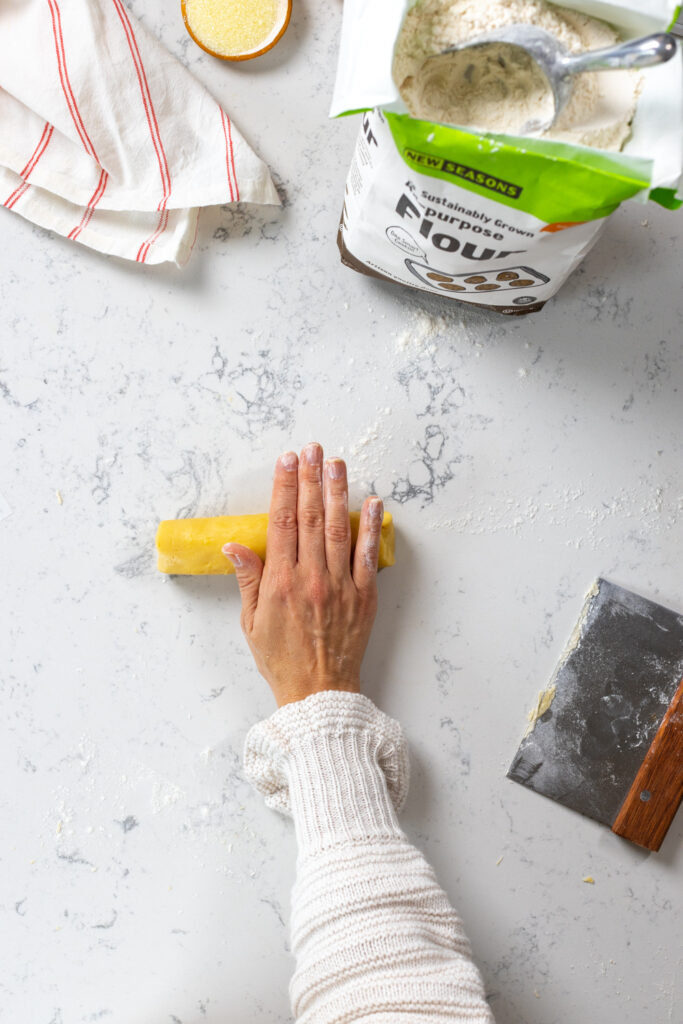
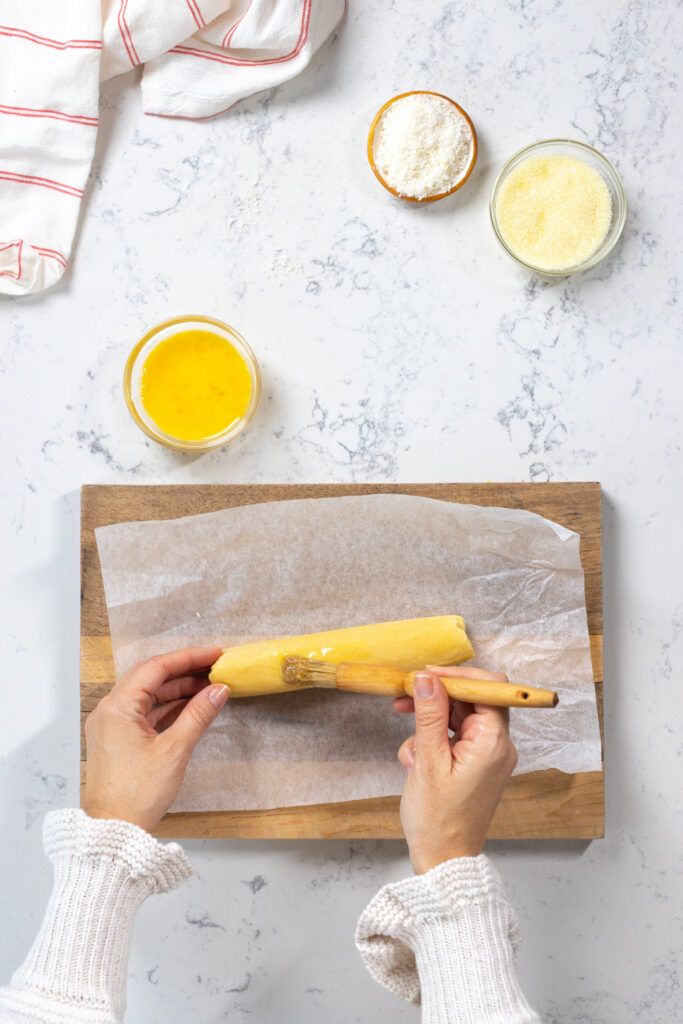
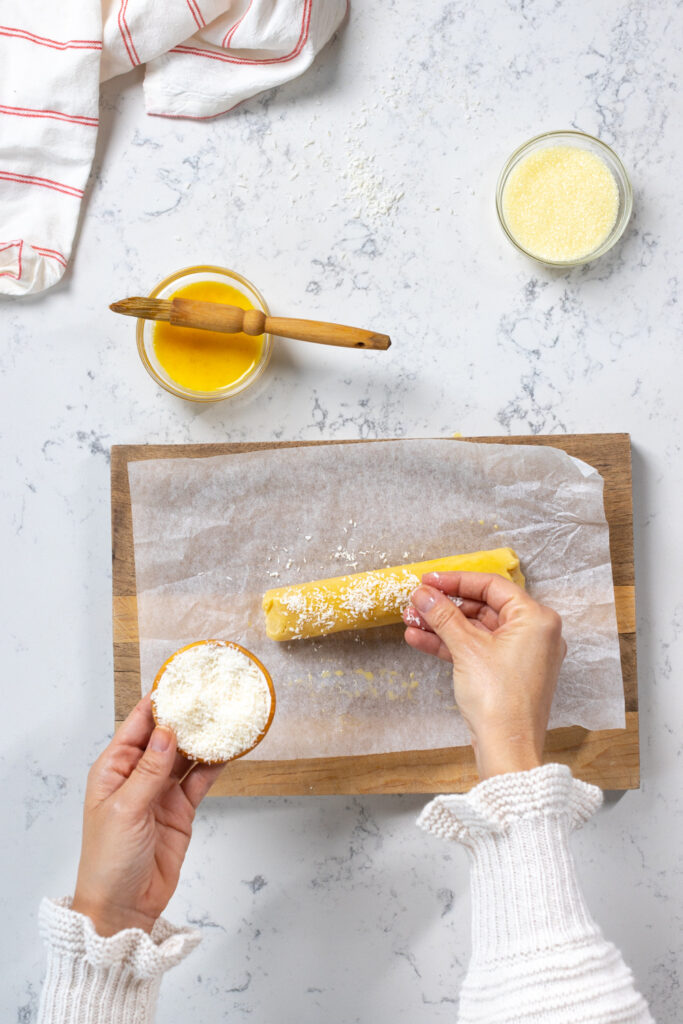
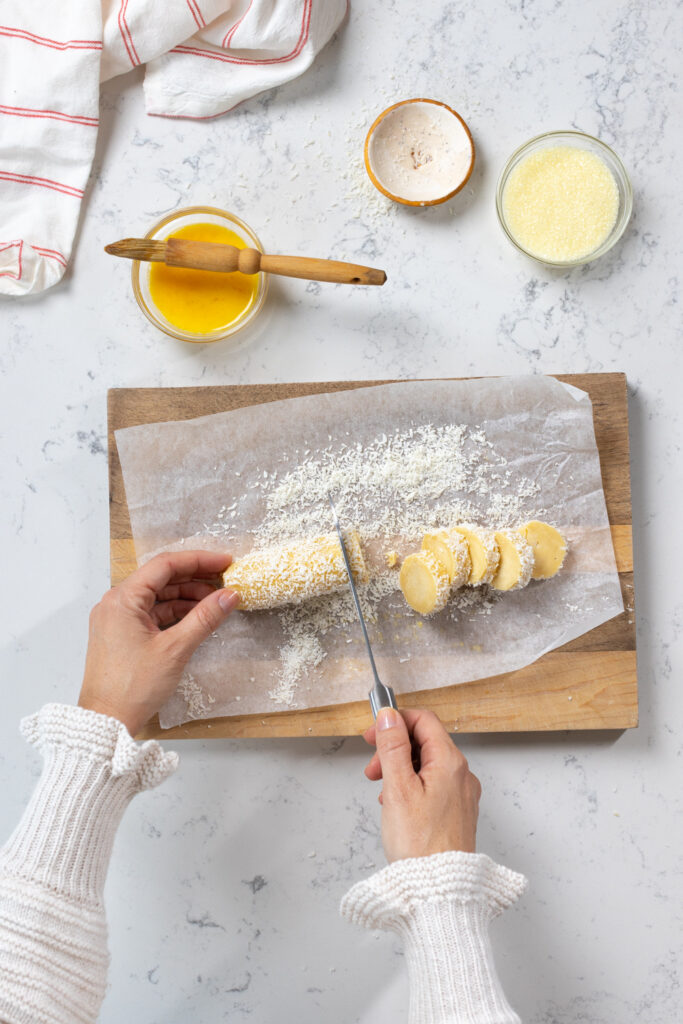
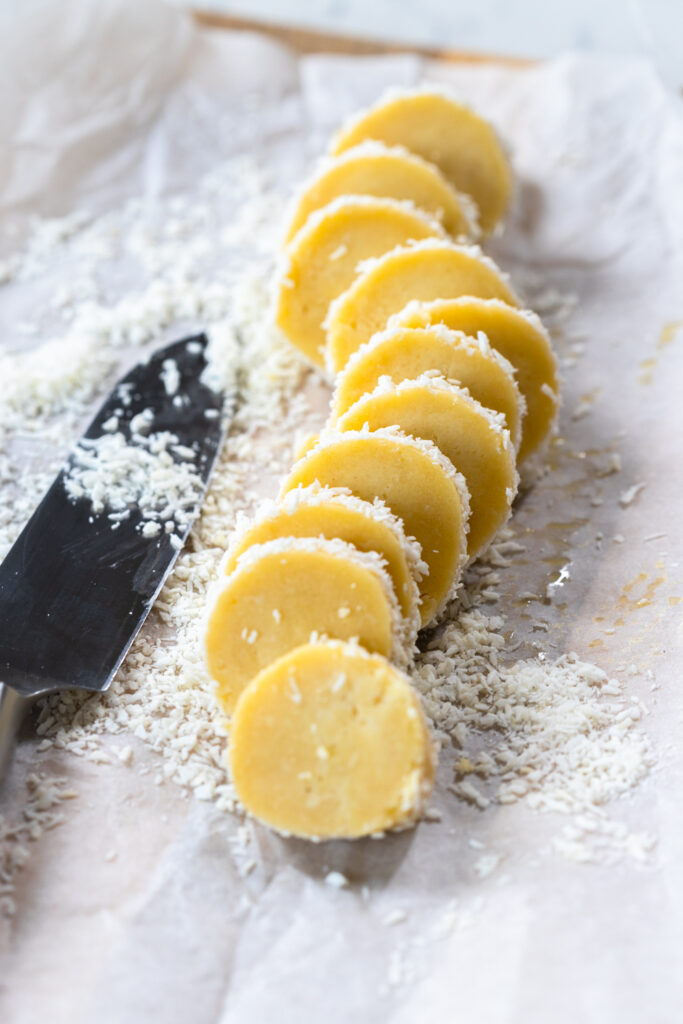
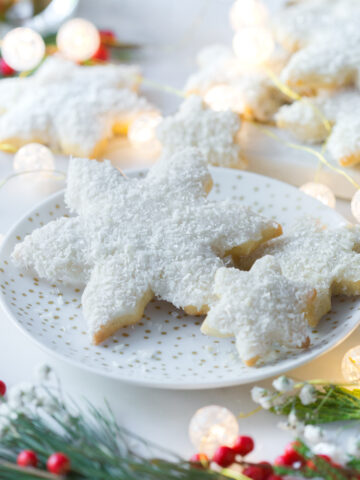
Since one of the rounds of the original Danish Butter Cookies is coconut flavored, I decided my Round Cookies would be rimmed in shredded coconut. The dough is shaped into a simple slice and bake log. Just before baking, the log is brushed with egg wash and sprinkled with shredded coconut. Then the cookies are sliced and baked with a ring of toasty, golden coconut around the edges.
How to shape rectangle-style holiday cookies
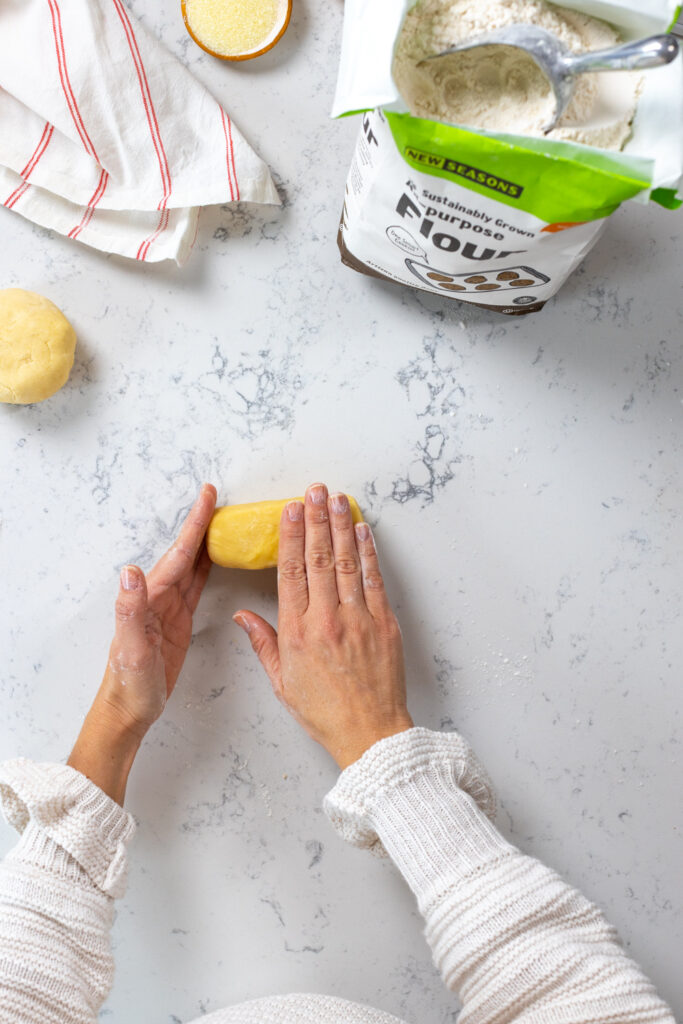
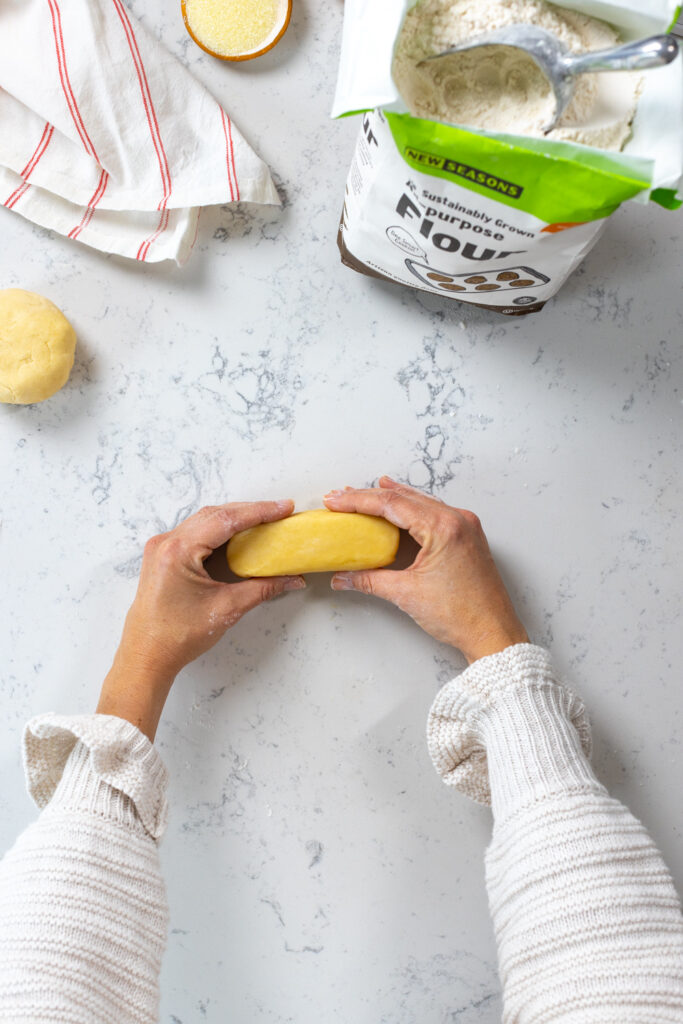
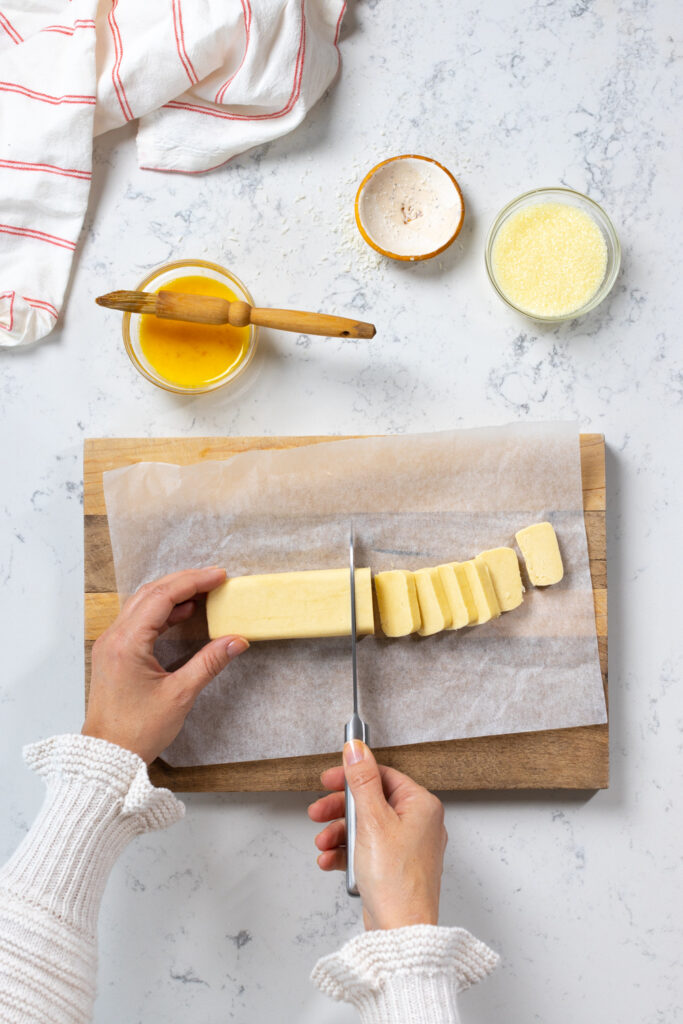
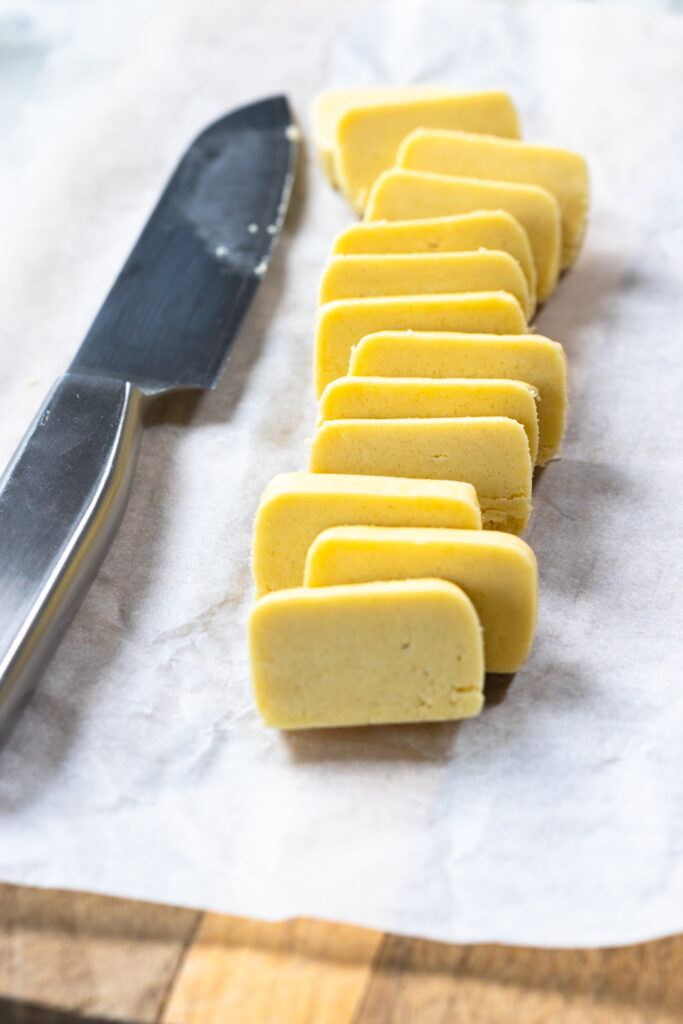
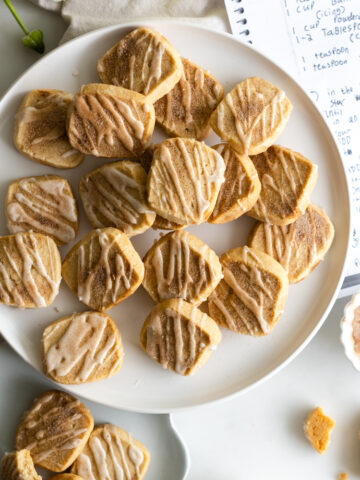
Another simple slice and bake, these Rectangle Cookies get shaped into a rectangular log, then sliced. The tops are brushed with egg wash and sprinkled with sanding sugar for a glitzy finish.
How to shape pretzel-style holiday cookies
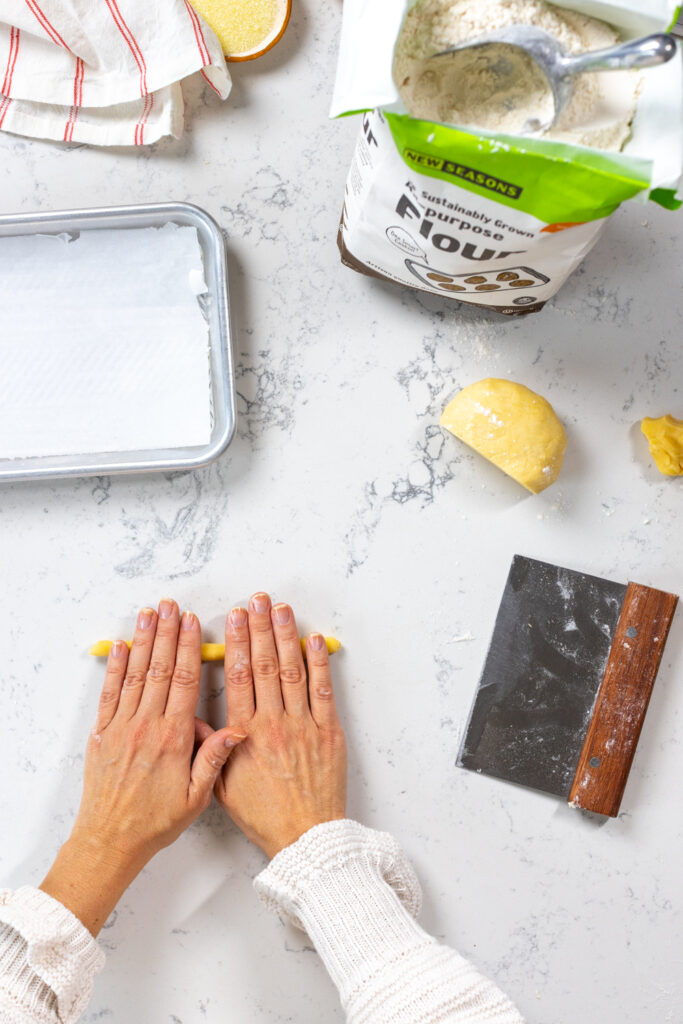
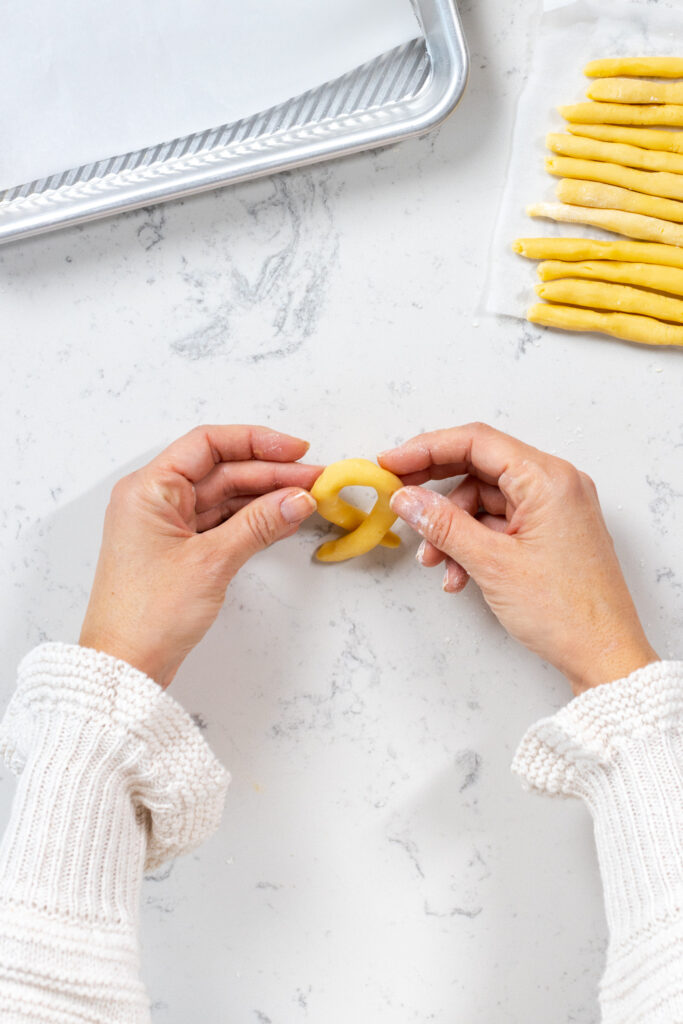
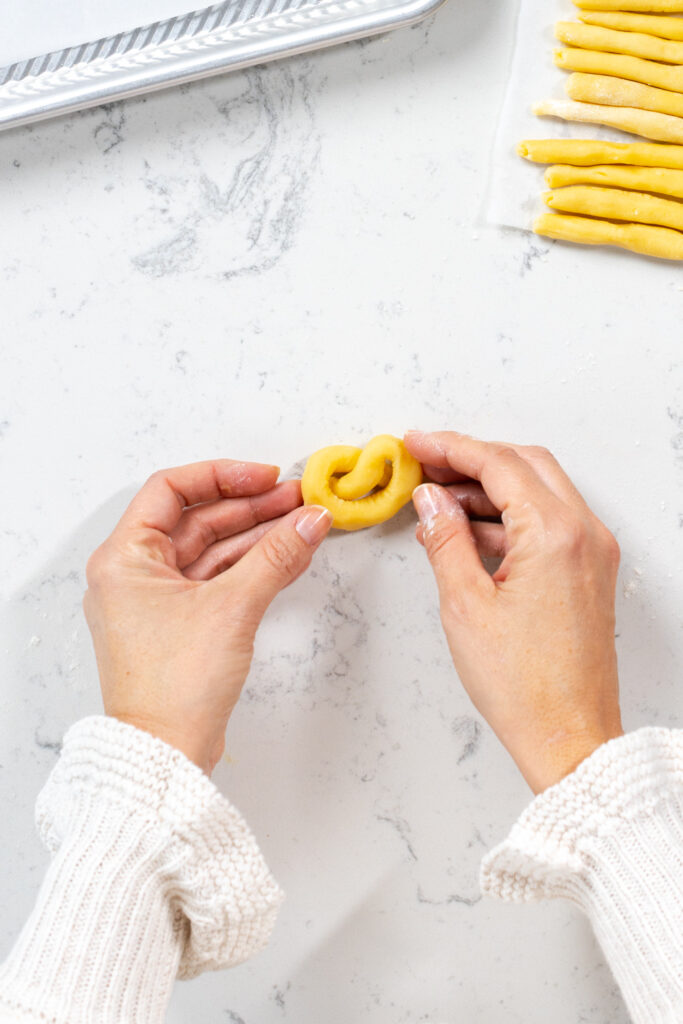
While the others are super simple, the Pretzel Cookie is more complicated to shape. Since the dough is delicate, which we want because it gives the cookies their classic buttery bite and delicate texture, this one is tricky to shape. It’s all about the right temperature. If the dough is too cold, it will tear. If it's too warm it may stick and squish.
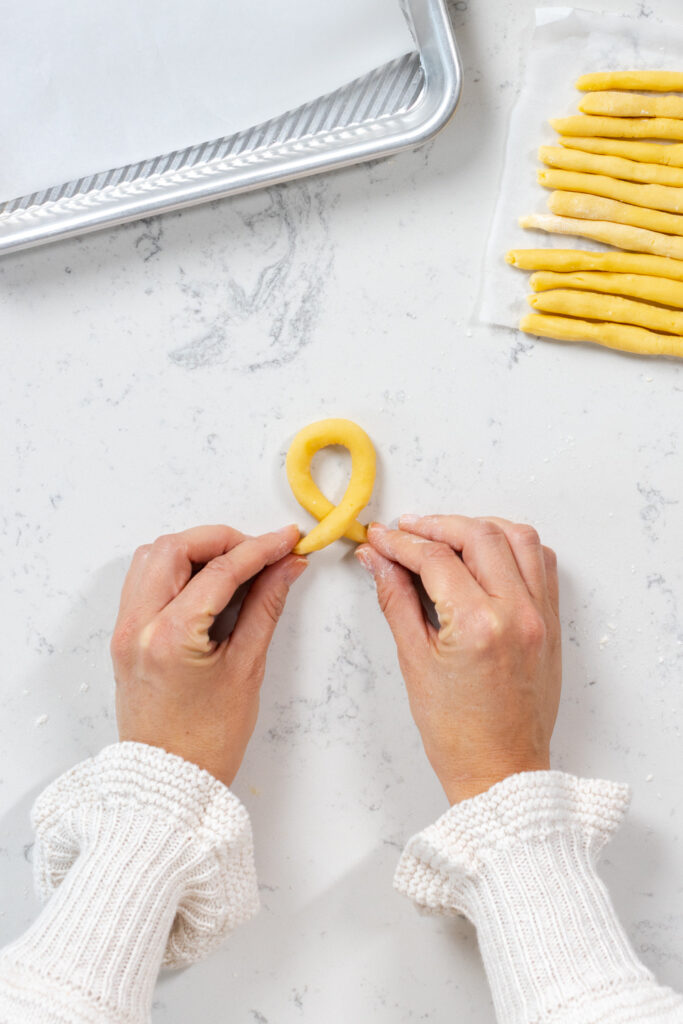
When it’s just warm enough to be pliable, I shape the dough into small logs about ¼” thick by 6” long, then cross the ends of each log into a ribbon shape. Gently grab the top of the ribbon and fold it down over itself to create a quick pretzel shape. To finish, the Pretzel Cookies are brushed with egg wash and sprinkled with the sanding sugar.
Decorate, chill & bake the Holiday Butter Cookies
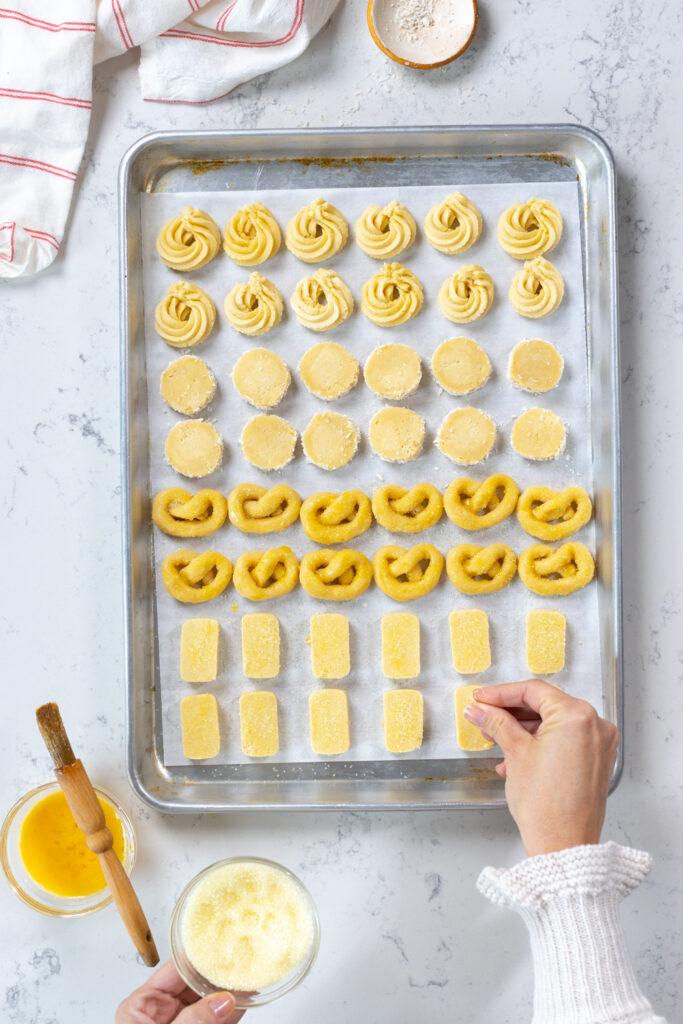
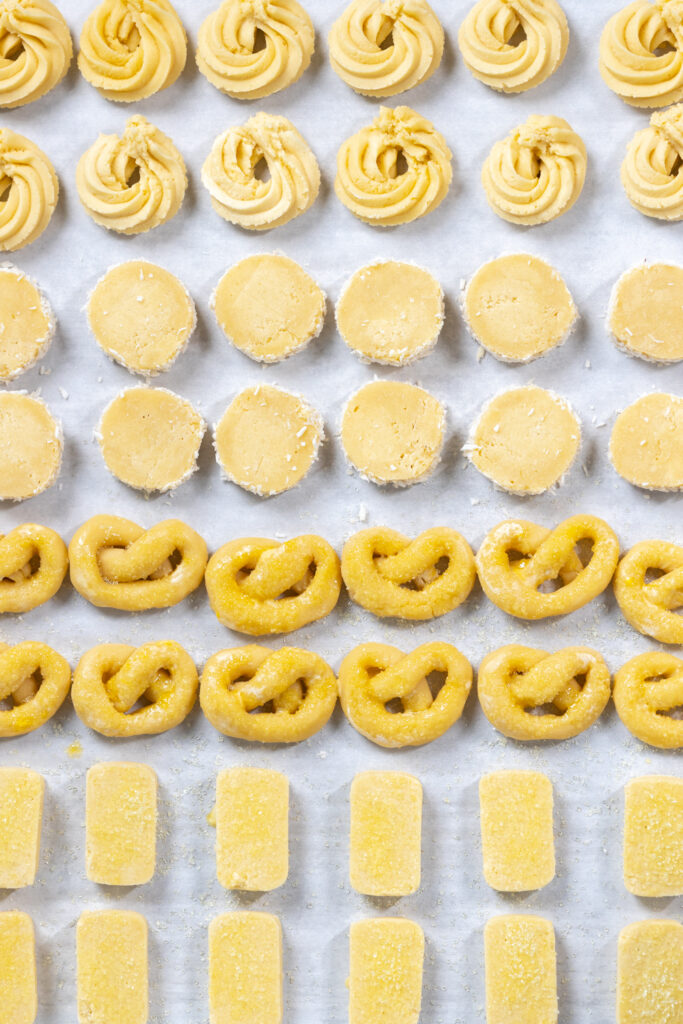
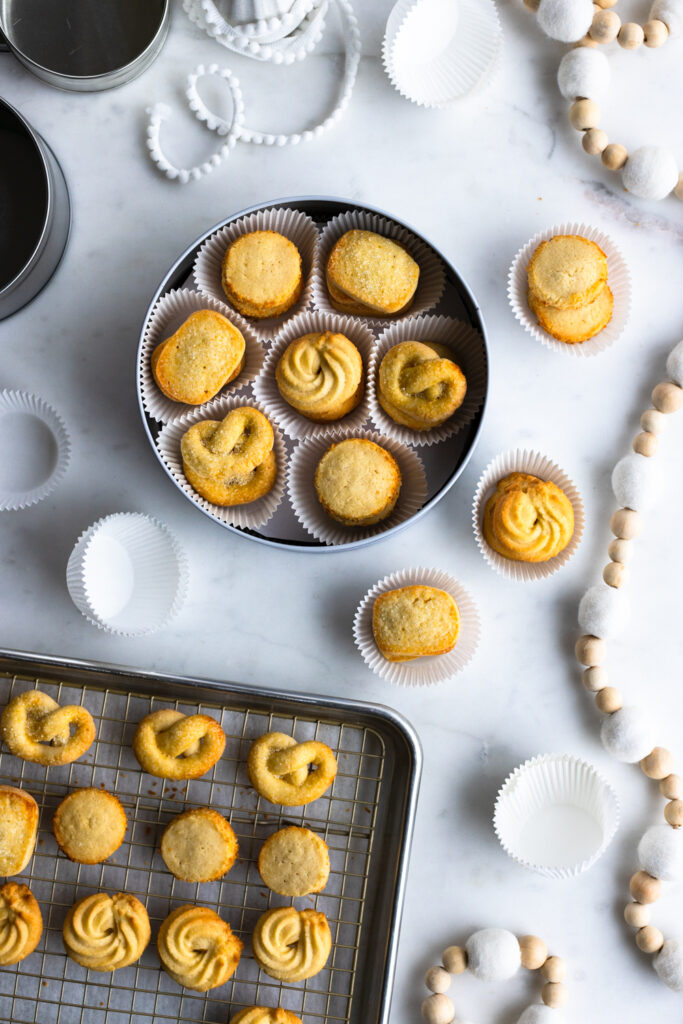
This recipe for Holiday Butter Cookies brings the spirit of the original to the kitchen with a glimmer of sentimentality and the sparkle of a sugary finish. To really lean into that nostalgia, package the cookies up in white baking cups nestled into round cookie tins. Make all four shapes or keep it simple with just one or two. Whatever you go with, your friends and family will instantly be transported when they open that tin. Each bite is guaranteed to wrap them in crisp and buttery, sugar-kissed holiday memories.
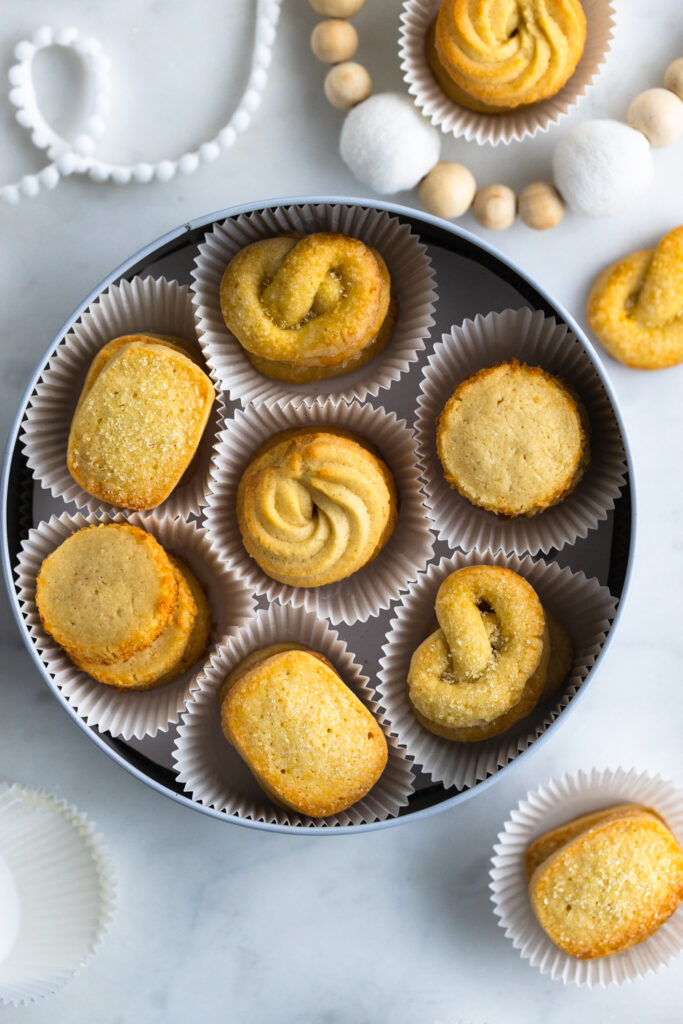
A great big thank you to my pals and partners from New Seasons Market for sparking nostalgia and supporting me as I developed and refined this classic into a home baked recipe. Seasons greetings, friends. I hope you bring the holidays home with a festive tin of these timeless Holiday Butter Cookies.
This post was made in partnership with New Seasons Market. Follow New Seasons on Instagram and Facebook or check out newseasonsmarket.com to learn more about their commitment to build community through good food.
Thank you for supporting me and the brands that I love!

More cheerful cookie recipes to get you in the holiday spirit
Recipe

Holiday Butter Cookies
- Total Time: 1 hour 12 minutes
- Yield: 4 dozen
Description
These Holiday Butter Cookies are an ode to that iconic blue tin of nostalgia we all know and love. A simple vanilla and almond scented butter cookie dough takes on 4 classic cookie shapes. Each unique shape has a flair of individuality with buttery ridges that give way to a delicate interior. These festive, melt-in-your-mouth cookies are just sweet enough, with the rich and buttery essence of the beloved original.
Ingredients
- 1 cup unsalted butter (- at room temperature)
- ⅔ cup granulated sugar
- 2 large eggs, at room temperature ( - divided)
- 1 ½ teaspoons vanilla extract
- ½ teaspoon almond extract
- 2 ¼ cups all purpose flour
- ½ teaspoon fine sea salt
- 2 tablespoons sanding sugar or Turbinado sugar
- 2 tablespoons shredded coconut
Instructions
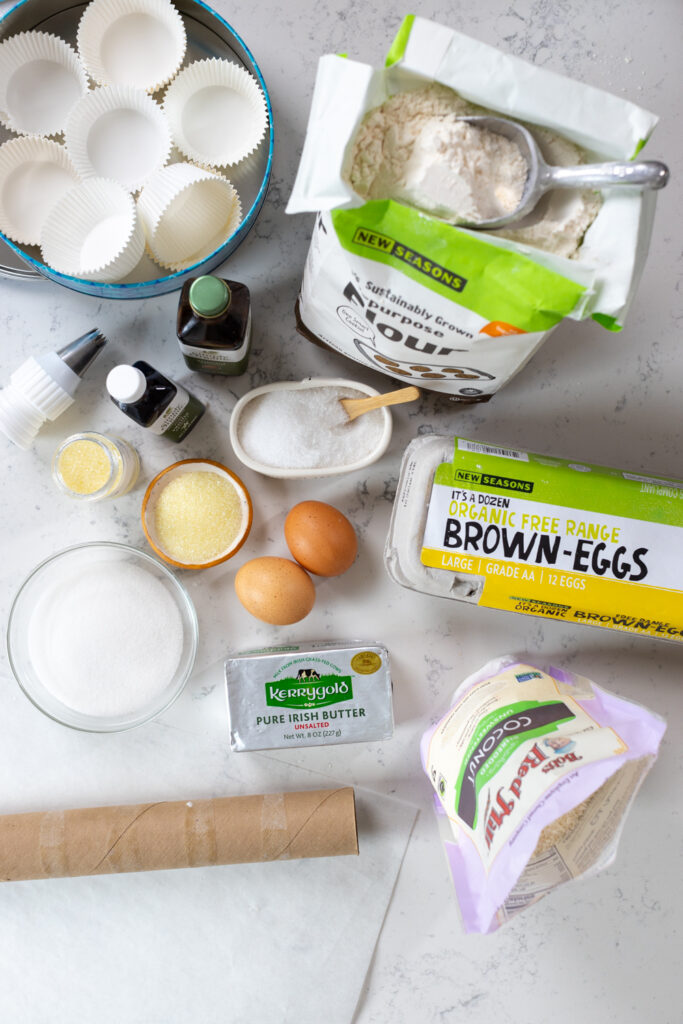
MAKE THE DOUGH
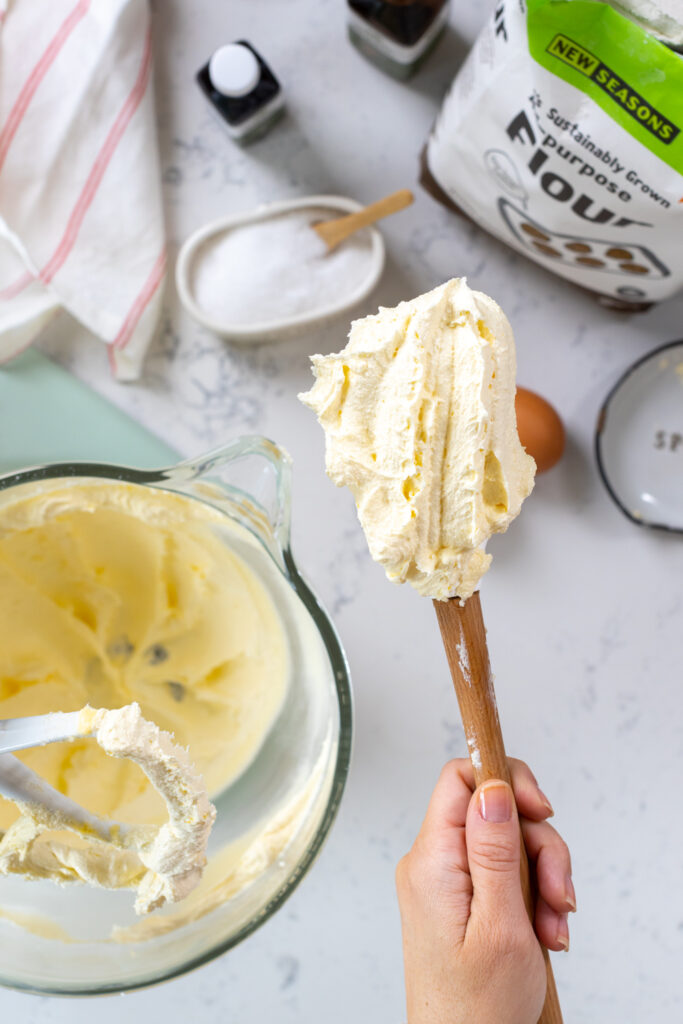
- In the bowl of an electric mixer fitted with the paddle attachment, cream the butter and sugar together on high speed for 3-5 minutes until the mix is light and fluffy. Stop the mixer occasionally to scrape down the sides of the bowl.
Add one egg, vanilla and almond extract and beat for about a minute. Stop the mixer once to scrape down the sides of the bowl.
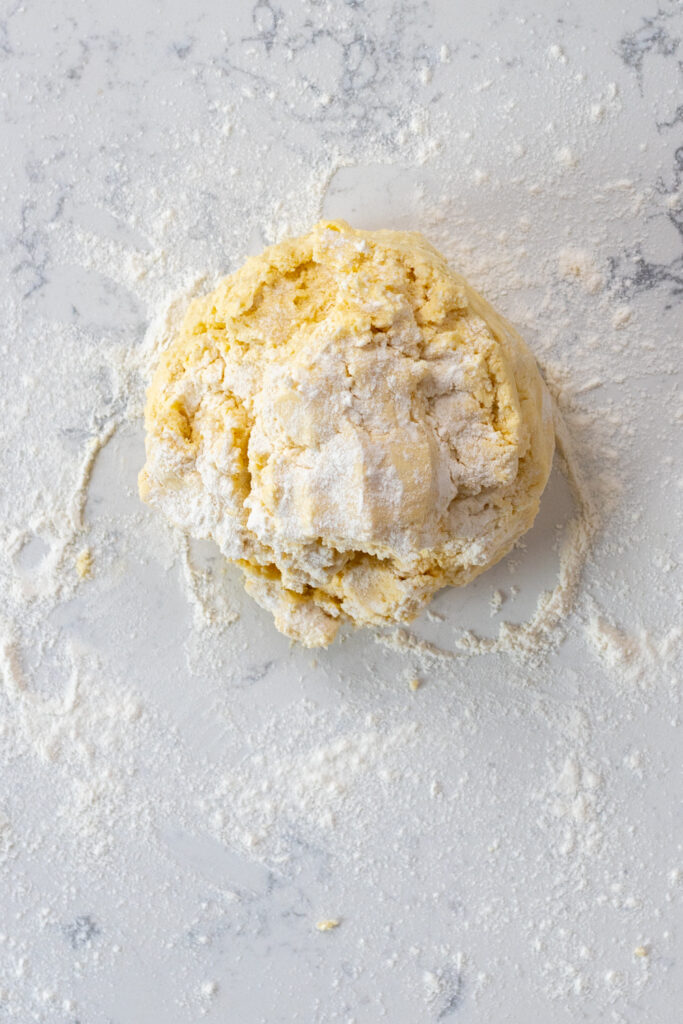
Add the flour and salt. Mix on low speed, just until the flour has been absorbed. - On a lightly floured work surface, gather the dough into a disk, then divide dough into 4 equal pieces and form 3 of the pieces into disks. Wrap the 3 disks separately in plastic wrap and refrigerate.
SHAPING THE RING COOKIES *makes about 12 cookies
- Transfer the remaining quarter of the cookie dough into a pastry bag fitted with #825 (7/16”) open star pastry tip. On a lined baking sheet, pipe horseshoe shaped rings, about 1 ½” in diameter. *If you mess up, you can always transfer the dough back into the pastry bag and try again. It may take a couple of tries to get the hang of it.
Place the sheet of cookies in the freezer to chill.
SHAPING THE ROUND COCONUT COOKIES *makes about 12 cookies
- Remove a dough disk from the refrigerator, unwrap, and place on a lightly floured work surface. Keep an empty paper towel roll nearby. Use your hands to shape a rough log shape. Roll into a smooth log until it is about 1 -1 ½” in diameter (eyeball it to about the size of your empty paper towel roll) by about 6” long.
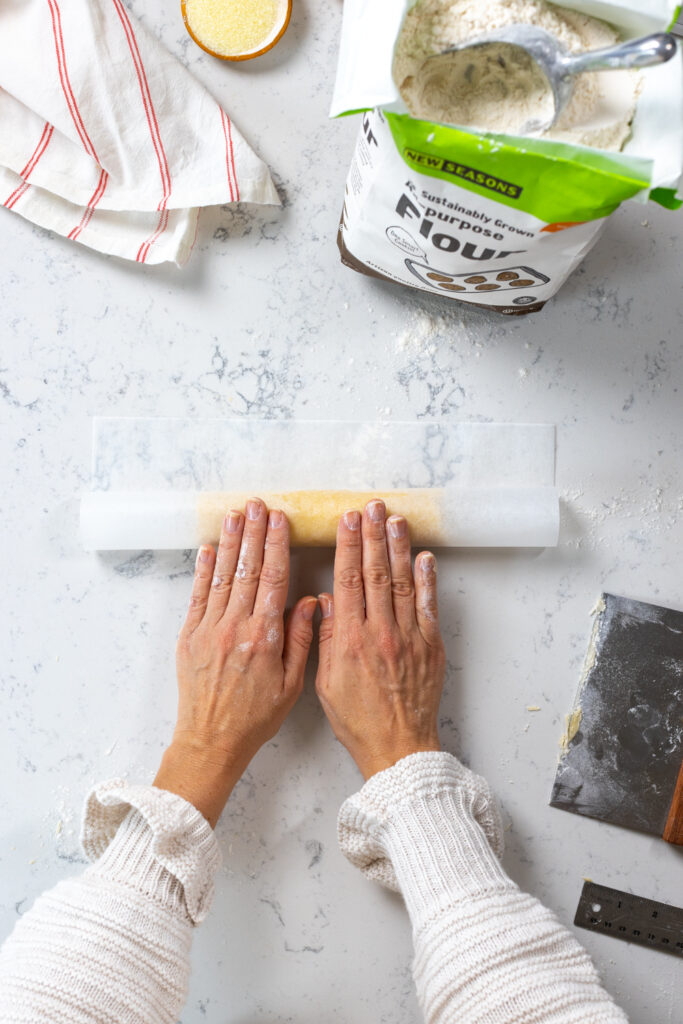
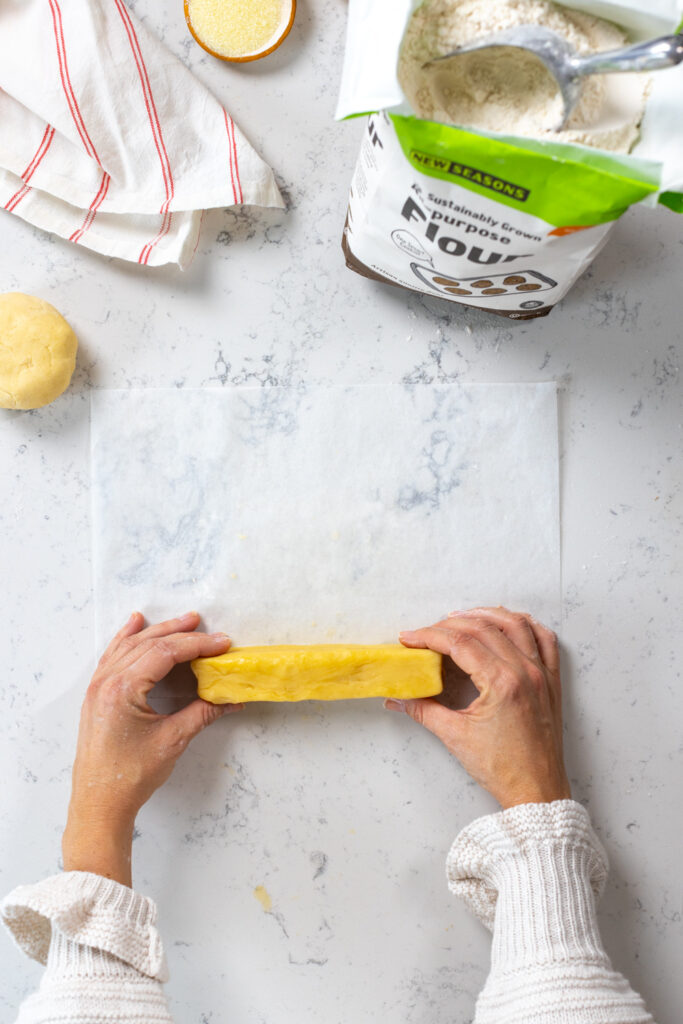
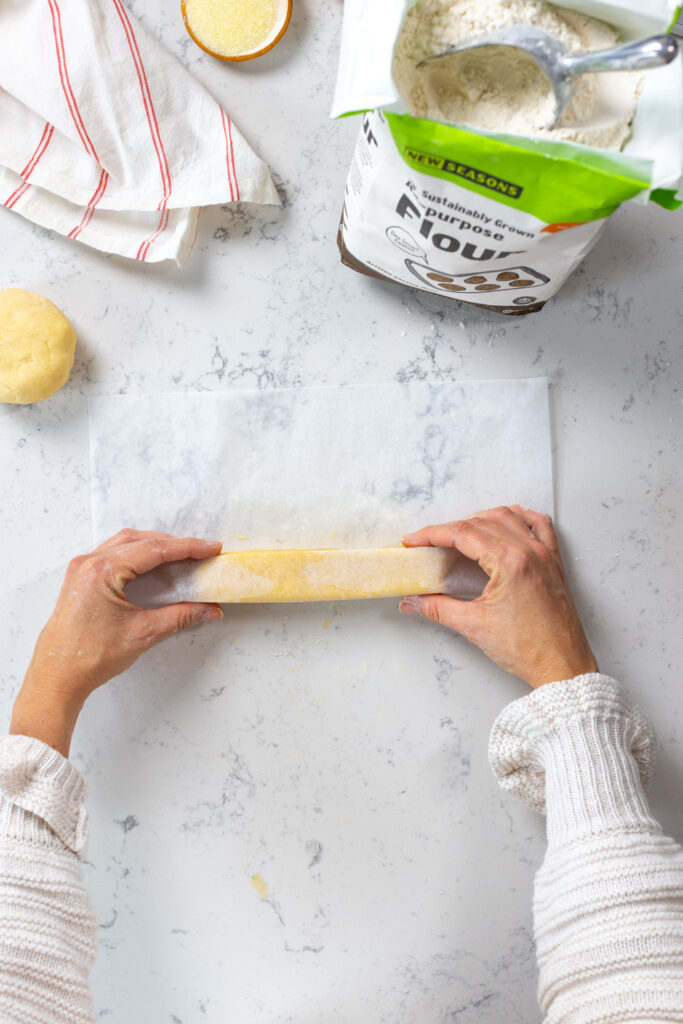
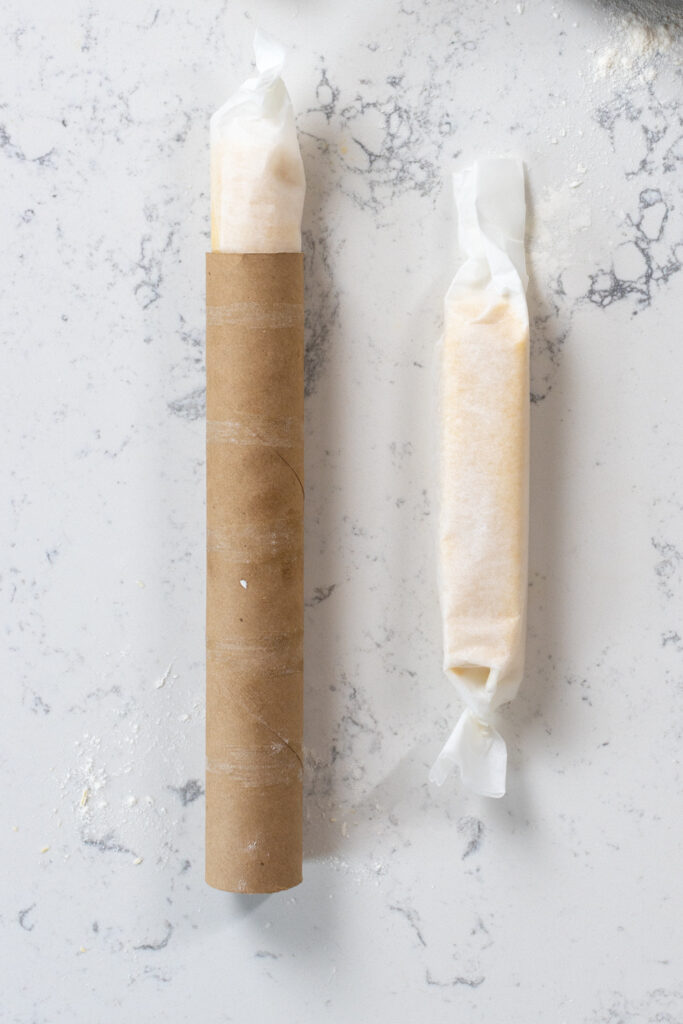
- Roll a sheet of parchment paper around your dough log, lengthwise. Then twist each end of the paper into pigtails. Gently roll from the center outward until you feel that you have a perfectly smooth, cylindrical log.
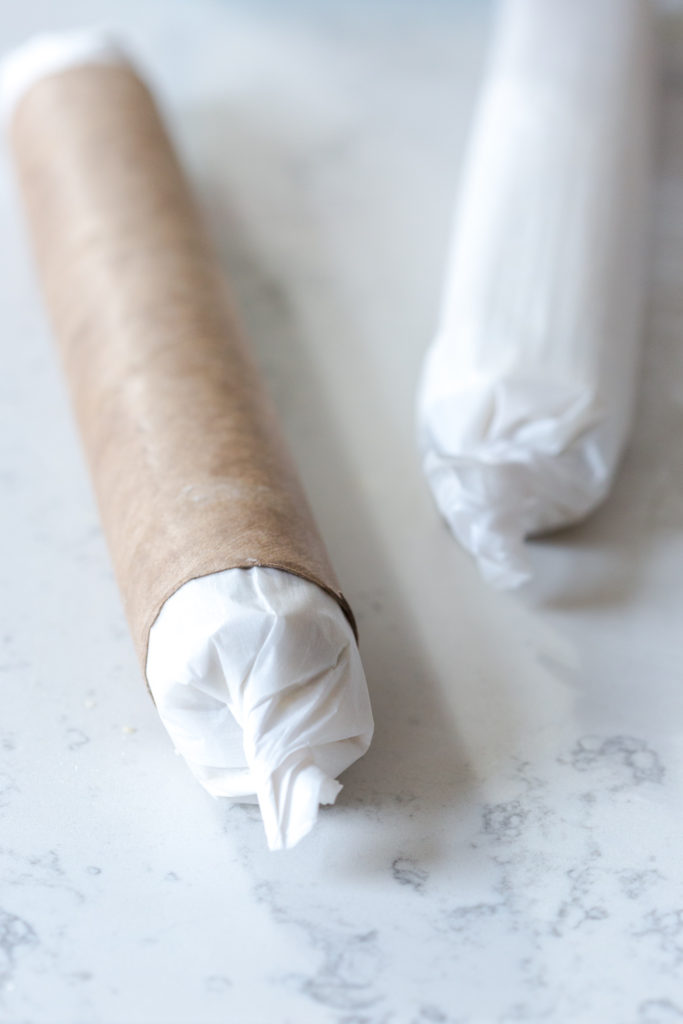
- Carefully slide the dough log into the empty paper towel roll. This will help dough hold its cylindrical shape while it chills. Place the paper towel roll with the dough log inside into the refrigerator to firm up. *Once fully firm, you can wrap the dough log tightly in plastic wrap or place in a freezer baggie and store in the freezer up to 3 months.
SHAPING THE RECTANGLE COOKIES *makes about 12 cookies
- Remove a dough disk from the refrigerator, unwrap, and place on a lightly floured work surface. Use your hands to shape a rough log, then pat the log into a rectangular shape, squaring off the edges. Press into the counter to square off the edges and turn the log ¼ turn (instead of rolling) patting gently on the top to create even sides. Keep rotating and patting until the log is rectangular, about 1” x ¾” tall and 6” long.
Wrap in parchment paper as you did with the round log. Place in the refrigerator to firm up. *Once fully firm, you can wrap the dough log tightly in plastic wrap or place in a freezer baggie and store in the freezer up to 3 months.
SHAPING THE PRETZEL COOKIES *makes about 12 cookies
- *The Pretzel Cookies are more difficult to shape. The dough is delicate, which we want because it gives the cookies their classic buttery bite and delicate texture, but that means shaping is temperamental. It’s all about getting the right temperature. If the dough is too cold, it will tear. If it’s too warm, it’ll stick and squish. You may need to stop and refrigerate the dough a couple of times during the shaping process. That said, they are fun to shape once you’re in a rhythm, and you can always ball the dough back up and try again.
- Remove a dough disk from the refrigerator, unwrap and place on a lightly floured work surface.
Slice off a hunk of the dough and roll into a small log about ¼” thick by 6”-7” long. The dough should be pliable but not sticky. Fold the log into a ribbon shape, with the ends crossed at the bottom. Gently grab the loop of the ribbon at the top and fold it down over the ends to create a quick pretzel shape. Transfer the shaped cookie to a lined baking sheet. Repeat with the remaining dough, working in batches and shaping a few pretzel cookies at a time.
If the dough logs feel too warm or delicate to shape, chill on a lined baking sheet in the refrigerator for a few minutes before shaping the rest of the pretzel cookies.
Place the cookies on the lined baking sheet in the freezer to chill.
SLICE, DECORATE, CHILL & BAKE
- I suggest chilling the cookies solid before baking to help them keep their shape when baked.
For the round and rectangle dough logs, you will slice the dough into cookies. If the logs are frozen solid, you may need to let them rest at room temperature for a few minutes before slicing.
Just before baking, make an egg wash by combining the remaining egg and 1 teaspoon of water in a small bowl. Whisk until blended. - Remove the Round Cookie log from the freezer and unroll it onto a cutting board, leaving the log on the parchment paper for easy cleanup.
Use a pastry brush to gently brush with the egg wash on all sides of the log. Sprinkle the shredded coconut over the egg washed edges, all the way around the exterior.
Using a sharp knife, slice the log into ½” thick cookies. Roll the log ¼ turn between slices to keep it from flattening out on one side. You should get about 12 cookies. Place the cookies closely together on a lined baking sheet. - Remove the Rectangle Cookie log from the freezer and unroll on a cutting board, leaving the log on the parchment paper for easy cleanup.
Using a sharp knife, slice the log into about ½” thick cookies. Turn the log ¼ turn between slices to keep the edges squared. You should get about 12 cookies. - Place on the same lined baking sheet as the Round Coconut Cookies to chill in the freezer.
Chill the cookies for at least 30 minutes before baking, until they are firm. - Preheat the oven to 350°F. Arrange 12 frozen cookies on separate lined baking sheets at least 2” apart.
- Brush the tops of the Rectangle and Pretzel Cookies with egg wash and sprinkle with sanding sugar.
- Bake for about 12 minutes, rotating the baking sheets halfway through, until the edges start to turn a light golden brown. Transfer the cookies to wire racks and allow to cool to room temperature.
- For a classic presentation, stack the cookies in baking cups and place in a round tin for nostalgic gifting.
Notes
The base recipe for these cookies is simple. If you are up for the nostalgic challenge, making all 4 classic shapes is a fun and nostalgic holiday project, but making just one or two shapes is always an option!
These cookies can also be drizzled or dunked with melted chocolate, rolled in sprinkles or rimmed with chopped nuts. Get creative and have fun with this festive recipe!
This dough can be stored in the freezer for up to 3 months if tightly sealed in freezer bags. Bake straight from frozen to keep the integrity of the cookie shapes.
- Prep Time: 1 hour
- Cook Time: 12 minutes
- Category: Dessert
- Cuisine: Cookies



Comments
No Comments