
While developing this Candy Corn Blondies recipe someone said to me, "Yum! But eww, why candy corn?". The answer is because candy corn is fun and kids love it! And guess what, it turns out a lot of adults do too.
I first baked these with the sweetest kid on the block, my 6th grade neighbor Nelle. I've been giving her weekly baking lessons as a sort of Learning Pod situation. Every week we brainstorm together and come up with a plan on what we want to bake the following week. This Snickerdoodle Shortbread Cookies recipe is the brainchild of this brilliant child. They quickly became a fan favorite!
This Blondie recipe is pure, unadulterated FUN!
Since it's October, we both had Halloween on our minds and you can't have Halloween without a little candy corn. So we came up with a plan for this Candy Corn Blondies recipe! I get it, most adults have evolved beyond that candy corn phase in their lives. But to put it plainly, candy corn is FUN! So why not make it even more cheerful by baking it into a batch of Blondies?
Candy Corn Blondies are the great way to use leftover Candy Corn
This easy blondie recipe whips up quickly and it's so simple a kid can make it. Plus it's a great way to use up any of that candy corn you've got floating around your house come November 1st.
Something magical happens as the candy corn bakes in the blondies
When I shared these Candy Corn Blondies with friends, I saw a little hesitation before they bit into the blondies. But once they were in, the feedback was overwhelming and enthusiastically pro candy corn. When asked "Does something magical happen to the candy corn as it bakes?" I simply smiled and nodded. Because something magic does indeed happen when the corns hit that heat. I can't quite put my finger on it but the flavor is reminiscent of caramel corn. I think it's just good old fashioned burnt sugar. Plain, simple and irresistible.
The flavor of these Candy Corn Blondies is reminiscent of caramel corn
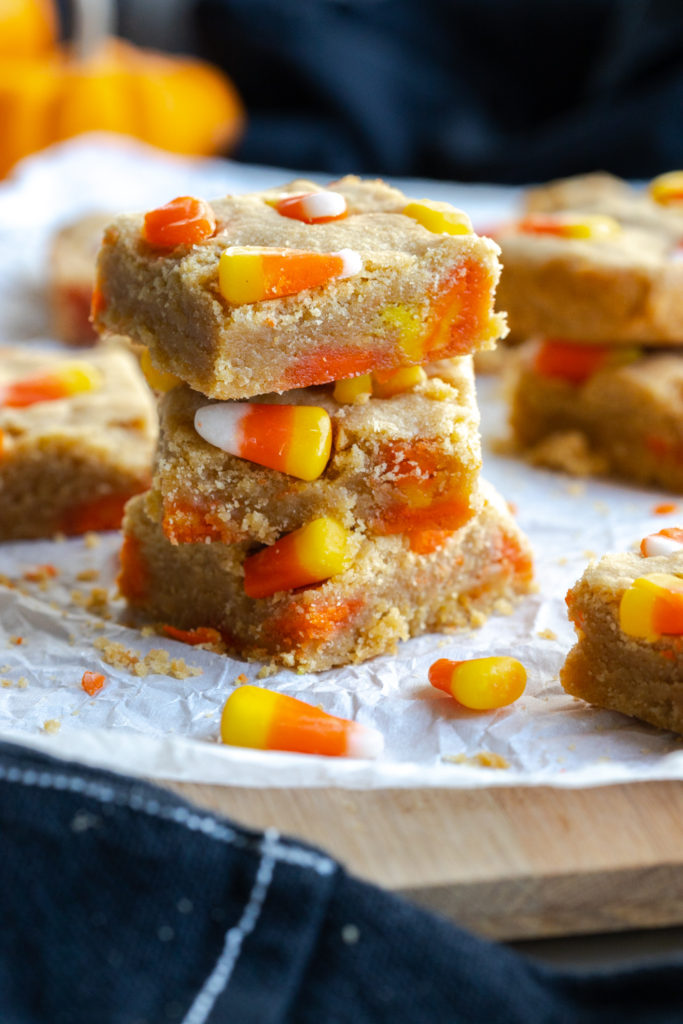
Combine the caramelized flavors with soft and homey browned butter based blondies and these Candy Corn Blondies go from corny and kitschy to rich and delish. Children and adults alike enjoy this festive fall blondie recipe. Even so called candy corn haters have been known to indulge in these rich, sweet treats.
Make these Candy Corn Blondies with 8 simple ingredients
- Butter
- All purpose flour
- Baking powder
- Fine sea salt
- Brown sugar
- Eggs
- Vanilla
- Candy Corn!
- Bonus ingredient: sea salt flakes (totally optional but so delicious)
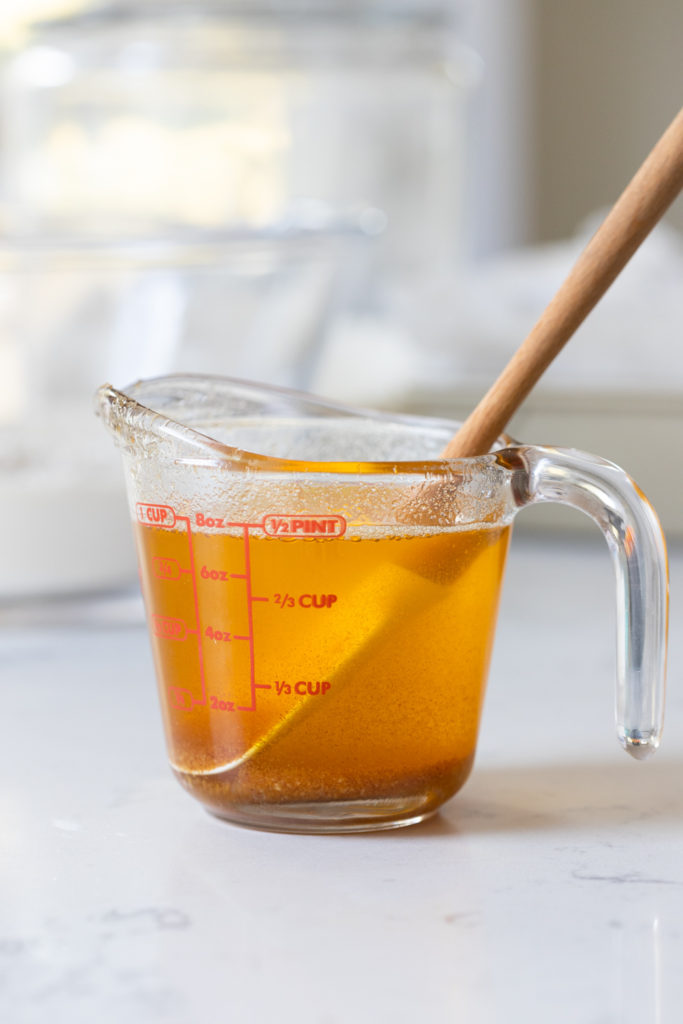

Browning the butter adds rich depth to basic Blondies
Sure, browning the butter is an extra step in this simple blondie recipe. But, by browning the butter first you are creating richness that gives the blondies character and dimension. Not only is the brown butter imbuing the Candy Corn Blondies with warm, nutty flavor. It also gives the blondies an ultra chewy texture. Totally worth it!
How to make Candy Corn Blondies
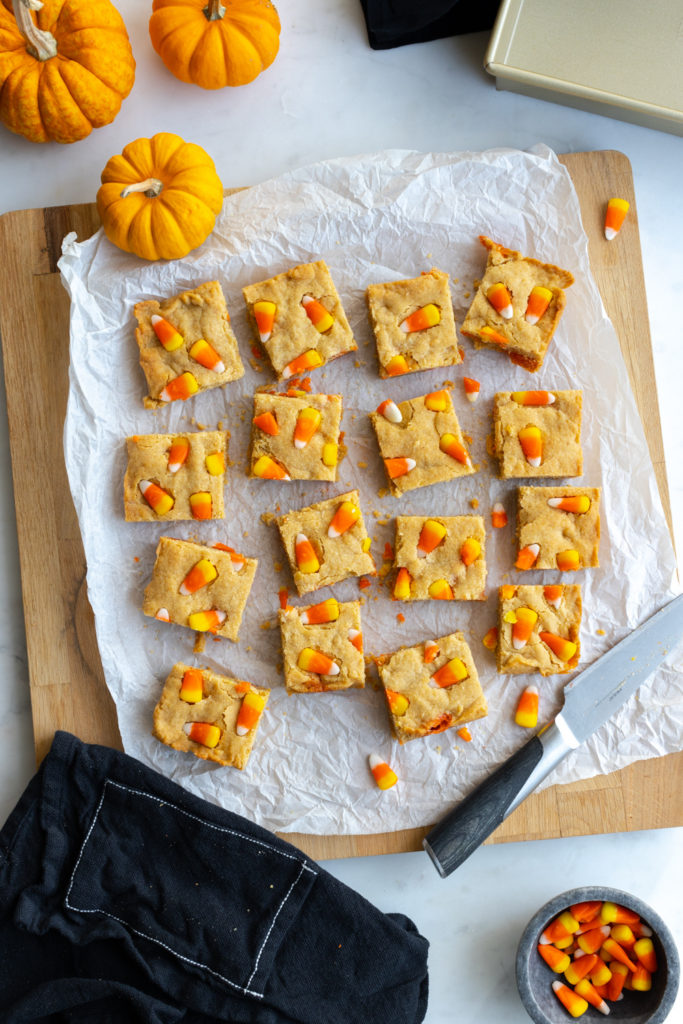
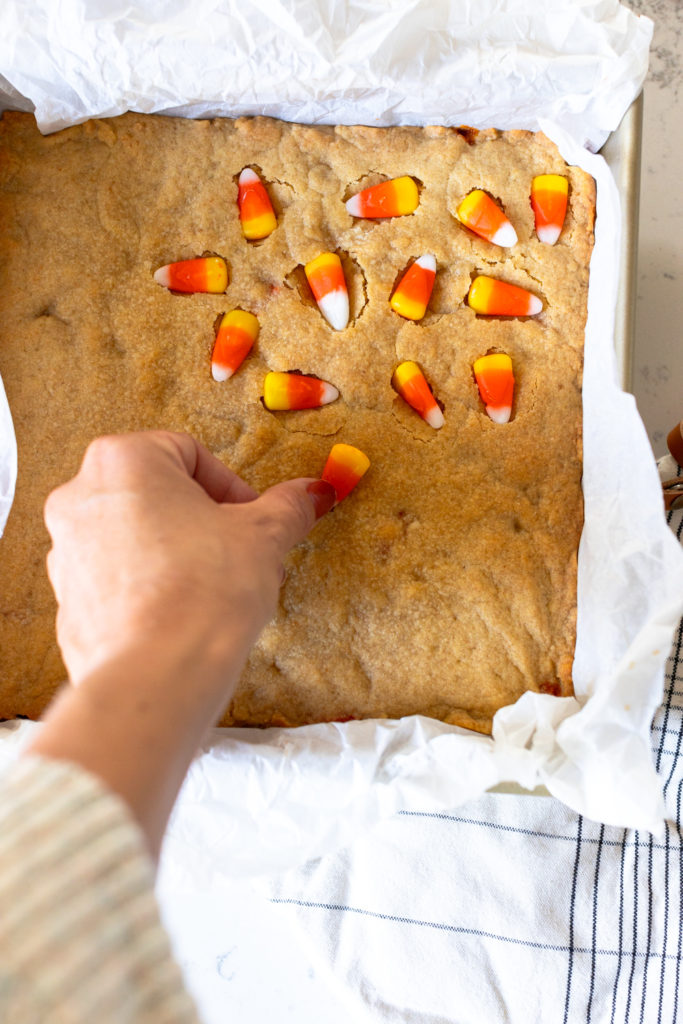
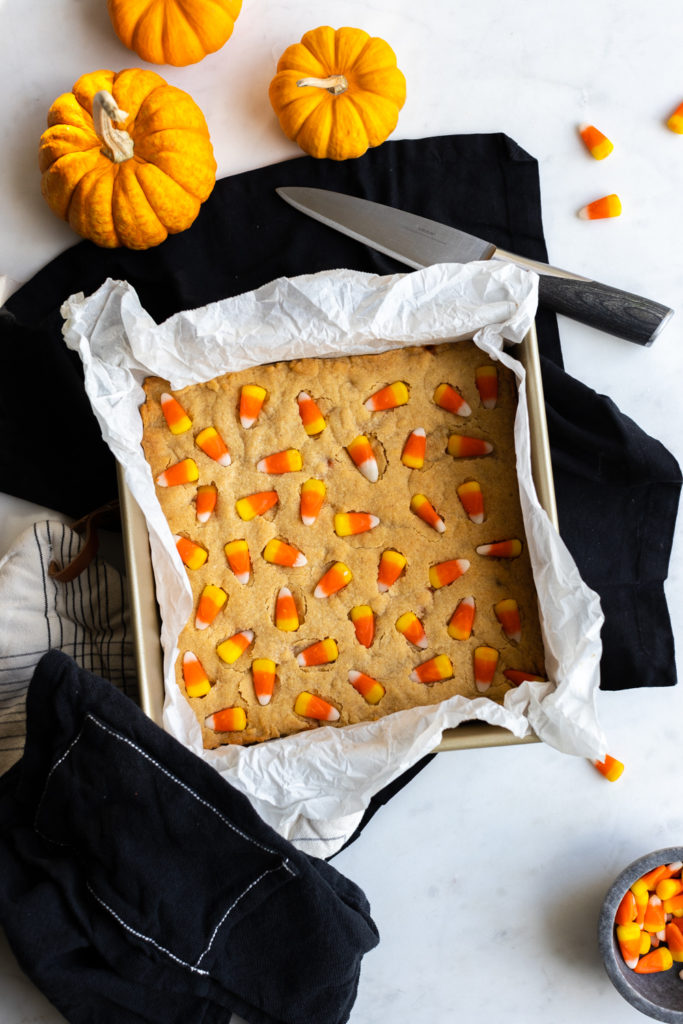
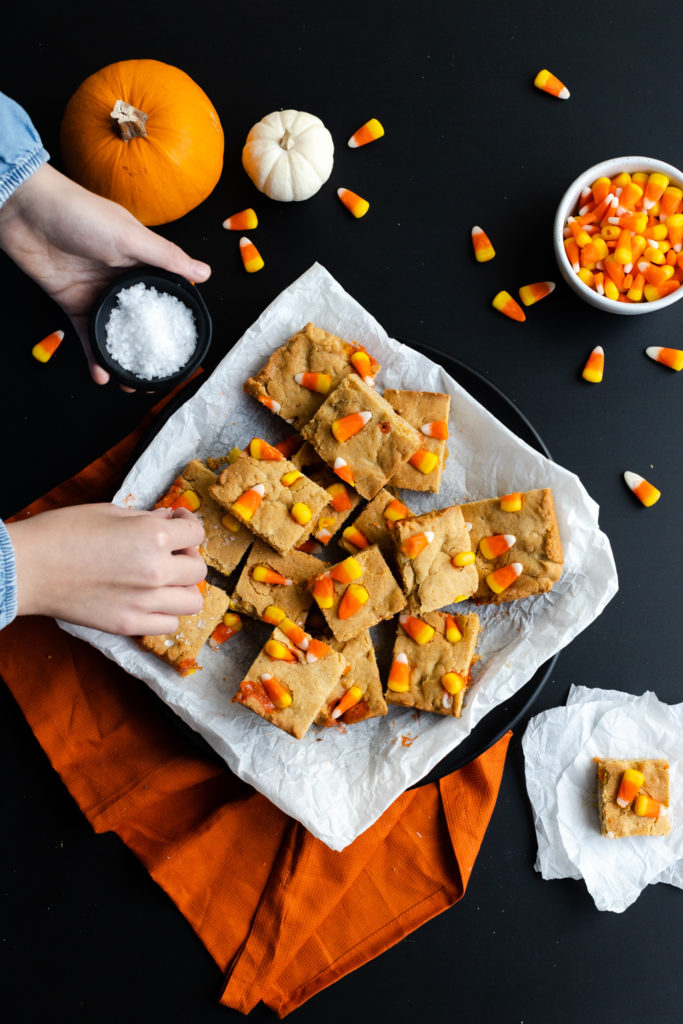
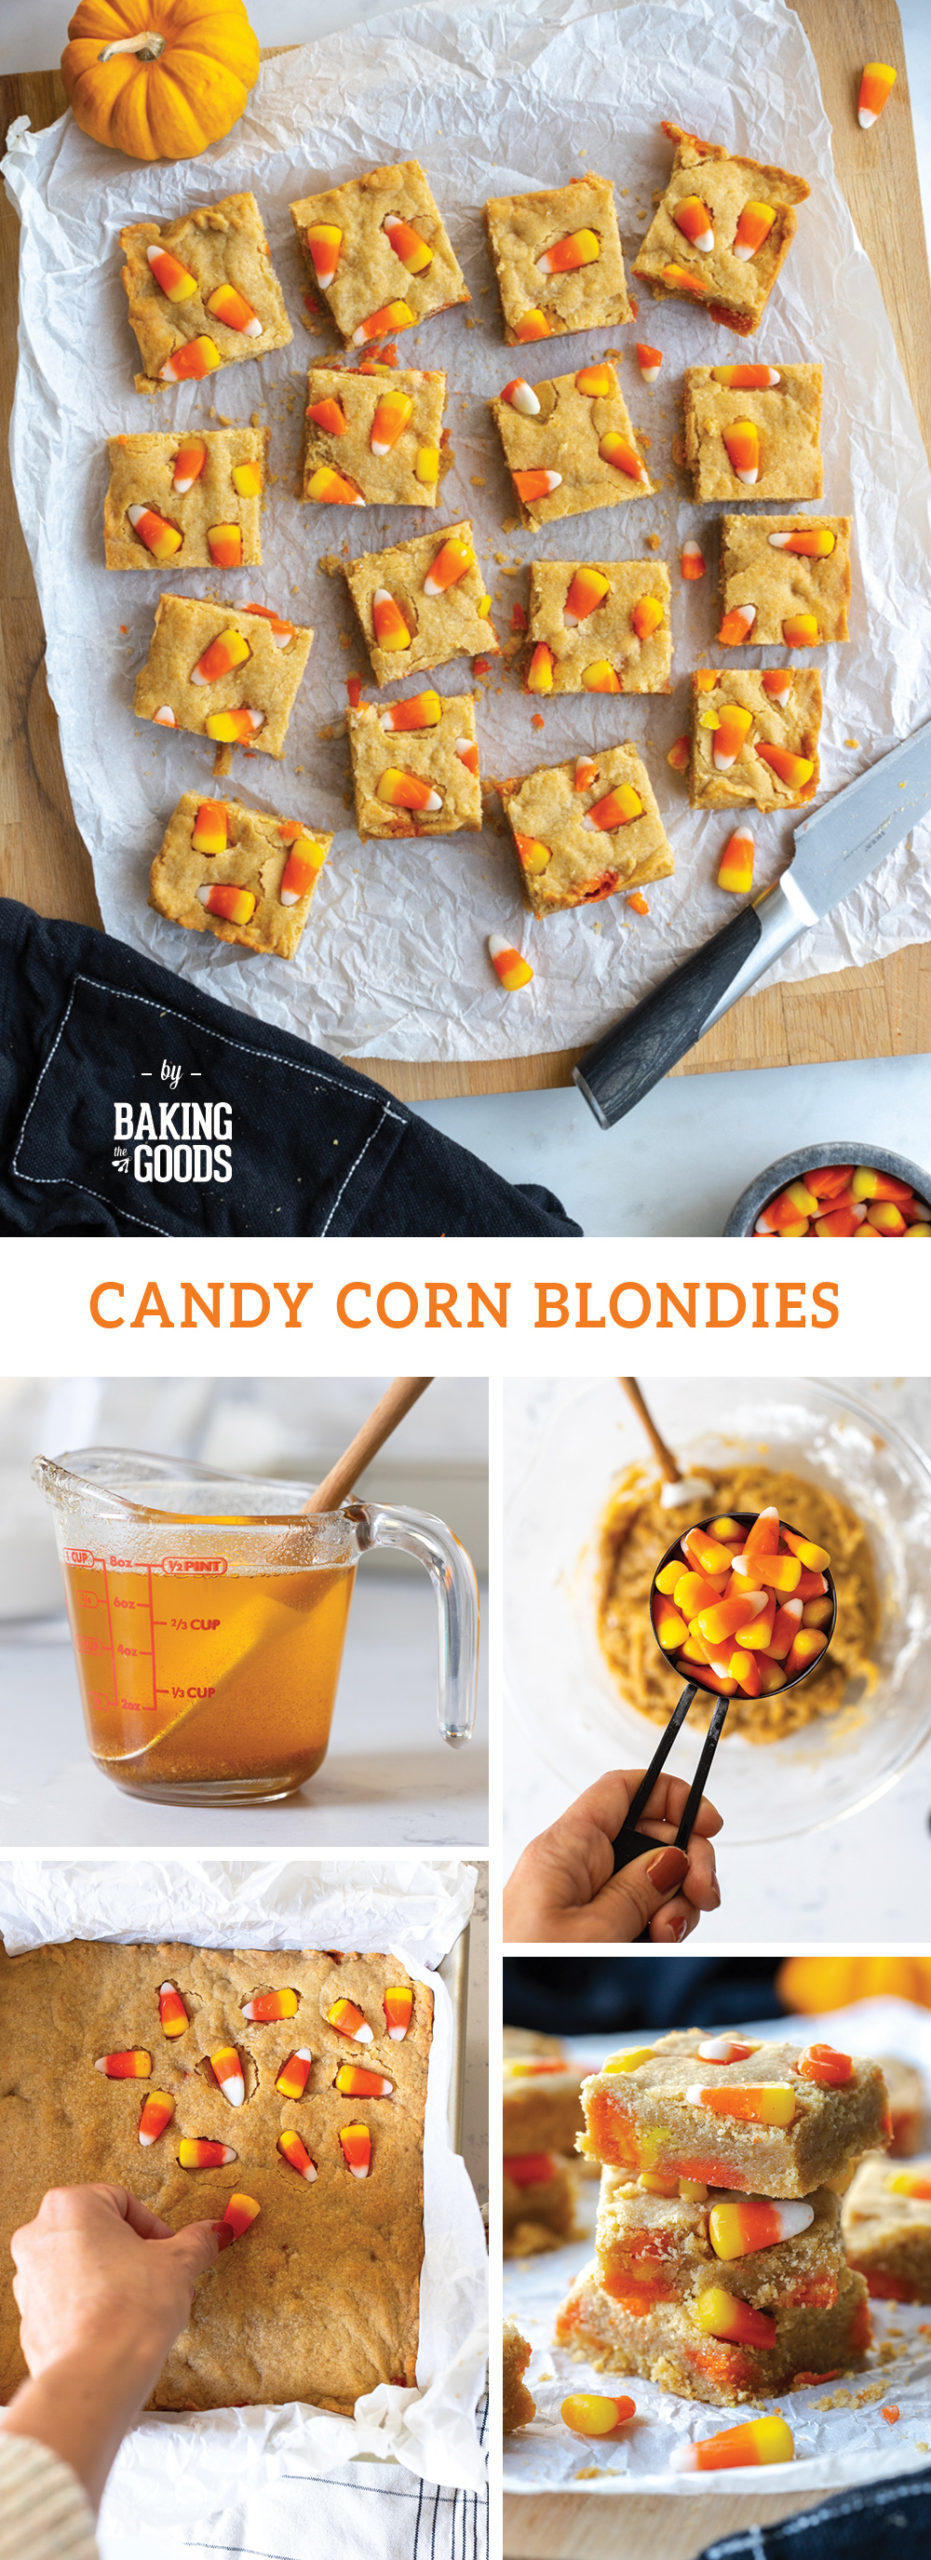
Reserve ½ cup of Candy Corn to dot the top of the Blondies
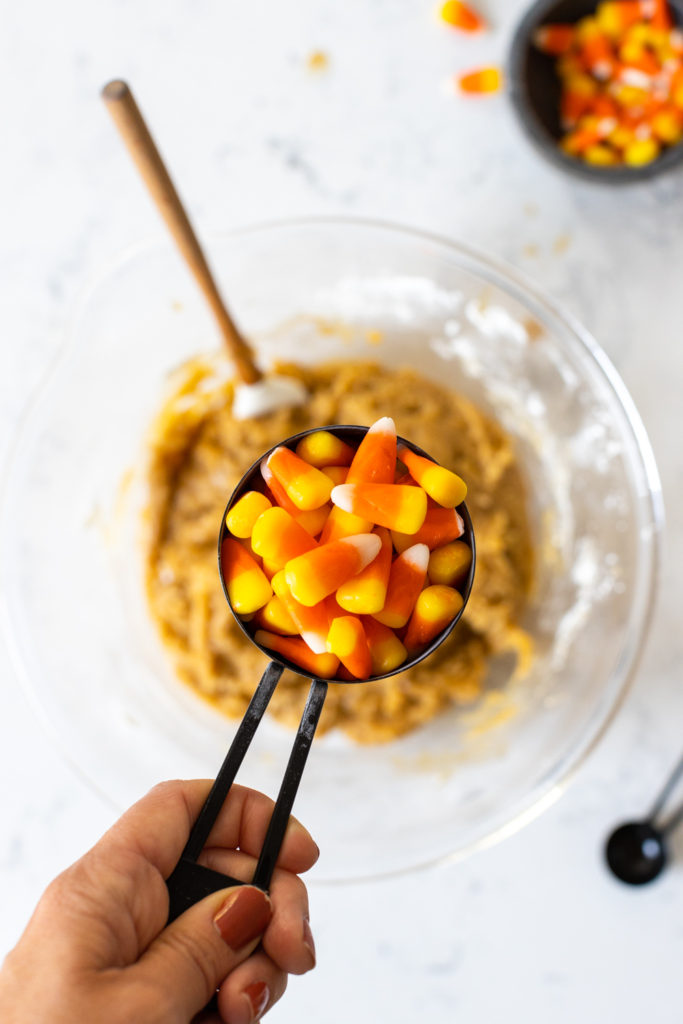
While developing this recipe, Nelle and I discovered that the best use of the candy corn is to mix ½ cup in with the batter. This is what will melt, burn and caramelize in the oven. Yum! However, you'll reserve the other ½ cup of candy corn and gently press them into the top of the warm blondies when they come out of the oven. Then, you still get that classic candy corn experience.
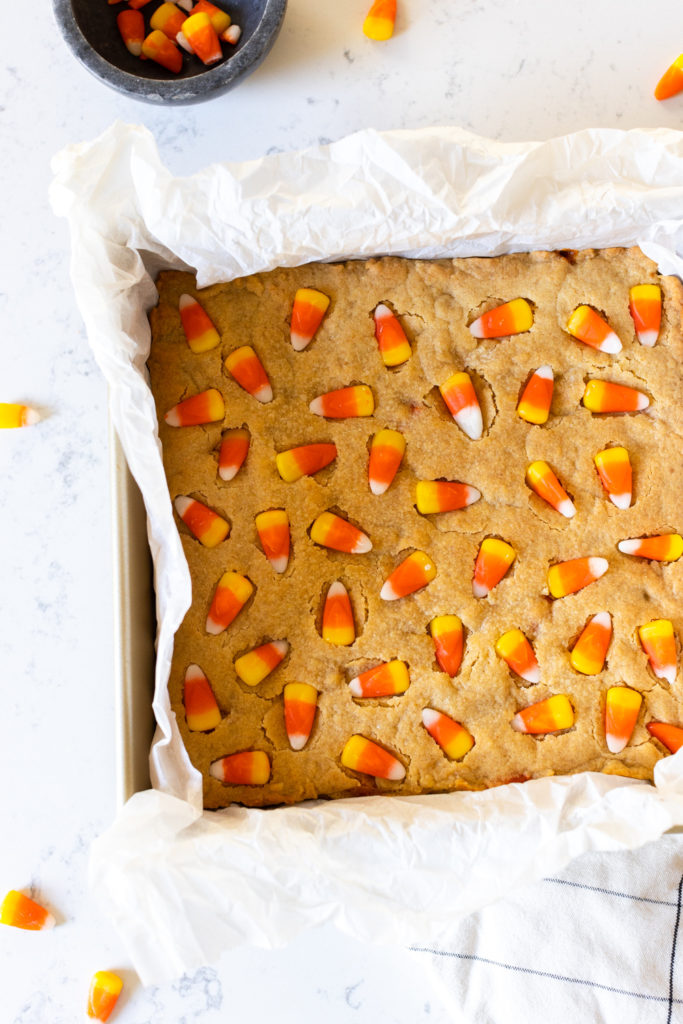
All of those rich and deeply caramel flavors and melty bits of candy corn are hidden within the blondies. But, you're not missing out on that signature, waxy bite of fresh candy corn. With the whole candy corn on pressed into the top, these Candy Corn Blondies pop with festive fall feels.
Recipe
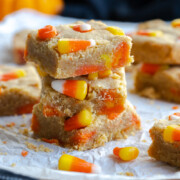
Candy Corn Blondies
- Yield: 16 blondies 1x
Description
Nostalgia and aromatic browned butter combine in these irresistibly rich, soft and homey Candy Corn Blondies topped with festive, fresh candy corn sprinkles.
Ingredients
- 1 cup unsalted butter
- 2 ½ cups all purpose flour
- 1 ½ teaspoons baking powder
- ¾ teaspoon fine sea salt
- 1 ¼ cups brown sugar
- 2 large eggs (- at room temperature)
- 2 teaspoons pure vanilla extract
- 1 cup candy corn
- 1-2 teaspoons sea salt flakes (- optional)
Instructions
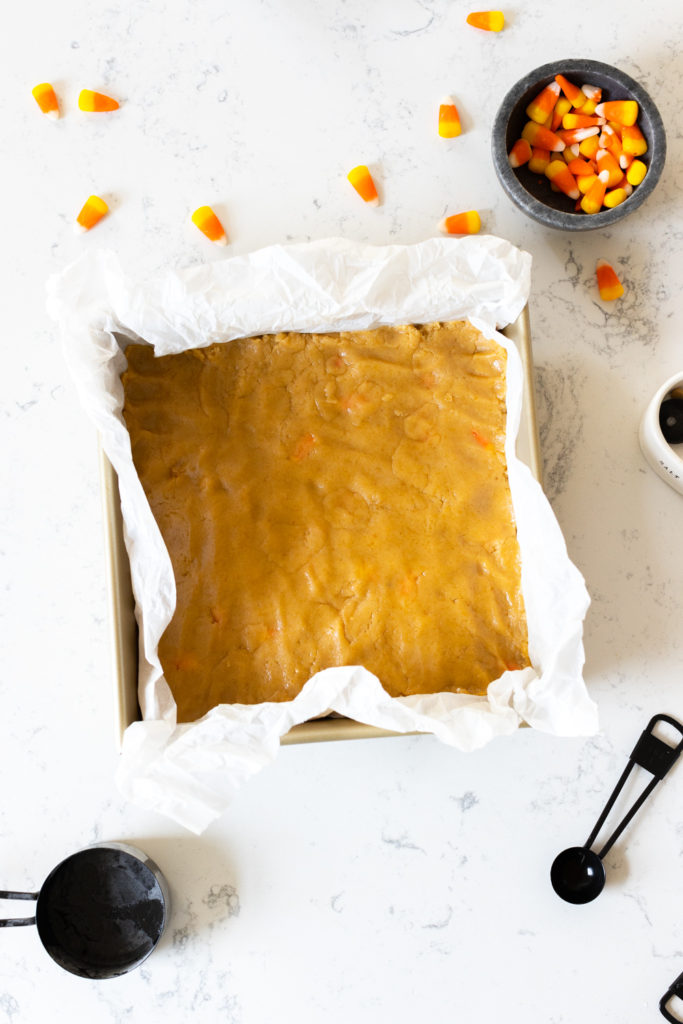
- Preheat oven to 350°F. Line 9x9x2-inch metal baking pan with parchment paper, extending over the sides by 2 inches.
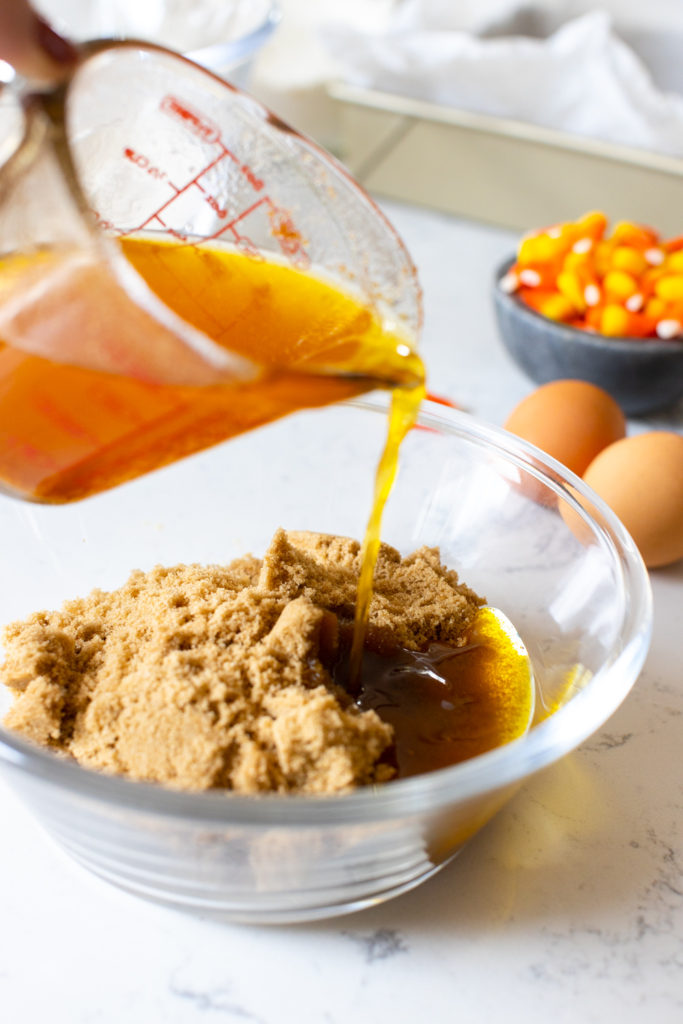
- Melt the butter in a saucepan over medium heat. Swirl the pan occasionally to be sure the butter is cooking evenly. As the butter melts, it will start to turn from yellow to a deeper golden color and toasty bits will start forming around the edges. When the butter starts to foam up and give off a nutty aroma, the brown bits will start to really show up. Take it off the heat immediately to avoid burning. Pour the butter and scrape the browned bits into a heatproof bowl or liquid measuring cup to cool down for about 15 minutes.
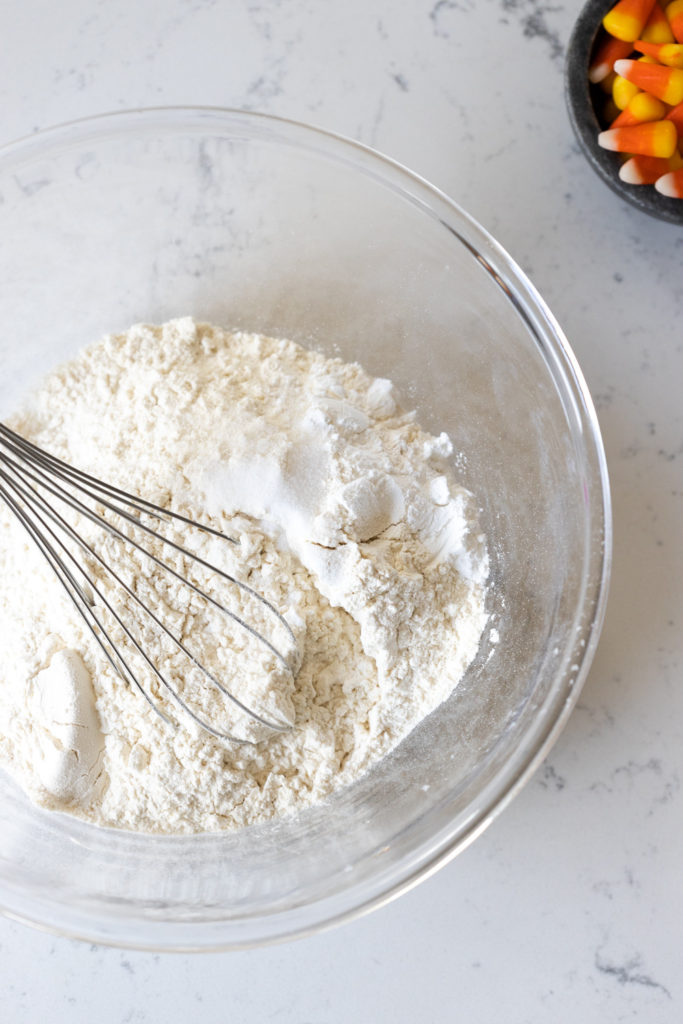
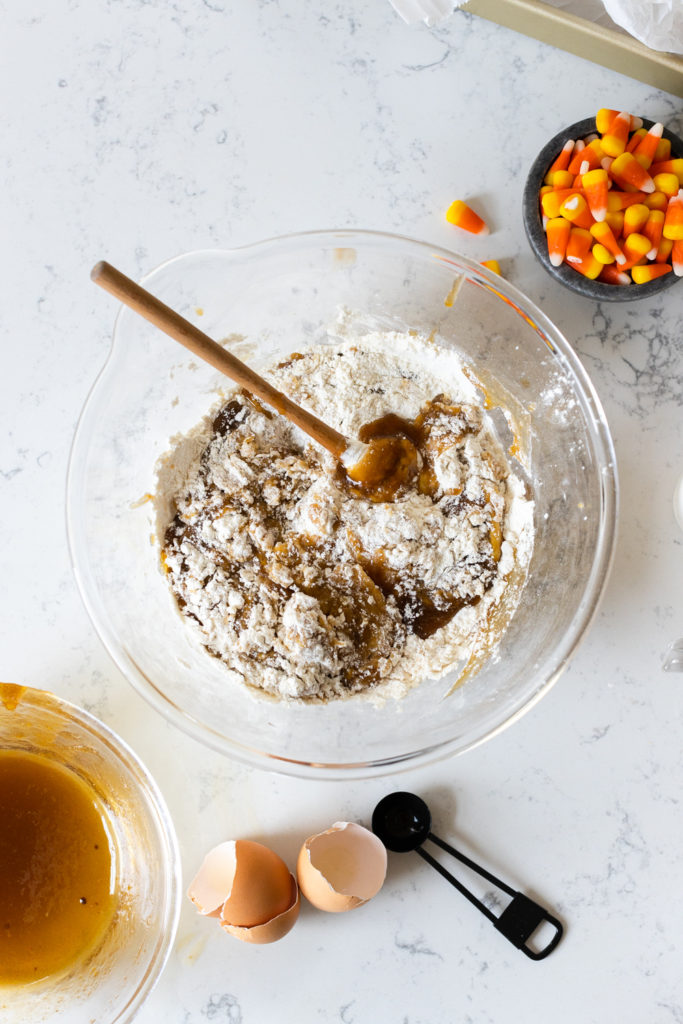
- In a medium bowl, whisk together the flour, baking powder and salt.
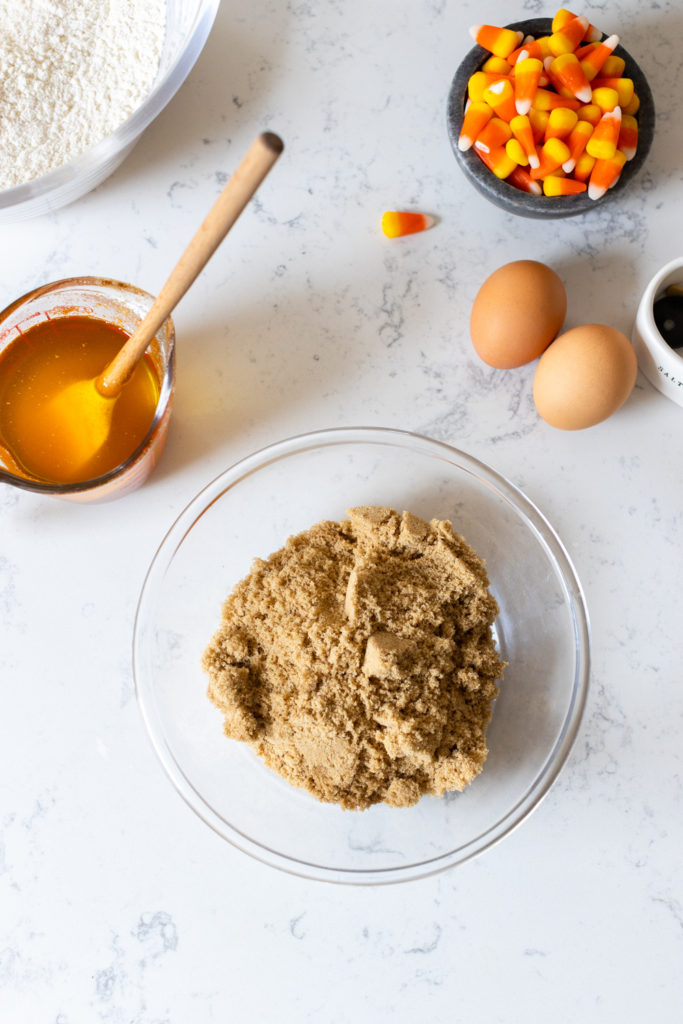
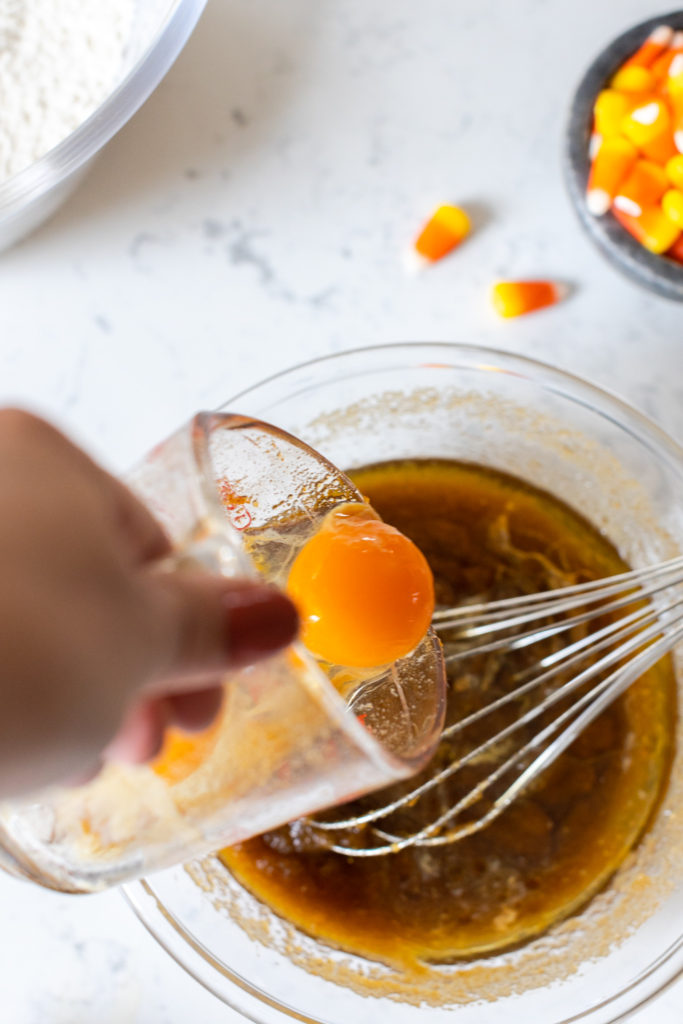
- Once the butter is cool to the touch, combine the butter and brown sugar in a medium sized mixing bowl and whisk together until combined. Stir in the eggs and vanilla until completely combined. Using a spatula, fold in the dry ingredients and mix until just combined. Stir in ½ cup of the candy corn and reserve the other half cup.
- Spread the blondie batter into the prepared pan, using a spatula or your hands to press it into the pan evenly. I like to hide the candy corns underneath blondie batter so the top in an even, clean canvas when it bakes.
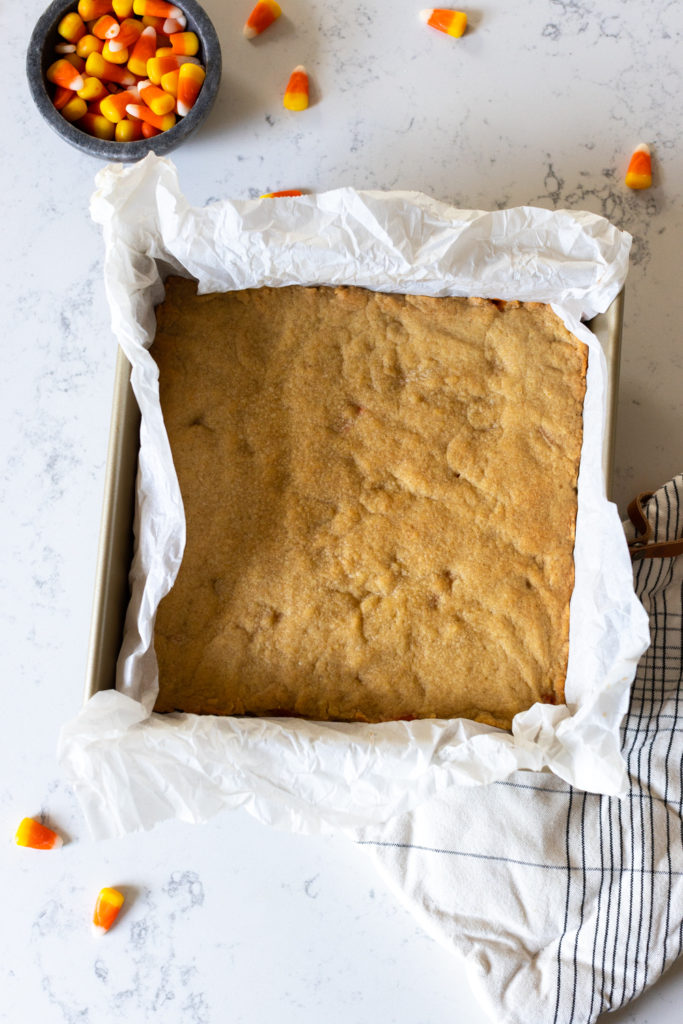
- Bake until a tester inserted in the center comes out with just a few crumbs, somewhere between 25-30-ish minutes. The edges should be a deep golden color and look firm and well-baked. The center should be moist but not gooey.
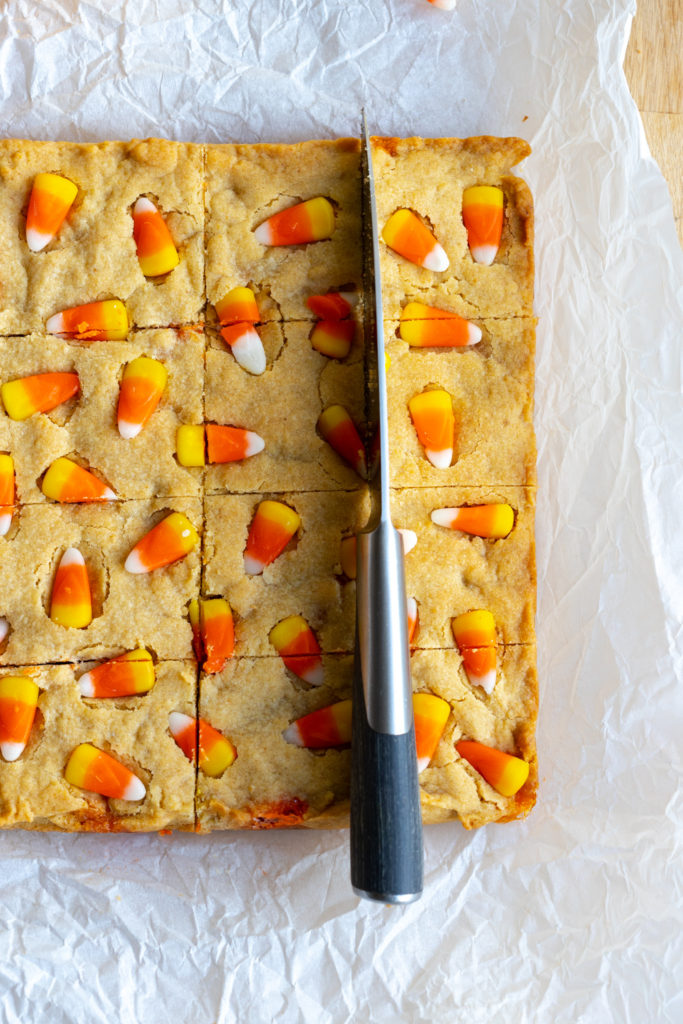
- Allow Blondies to cool in the pan for a few minutes. Once, they've cooled a bit, but while they are still warm, gently press the remaining ½ cup candy corn in a random pattern on the top of the surface. Allow to continue cooling for at least 20 - 30 minutes.
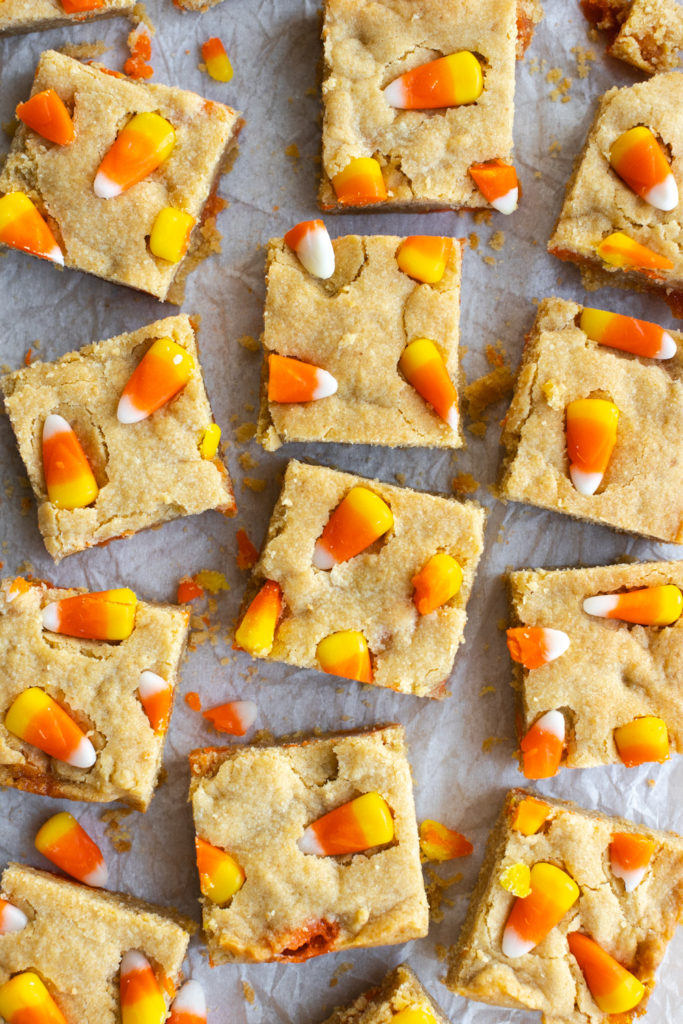
- Once the blondies have cooled, gently lift the excess parchment and lift the blondie slab out of the pan and onto a cutting board. Cut into 16 squares and serve while still slightly warm!
Notes
The blondies will last up to a week when stored in an airtight container.

Ellen says
I have not made yours yet but when I have made these in the past I found that the candy corn that hits the pan underneath burns and becomes a mess. Could you tell me how to avoid this please?
Thank you so much!
Becky Sue says
Lining the pan with parchment paper helps to keep the candy corn from burning and sticking to the pan. I haven't run into burning candy corn with this recipe. Some of corns that are mixed into the batter do melt and caramelize a little but no burning. I also press the candy corn into the top layer after the blondies bake so they don't melt. All of those tips are in the post!