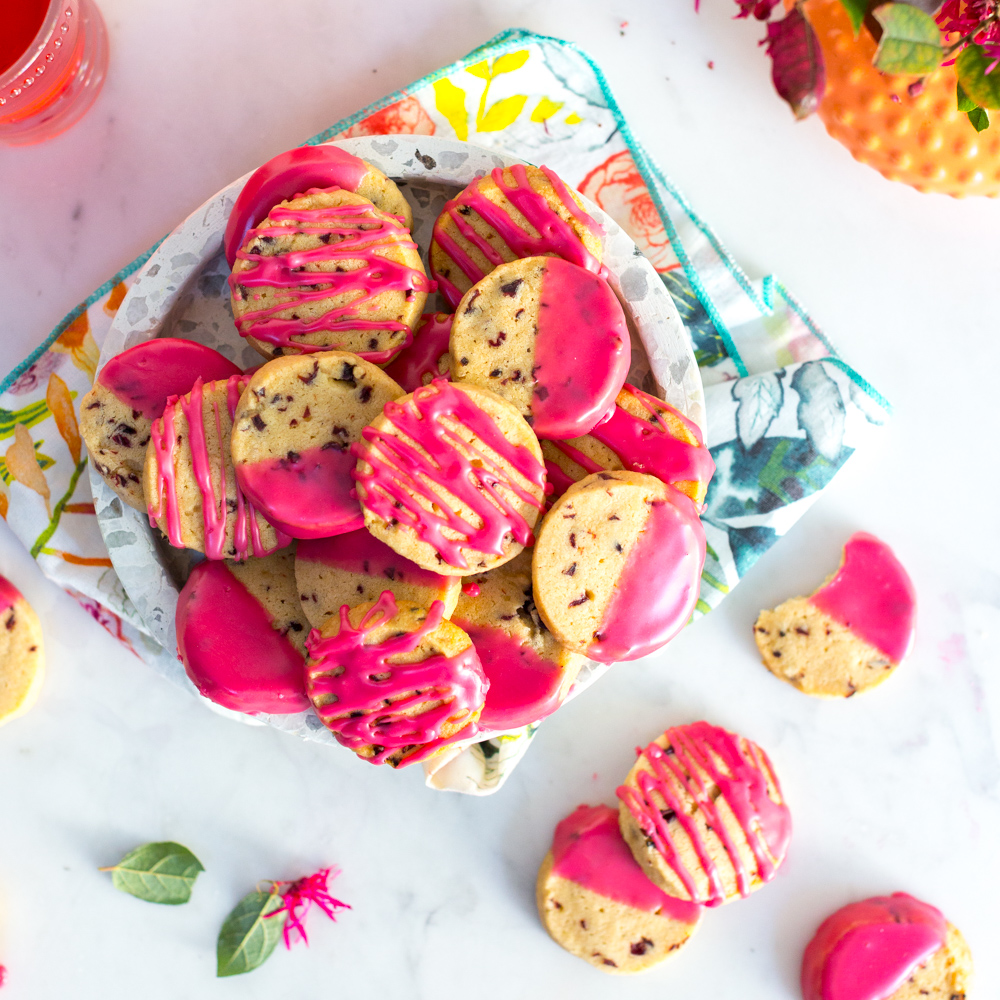
These gorgeous Glazed Hibiscus Shortbread Cookies start with a simple buttery shortbread cookie base. The dough is studded with the zippy tartness of chewy, candied dried hibiscus flowers, rounded out with warm cinnamon notes. Then to finish, the cookies are dipped and drizzled with the warm vibrant glow of a hibiscus tea glaze.
At first sight, the star ingredient in these Glazed Hibiscus Shortbread Cookies might conjure up visions of the Demogorgon that haunts the town of Hawkins in the 80's nostalgia inspired Netflix series, Stranger Things. The dried hibiscus flowers may look strange with their slightly unsettling, tentacle-like extremities, but don't let the creepy crawlies get the best of you. They are a delightful treat with a tangy zip and a kiss of floral sweetness. More tart cherry with flowery undertones than the deep, dark scarlet lit world of the parallel Upside Down universe where they could easily originate from.


Yes, hibiscus is a flower but it tastes like a tart dried fruit
So yes, when you make this recipe Glazed Hibiscus Shortbread Cookies you will be eating flowers. How lovely is that? If you are opposed to lavender or rose flavored foods, don't let that deter you from hibiscus. The flavor is much less floral and tends to taste more tart. Not only does the flavor of dried hibiscus taste like a dried cherry or cranberry, the chewy texture mirrors that of the dried fruits too.
I've long been a fan of the tart and refreshing Mexican Agua Fresca, Jamaica, also known as Hibiscus Tea . The vibrant flavor and punchy color refreshes like no other and is especially welcome alongside a spicy Mexican dish. You may want to acquaint yourself with Jamaica by trying this Easy 3-Ingredient Agua de Jamaica {Hibiscus Iced Tea} recipe from my pal Kate of the blog Hola Jalapeño. And, something tells me her tea and these Glazed Hibiscus Shortbread Cookies would pair up perfectly.
Hibiscus tea vs. whole dried hibiscus flowers
Dried hibiscus is most often cut & sifted hibiscus flowers meant to be steeped into a tea. The dried and candied hibiscus pebbled into the dough of these Glazed Hibiscus Shortbread Cookies is a whole flower version of dried hibiscus that has been sweetened with sugar. It looks, tastes and feels like a dried fruit, similar to dried cranberries or tart cherries. This recipe actually calls for both forms of hibiscus. Chopped chewy candied dried hibiscus gems in the dough. As well as steeped hibiscus tea to create the vibrant glowing glaze.

Where to find dried hibiscus
When I first spotted the dried hibiscus in the fruit and nut section at my local Trader Joe's last summer, I bought 2 bags immediately, no questions asked. I've been picking up a bag nearly every visit since and we endearingly refer to them as Demogorgons around here. TJ's doesn't always stock them so I suggest snagging a few bags when you do see them. However in recent years, I have seen them popping up all over the place. You can find dried hibiscus online, at World Market and I've even seen a giant bag at Costco!
I love adding the "Deomogorgons" to cheeseboards or snacking on them like candy when I need a little sweet rush. And while it can be a bit of a challenge to convince yourself that you are actually biting into a hibiscus flower and not some super-organism that crawled in from the Upside Down, the immensely tart sweetness will immediately win you over.
These Glazed Hibiscus Shortbread Cookies begin with a basic shortbread cookie base
The best things about shortbread cookies, well aside from their buttery flavor and snappy sandy texture, is just how easy they are to make. A standard shortbread cookie recipe really only requires 3 ingredients, butter, sugar and flour. However, many basic shortbread recipes will call for salt and vanilla extract.
You'll need these 9 ingredients to make these shortbread cookies
- Butter
- Sugar
- Vanilla
- All Purpose Flour
- Salt
- Cinnamon
- Candied dried hibiscus flowers
- Powdered sugar
- Hibiscus tea
The cookies themselves only require the first 7 ingredients but if you want that poppin' pink glaze, steeping hibiscus tea in hot water and then whisking it with powered sugar is all else you'll need.
Cinnamon, vanilla & hibiscus are a other-worldly combo
The flavor combo of the simple buttery shortbread cookies with the tart and tangy dried hibiscus bits, plus a little punch of cinnamon combine into an other-worldly tasting experience. Not to mention a texture combo for the cosmos. The strange thing is, I just made one small ingredient change to a basic cookie recipe and I feel like I've opened the door to a whole new, untapped cookie world.
Mixing & shaping the Glazed Hibiscus Shortbread Cookie dough is easy
Shortbread cookies doughs come together in snap! Since they don't use eggs or leavening agents like baking soda or baking powder, they won't rise while baking the way traditional drop cookies do. So shortbread cookies are a great option when you don't have eggs in the house. Or let's say there is a countrywide egg shortage going on.
FYI, If you aren't able to get your hands on dried hibiscus flowers, you can absolutely sub in tart dried cherries or dried cranberries
 for the chewy dried fruit bits in the shortbread cookie dough.
Mixing the shortbread cookie dough is as easy as 1,2,3
- Step 1: cream the butter, sugar and vanilla together until incorporated. Only creaming for about 3 minutes. The mix should still be a bit sandy, this translates to the signature sandy and snappy texture of shortbread cookies.
- Step 2: blend in the whisked dry ingredients. Only blending until they've just mixed in enough for the dough to hold together. It will go from rough and crumbly to hydrated in just a few moments.
- Step 3: stir in the mix-ins! These Glazed Hibiscus Shortbread Cookies blend in chopped, dried and candied hibiscus flowers. But all kinds of mix-ins can be added to shortbread cookie dough, like the chopped dark chocolate chips used in my Salted Grapefruit Chocolate Chunk Shortbread Cookies recipe for example.


How to shape shortbread cookie logs for slicing and baking
Slice and bake cookies are the best! You can stash the cookie dough in the freezer and then slice and bake whenever fresh cookies are calling. Shortbread slice and bake cookies can come in all shapes and sizes, see my strawberry shaped Chocolate Dipped Strawberry Cookies and these squared off Snickerdoodle Shortbread Cookies. But simple rounds are the easiest and more popular method.
- First, gather your dough together into a basic rectangular log shape, then wrap it in parchment paper or wax paper and start rolling to smooth out the edges and create a tubular log shape.
- Next, wrap the parchment paper around your dough log, lengthwise. Then twist each end of the paper into pigtails in opposite directions (one towards you and one away from you) to form a locking mechanism. With each twist, the dough will compress and becomes smoothed out (think of it like a sausage in a casing). Roll from the center outward until you feel that you have a smooth, cylindrical log. Then chill the dough in the refrigerator before slicing.
- Once the Hibiscus Shortbread Cookie dough has chilled and the log is nice and firm, use a sharp knife to slice into ¼" - ½" thick slices.
Pro tip, stuff the parchment wrapped cookie dough log into an empty paper towel roll to help maintain a perfectly round shape while the dough chills. This will keep it from flattening out on the bottom.


These Glazed Hibiscus Shortbread Cookies perfectly showcase the best qualities of the dried hibiscus flowers with a simple shortbread cookie base that allows the brightness of the hibiscus color and flavor to shine through. When developing this recipe for shortbread cookies, I slayed those Demogorgons into little cheery bits of magenta magic and sprinkled them into the easy butter shortbread cookie dough.

 to cool and glaze.
Decorating the Glazed Hibiscus Shortbread Cookies
If you thought these cookie dough was easy, the glaze will be an absolute cinch. All it takes is a quick steep, a flick of the whisk and some dipping and drizzling. Told ya it was easy. This brightly sweet, vibrant hibiscus finish would even stop a Demogorgon in its tracks.


These Glazed Hibiscus Shortbread Cookies are one of the simplest cookie recipes I've ever made but quickly climbed up to the top as one of my favorite cookie recipes ever! Don't worry Salted Peanut Butter Chocolate Chip Cookies, you'll always be an Eleven in my book.


If you've never tasted hibiscus or used it in baking, don't be scared, there are much stranger things out there. It's time to transport yourself into this delicious dimension and bake up a batch of these Glazed Hibiscus Shortbread Cookies.
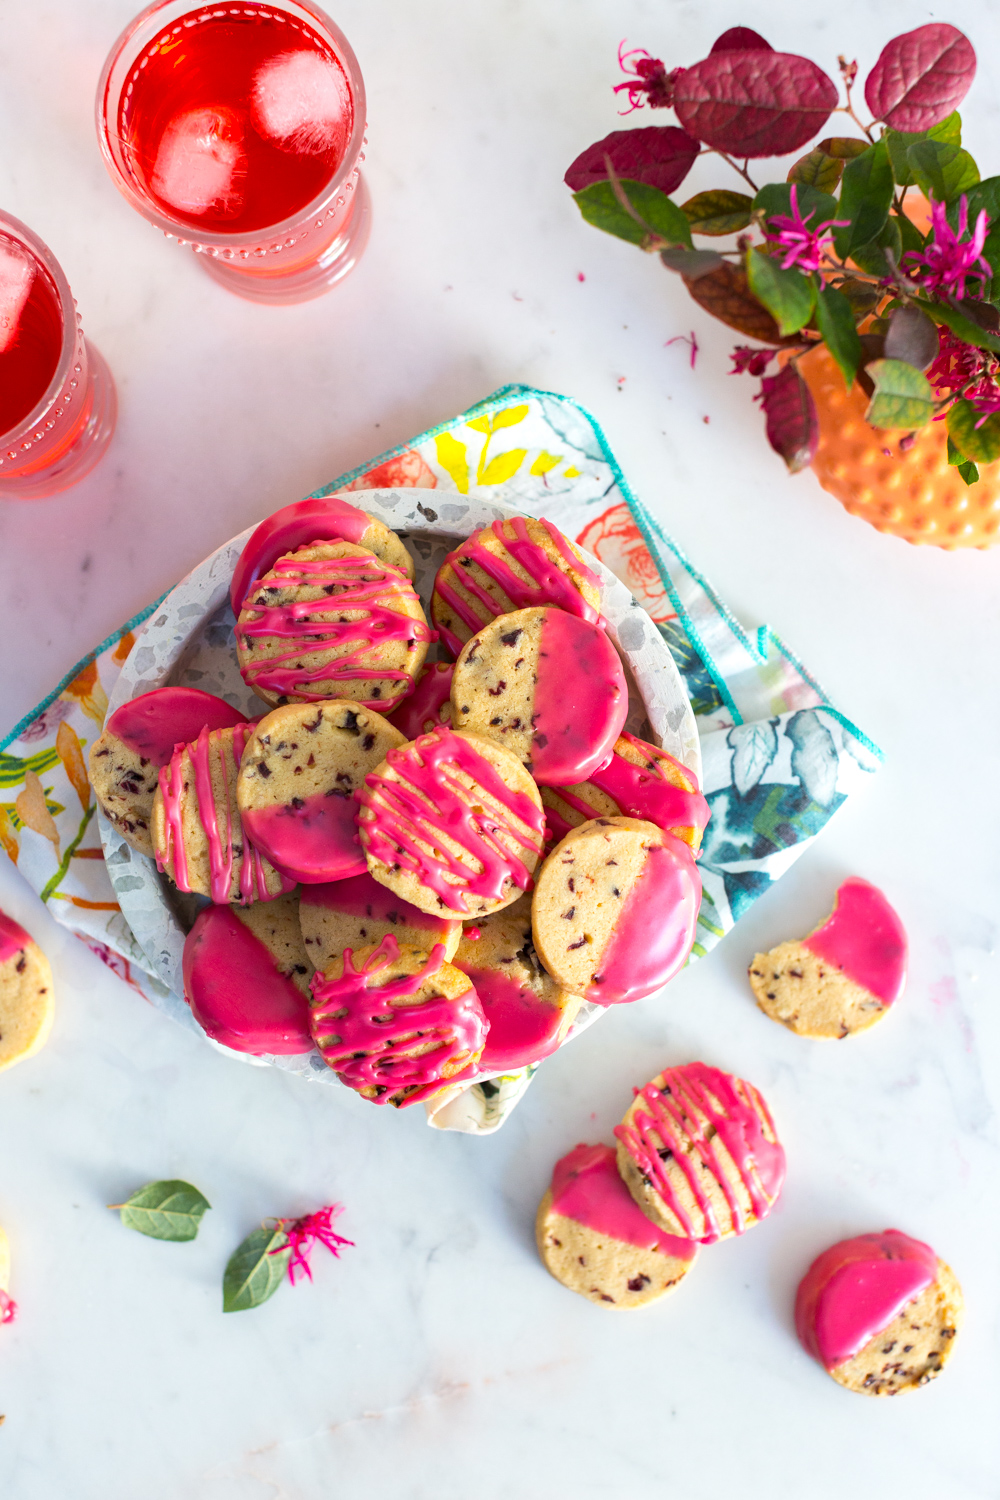
 , you might as well serve these Glazed Hibiscus Shortbread Cookies with a side of tangy, refreshing iced hibiscus tea.
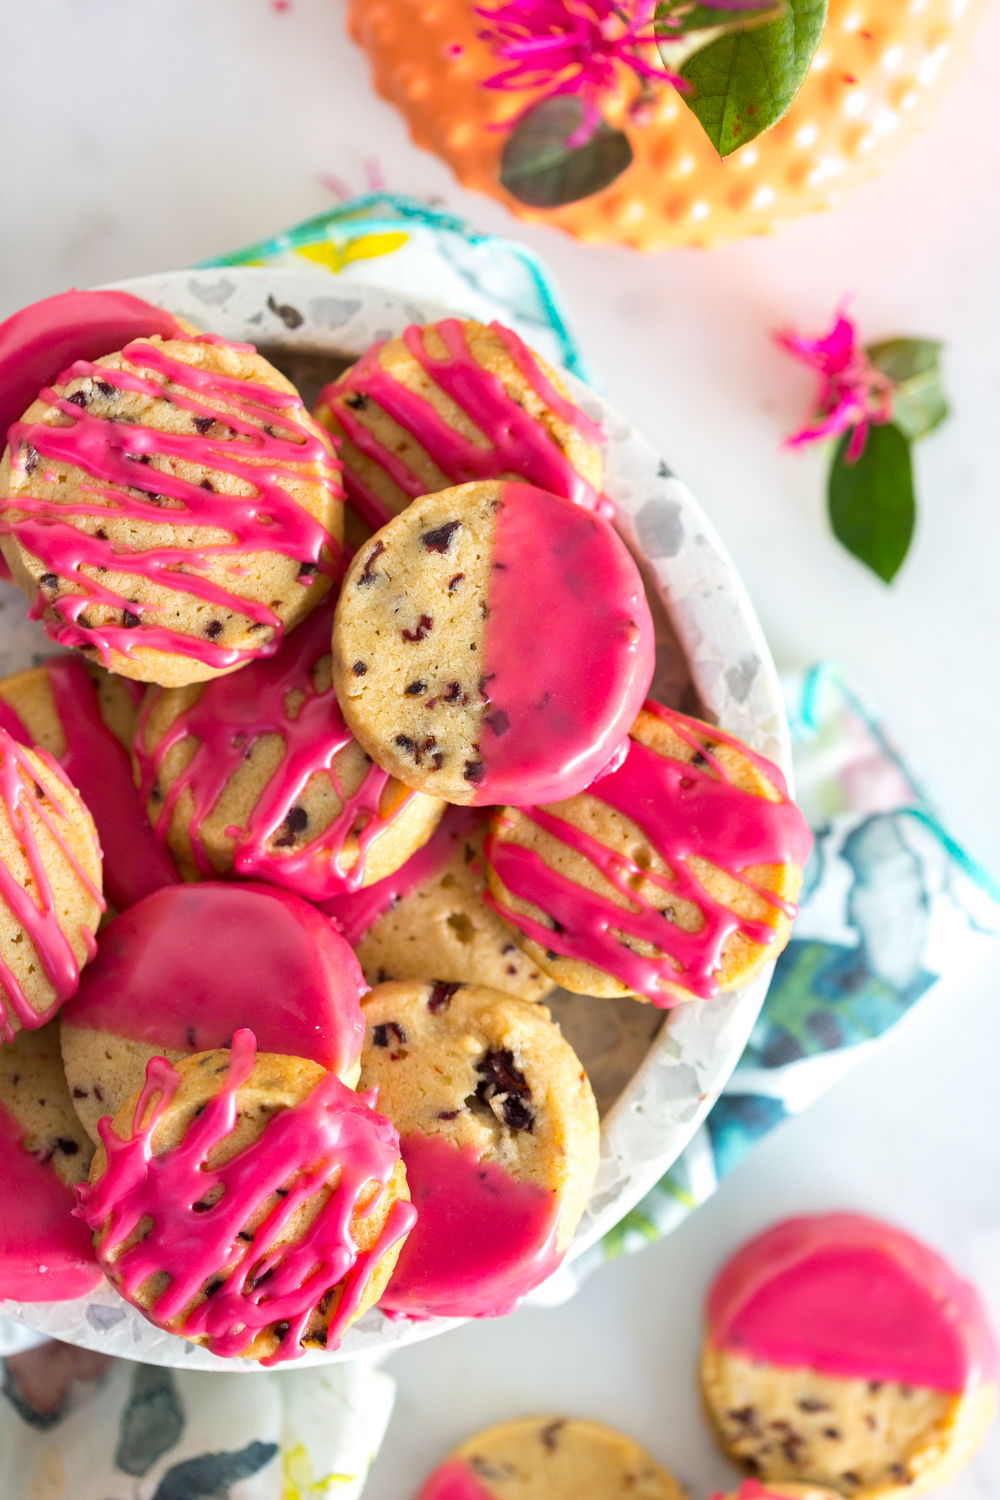
 is magical.
Recipe
Glazed Hibiscus Shortbread Cookies
- Total Time: 38 minutes
- Yield: 40 cookies 1x
Description
A simple buttery shortbread cookie base is peppered with the zippy tartness of dried hibiscus flowers, rounded out with warm cinnamon notes, then dipped and drizzled with a vibrant hibiscus tea glaze.
Ingredients
HIBISCUS SHORTBREAD COOKIES
- 2 cups all purpose flour
- 1 teaspoon fine sea salt
- 1 teaspoon ground cinnamon
- 1 cup unsalted butter, slightly cooler than room temperature
- ½ cup granulated sugar
- 1 teaspoon pure vanilla extract
- ½ cup candied dried hibiscus flowers, coarsely chopped
HIBISCUS TEA GLAZE
- 1 ½ cups powdered sugar
- 2 tablespoons loose leaf hibiscus tea
- ½ cup water
Instructions
HIBISCUS SHORTBREAD COOKIES
- Measure the flour, salt and ground cinnamon into a mixing bowl and whisk together.
- With the paddle attachment on a stand mixer, cream the butter, sugar and vanilla on a medium high speed for about 3 minutes, just until blended. You want the texture to be still slightly sandy. Be sure to stop your mixer and scrape down the sides of the bowl a few times so you are sure to incorporate all of the sugar into the butter.
- With the mixer on a low stir, slowly add the dry ingredients until incorporated. Mix until the dough just comes together.
- Gently stir in the chopped dried hibiscus flowers.
- Turn out the dough onto a clean, lightly floured surface. Gather the dough together into a disk by gently patting, not kneading the dough, and pat to flatten the top. Once you have a round disk shape, use a knife or a bench knife to cut directly in half and set aside.
- Clean your work surface, then lay down a sheet of parchment paper. If you have a couple of empty paper towel rolls handy, have them available. Drop one of your dough halves on the parchment paper and use your hands to shape a rough log shape, roll into a smooth log until it is about 1 -1 1⁄2” in diameter. Eyeball it to about the size of your empty paper towel roll.
- Wrap the parchment paper around your dough log, lengthwise. Then twist each end of the paper into pigtails in opposite directions, one towards you and one away from you, to form a locking mechanism. With each twist, the dough will compress and becomes smoothed out. Think of it like a sausage in a casing. Roll from the center outward until you feel that you have a smooth, cylindrical log. Repeat with the second log.
*Optional: now you can get tricky and stuff the dough logs into empty paper towel rolls. It should be a snug fit but should slide in and out easily. The idea behind the paper towel roll is that your dough is going to hold it’s cylindrical shape while it chills instead of having a flat bottom. - Refrigerate the dough for at least 1 hour, if not 2. This allows the dough to set up and hold its round shape nicely when baking.
*You can also freeze the dough at this point. Just remember to defrost it overnight in the fridge or at room temperature for about an hour before slicing and baking. - Preheat oven to 325° F.
- Remove dough logs from the fridge and unroll on a cutting board. Using a sharp knife, slice the log into 1⁄4” - 1⁄2” thick cookies. You should get about 14-20 cookies per log. Arrange them on a Silpat mat or parchment paper lined baking sheet about 1" apart, evenly spaced.
- Bake for 14-18 minutes, rotating the pans halfway through the bake. They should come out with a golden ring around the edge and be firm to the touch with just a bit of give in the center.
- Allow to cool either right on the trays or transfer to a cooling rack.
HIBISCUS TEA GLAZE
- Boil the water, then pour over the hibiscus tea in a heatproof vessel to brew. You want the color and flavor very concentrated so it doesn't take much water. Once it's cooled, pour through a fine mesh sieve and set aside.
- Sift the powdered sugar into a mixing bowl. Slowly whisk in the brewed and cooled hibiscus tea, 1 tablespoon at a time. Whisk until smooth. The glaze should run off of the whisk in a thick flowing ribbon. If the glaze is too thin, slowly whisk in more powdered sugar. If the glaze is too thick, slowly add more tea.
DECORATING THE COOKIES
- For the drizzle method - Place the cookies on a cooling rack and use the whisk to wave the icing back and forth over the cookies creating a vibrant, messy drizzle.
- For the dip method, gently dip the cookies halfway into the glaze, at an angle. Transfer to a cooling rack to set.
- The glaze needs at least 30 minutes to set. It will harden and form a soft, eggshell like finish.
Notes
For the shortbread cookies, look for candied dried hibiscus flowers at Trader Joe's, World Market in the dried fruit and nuts section or online.
For the vibrant pink icing, use loose leaf hibiscus tea or a couple of sachets for concentrated color and flavor.
If you aren't able to find on candied dried hibiscus flowers, you can sub in tart dried cherries or dried cranberries for the chewy dried fruit bits in the shortbread cookie dough.
- Prep Time: 20 minutes
- Chilling Time: 60 minutes
- Cook Time: 18 minutes
- Category: cookies
- Cuisine: dessert

NB says
These were fabulous. So pretty and delicious. I didn’t have candied hibiscus so I made my own with dried hibiscus, sugar, and water, then used the simple syrup with powdered sugar for glaze.
Becky Sue says
Oh wow, I love that you made your own candied hibiscus for this recipe. What a brilliant adaptation. I'm feeling inspired to try the same! Thanks for sharing. 🌺☺️