
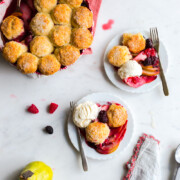
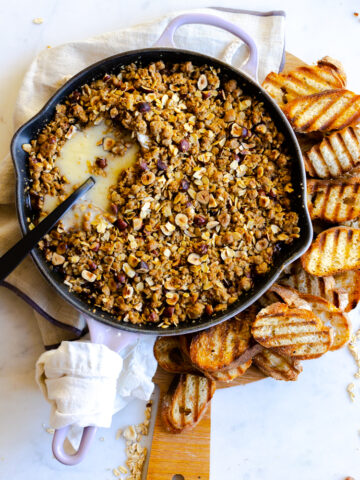
This rustic Pear Berry Cobbler is a casual, no-fuss recipe that makes the most of the start of pear season and peak summer berries. Naturally sweet Bartlett pears meld with bursting berries under an airy blanket of tender buttermilk baby biscuits.
California pear season runs from July - November
It's July, the middle of summer, and I know, pears aren't generally the first fruit to come to mind this time of year. But I bet you didn't know that California Grown pears are just starting to come into season. Fresh picked, early summer Bartlett pears are as sweet as candy right now. In this Pear Berry Cobbler, I combine the first pears of the season with juicy, peak summer berries for a laid back and superbly summery dessert.

I am a big fan of combining seasonal fruits in my desserts and this beautifully illustrated seasonality guide from California Grown helps me visualize what fruits work together and when. Plus, the vibrant color palette inspired me to mix green Bartlett pears with blackberries and raspberries in this Pear Berry Cobbler recipe! It's so pretty, I may just print it off and hang it on the wall in my kitchen.
Some background on Bartlett Pears
The Bartlett pear tree arrived in California by 1849, brought West by prospectors during the Gold Rush era. The idyllic climate and fertile soil of California proved to be just right for pears. Since then, California has grown to be one of the nation’s top suppliers of pears.
California Pear Farmers have become leaders in sustainability by taking an intentional, long-term approach in how they care for the land, environment, resources, workers and communities where they live and work. Knowing this, I seek out California Grown Pears when I am shopping at the market. You can use this handy “How to Know If It’s From California” guide to spot CA Grown produce at your local grocer.
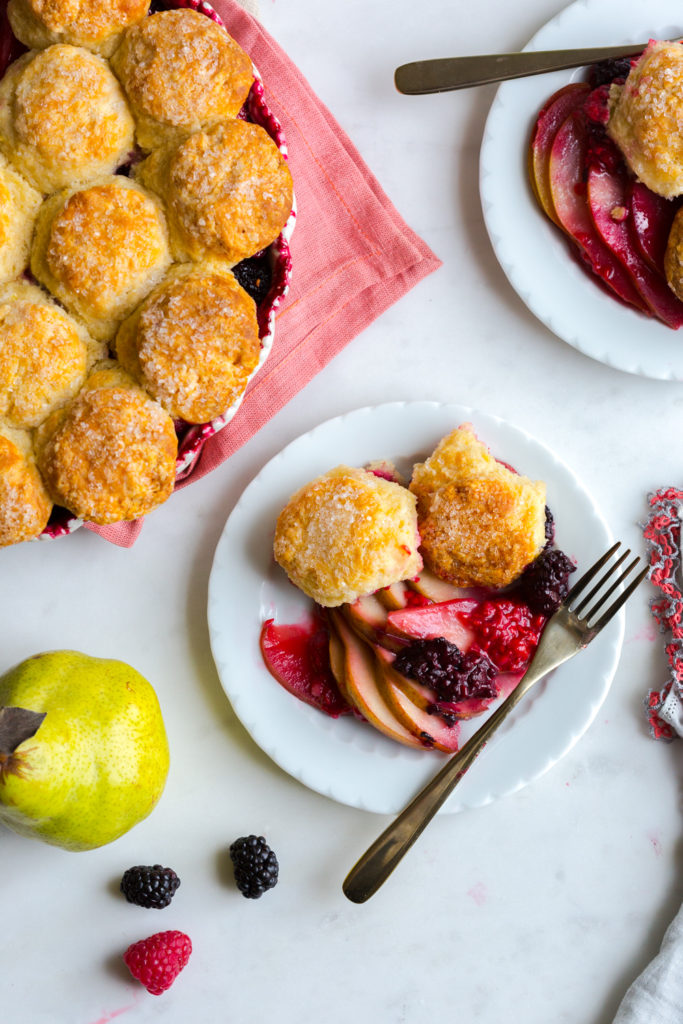
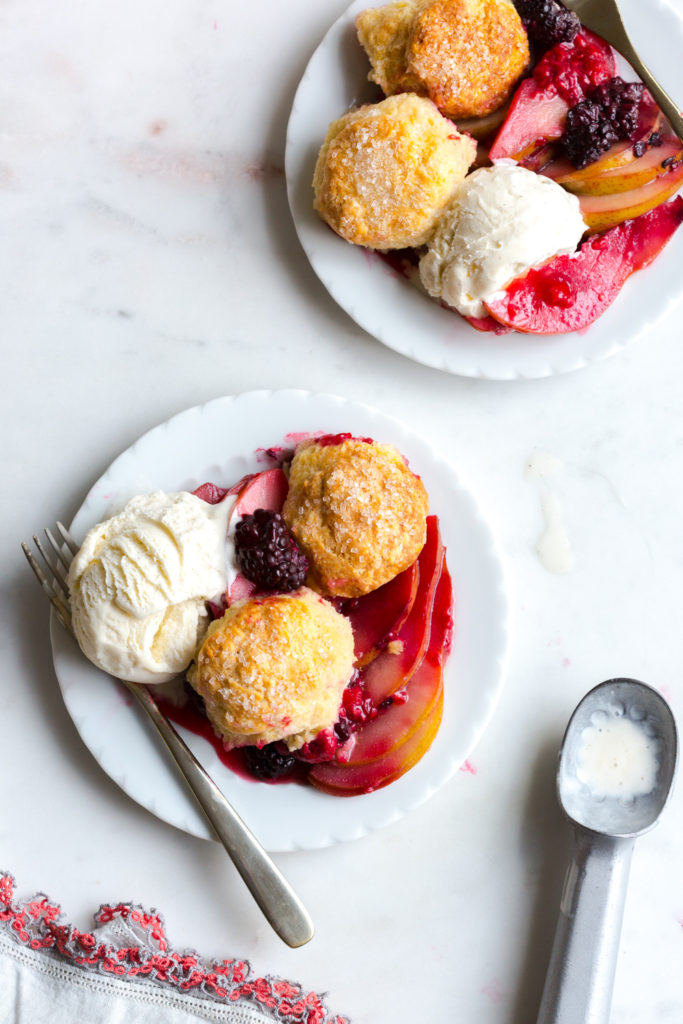
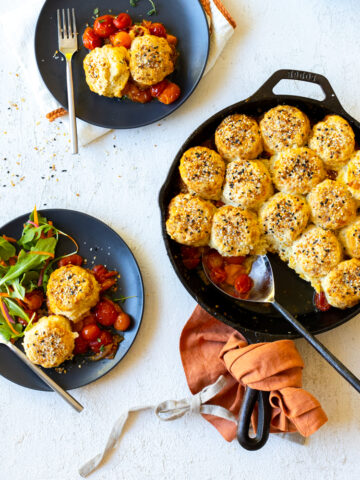
This Pear Berry Cobbler combines crisp Bartlett Pears with juicy, bursting berries
For me, summer desserts are all about showcasing that peak of the season fruit in a low key way. This Pear Berry Cobbler makes the most of the summer by combining fresh and crisp Bartlett Pears with juicy fresh, bursting berries. For this recipe, I adapted my Grilled Nectarine Shortcakes by making itty bitty biscuits to layer on the pears and berries as a cobbler.
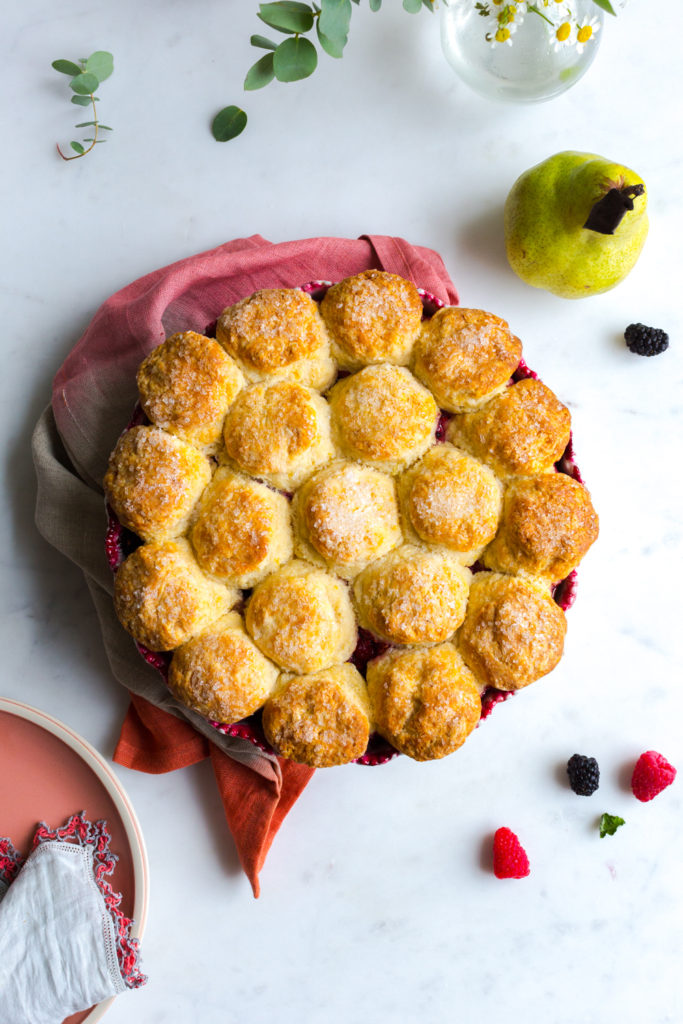
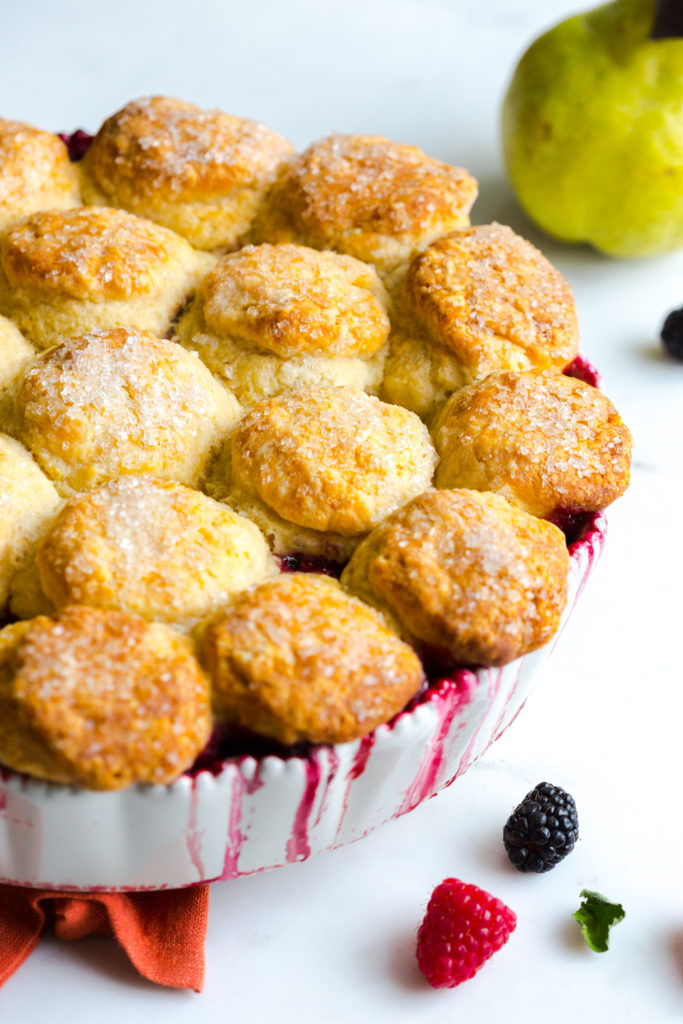
2 layers make this Pear Berry Cobbler 1 cozy bake
A layer of fruit and a layer of buttermilk biscuits come together to create one delightful dessert with contrasting flavors and textures. The pears and berries bake down into a tender and syrupy compote like base. While the butter filled cobbler topping gets golden crispy outer shell with soft and airy centers.
Pears & Berries create a fruity, luscious bottom layer
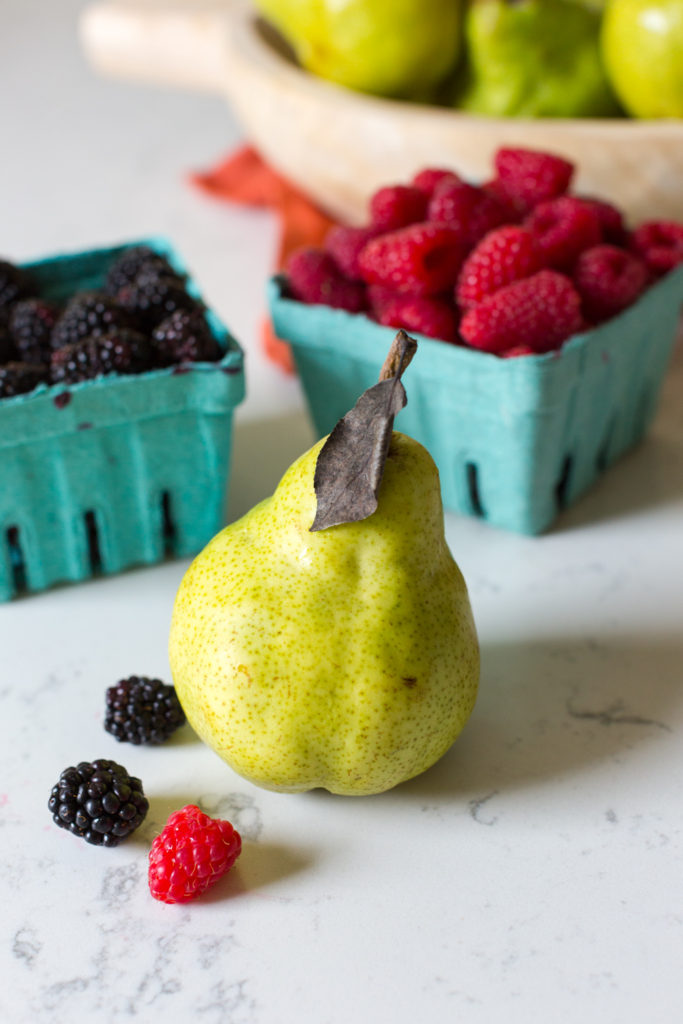
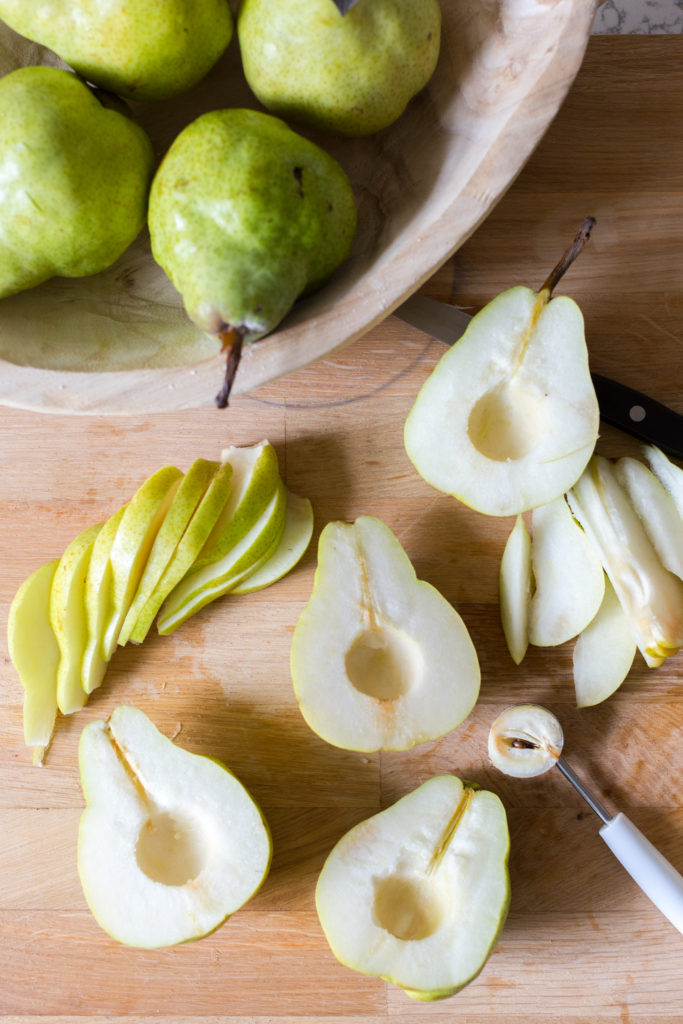
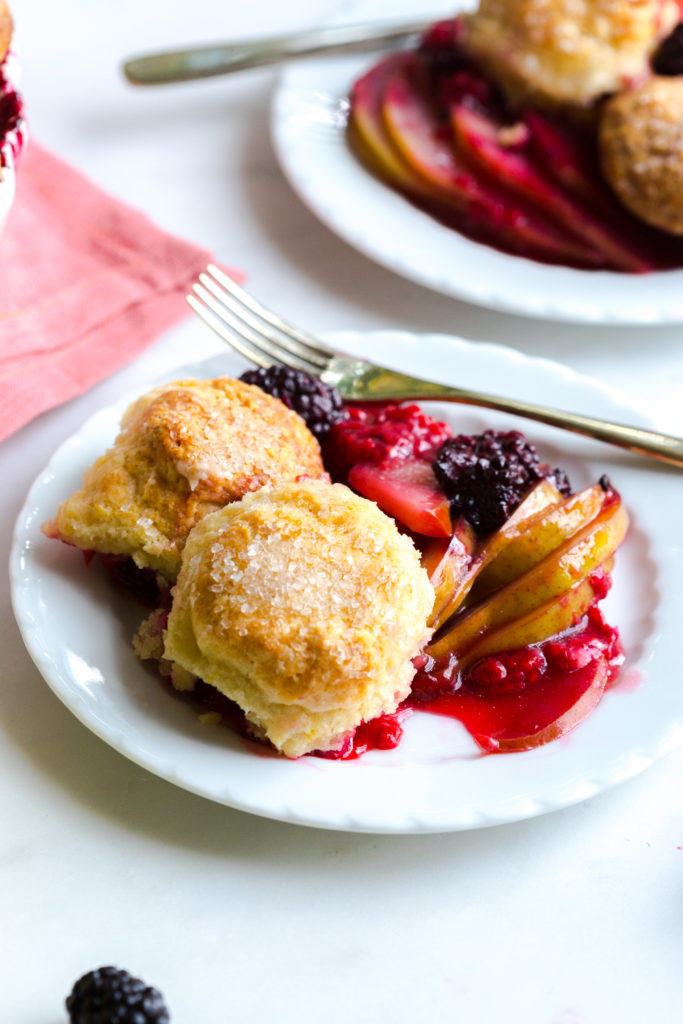
Bartlett Pears are great for baking recipes. When baking, I like to use Bartlett pears that are slightly under ripened and still crisp and green. Bartletts hold up wonderfully when baked at this stage and keep their gorgeous shape with an ever so slight bite. I don't even bother peeling them. The skin contains so many nutrients and that green color is a stunner.
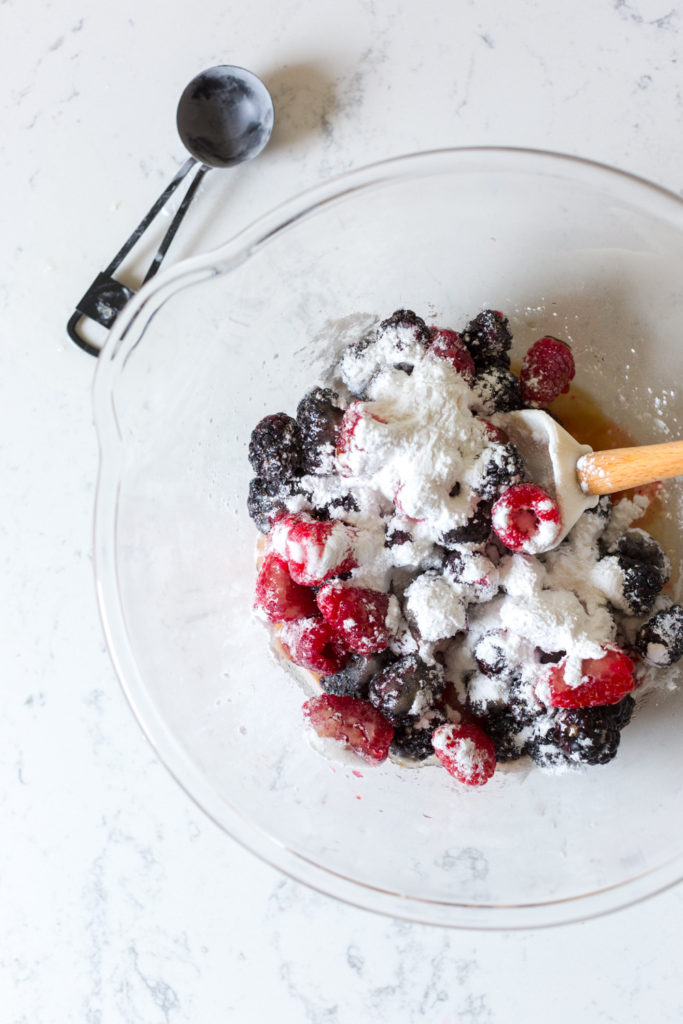
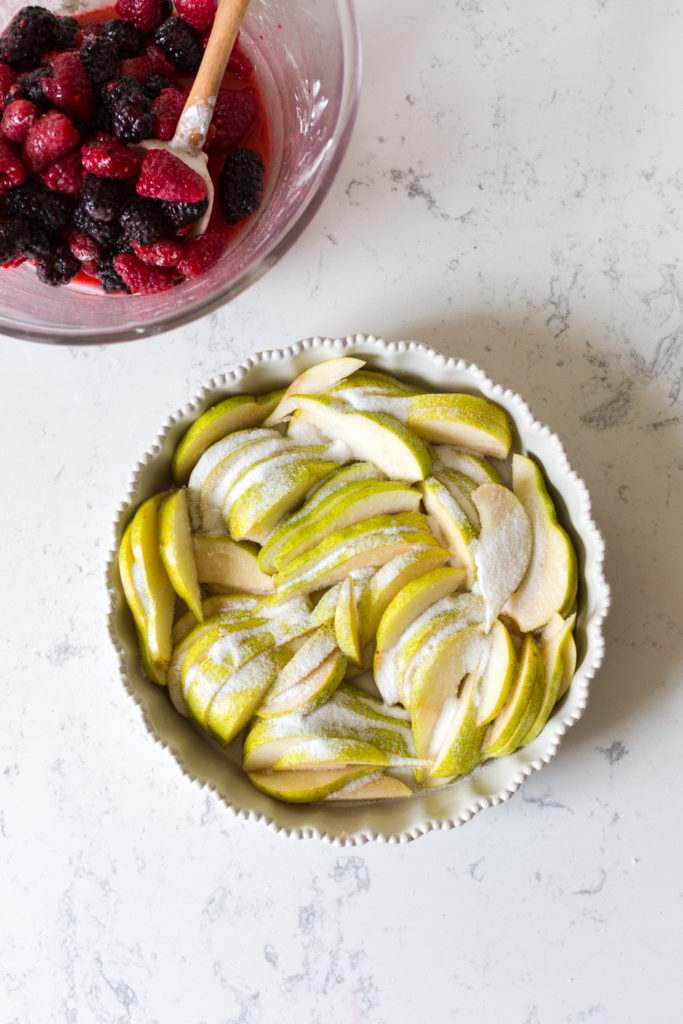
Juicy blackberries and raspberries add a jammy warmth with a tinge of tartness. As they berries break down, they transform into a sweet and tart syrup that thickens up in the oven. The pears soak in the glow and flavor of the juicy berries and create a harmonious flavor and texture.
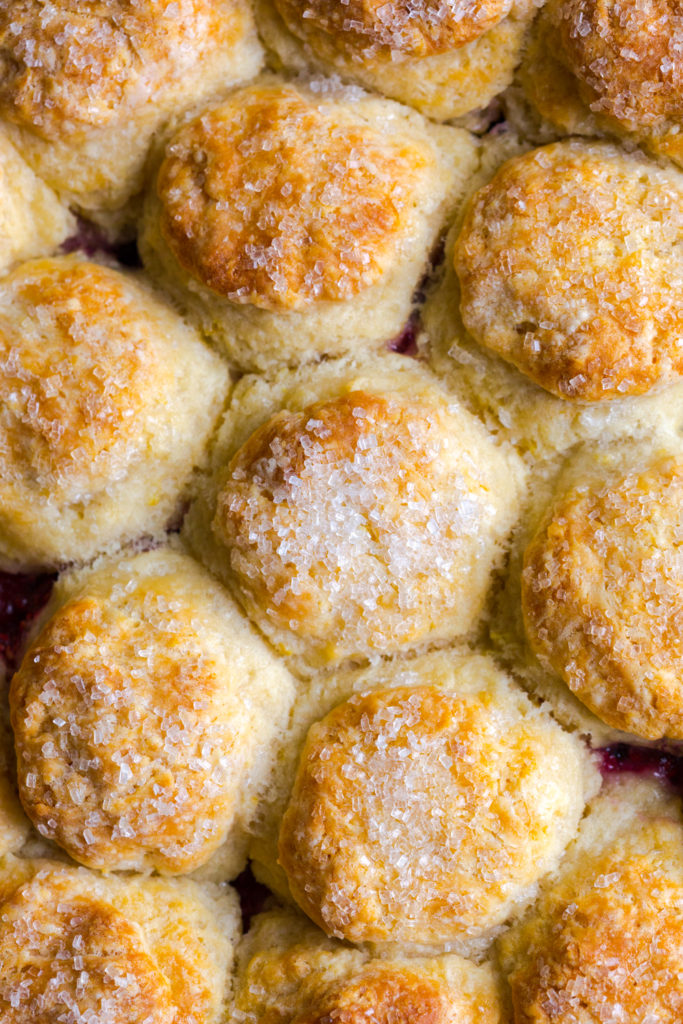
Angelic baby biscuits create a comforting top layer
Itty bitty buttermilk biscuits are baked atop the fruit filling. The tender texture of the angel soft baby biscuits soaks up the fruit flavor without getting all soggy. Biting into the Pear Berry Cobbler is a textural journey from the craggy, sugar encrusted biscuits to the soft and jammy berries and syrup laden, melt in your mouth pears. It's basically like taking a magic carpet ride through a California summer sunset. Or at least I imagine it to be similar.

A rustic cobbler is a staple and this Pear Berry Cobbler is a casual, no-fuss recipe
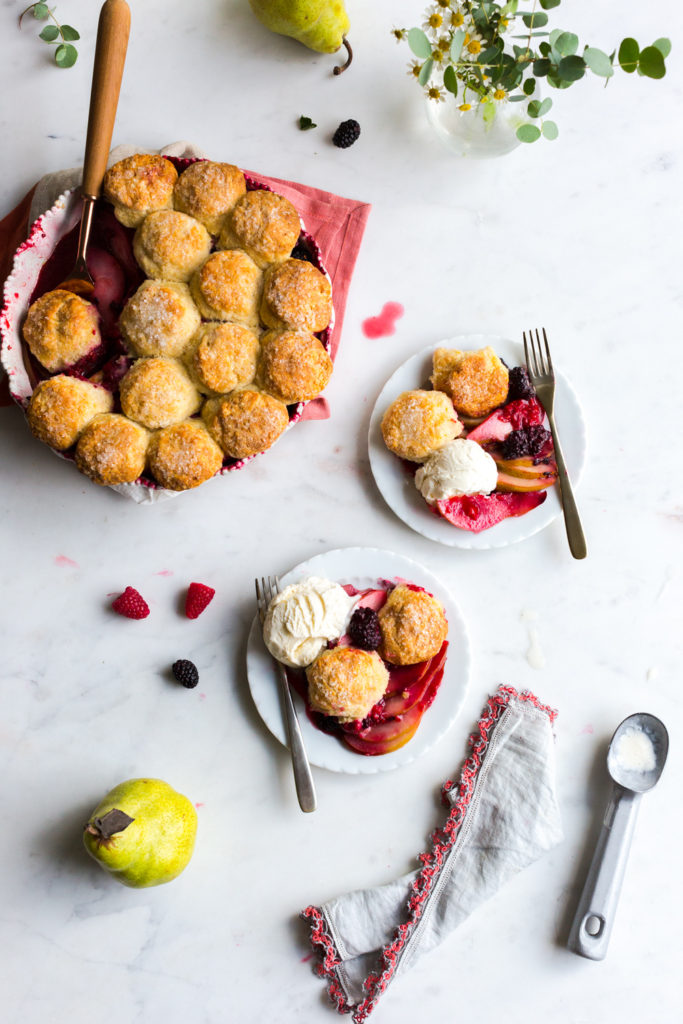
The little biscuits allow you to choose your own adventure when digging into the Pear Berry Cobbler. You can keep it light with a single biscuit and a bit of fruit. Or go big with 2-3 biscuits and a whole mess of juicy pears and berries. No matter what direction you choose, I highly recommend topping it with a creamy scoop of vanilla ice cream for the ultimate summer indulgence.

This post was proudly made in partnership with California Grown. All opinions are my own. It makes my heart happy to be able to share my fondness for California Grown food and I thank you for supporting me and the brands that I love.
Recipe
Pear Berry Cobbler
- Total Time: 1 hour 55 minutes
- Yield: 10 servings 1x
Description
This rustic Pear Berry Cobbler is a casual, no-fuss recipe that makes the most of the start of pear season and peak summer berries. Naturally sweet Bartlett pears meld with bursting berries under an airy blanket of tender buttermilk baby biscuits.
Ingredients
Baby Biscuits
- 2 cups all purpose flour
- 3 tablespoons granulated sugar
- 1 tablespoon baking powder
- 1 teaspoon fine sea salt
- 1 medium lemon (- zested, reserve the lemon juice for the filling)
- ½ cup unsalted butter (- cold & cut into ½" cubes)
- 1 cup buttermilk or heavy cream
Pear Berry Filling & Assembly
- 4 medium Bartlett Pears, crisp and green (- cored & cut into ⅛" - ¼" thick slices)
- 3 cups mixed berries
- ½ cup granulated sugar
- 2 tablespoons lemon juice (- from reserved lemon)
- 1 ½ teaspoons pure vanilla extract
- 3 tablespoons tapioca flour (- or cornstarch or all purpose flour)
- ¼ teaspoon fine sea salt
- 3 tablespoons unsalted butter (- melted and cooled)
- 1-2 tablespoons sparkling or raw sugar
Instructions
Baby Biscuits
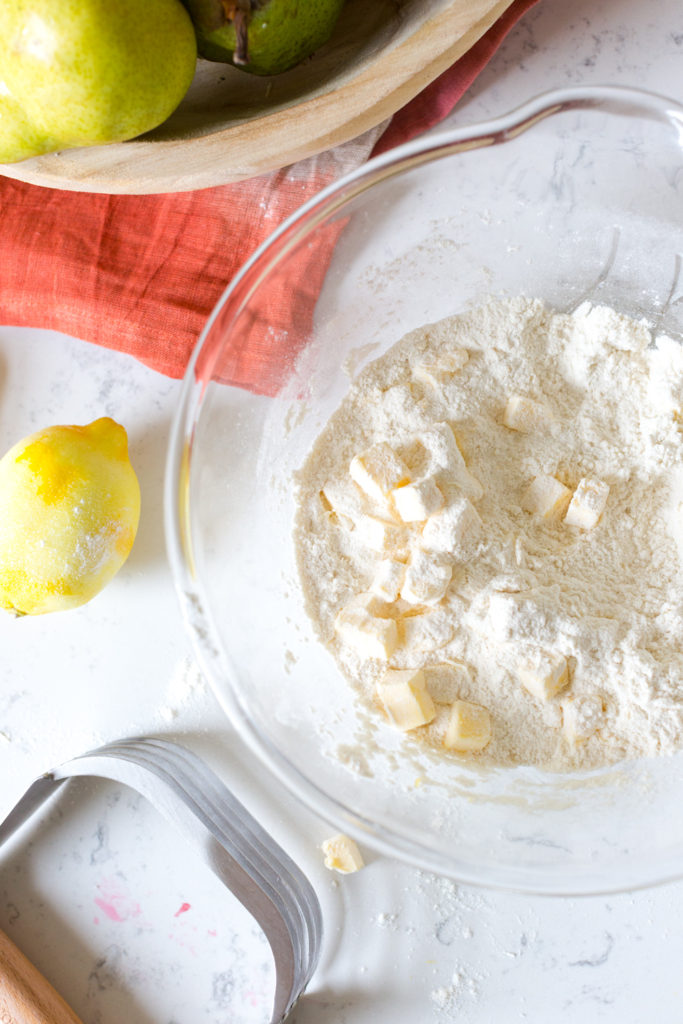
- Measure out flour, sugar, baking powder, lemon zest, and salt into a large mixing bowl. Whisk to combine.
- Add the cold and cubed butter and use a pastry blender, two butter knives or your hands to blend or smoosh the butter into the dry ingredients until the mixture resembles a coarse meal with small, visible butter chunks.
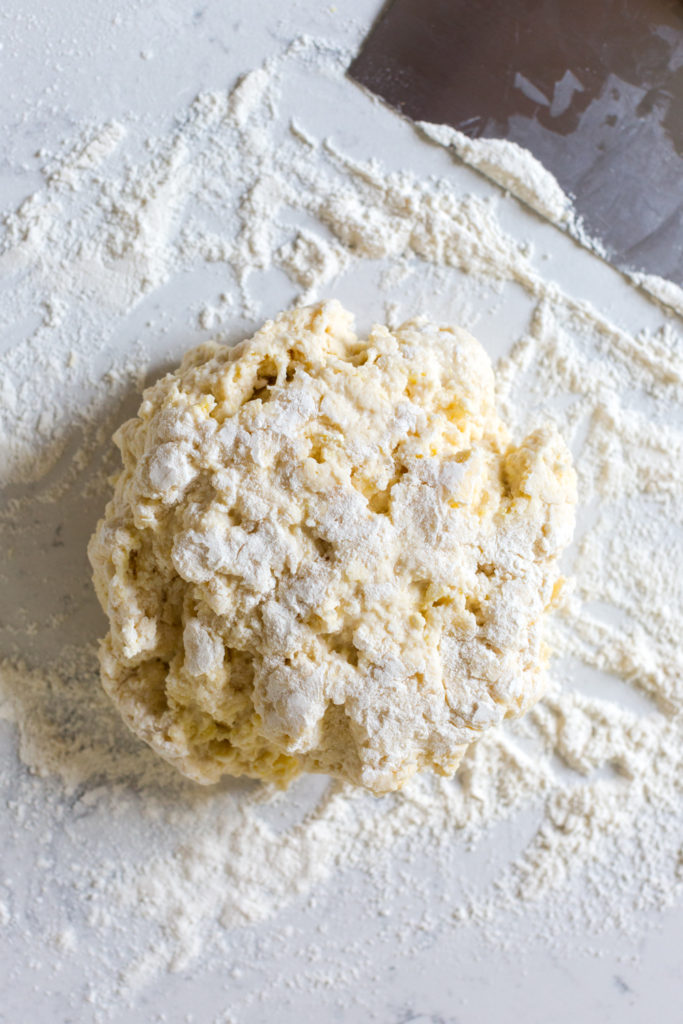
- Make a well in the center of the dry ingredients and pour the buttermilk in. Mix with a fork until the dough just begins to come together in large clumps, it wont take long.
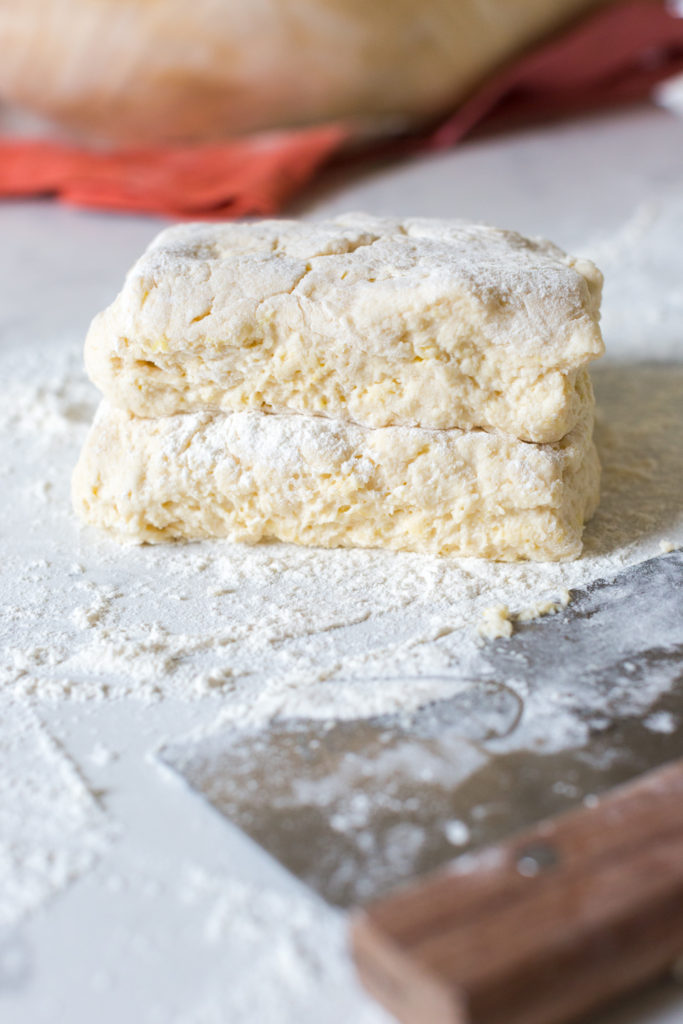
- Turn the dough out onto a floured surface and gently gather and pat the dough together until it becomes a somewhat cohesive mass. Pat the dough into a rectangle about 1" thick, then cut dough into 2 equal pieces and stack on top of each other, use a rolling pin to roll the dough down to 1" thickness. Then repeat the cutting and rolling process once more. This helps create the tender, flaky layers of the biscuits.
- Dust with more flour and use a rolling pin to flatten to about ¾" thickness, dusting with more flour as needed.
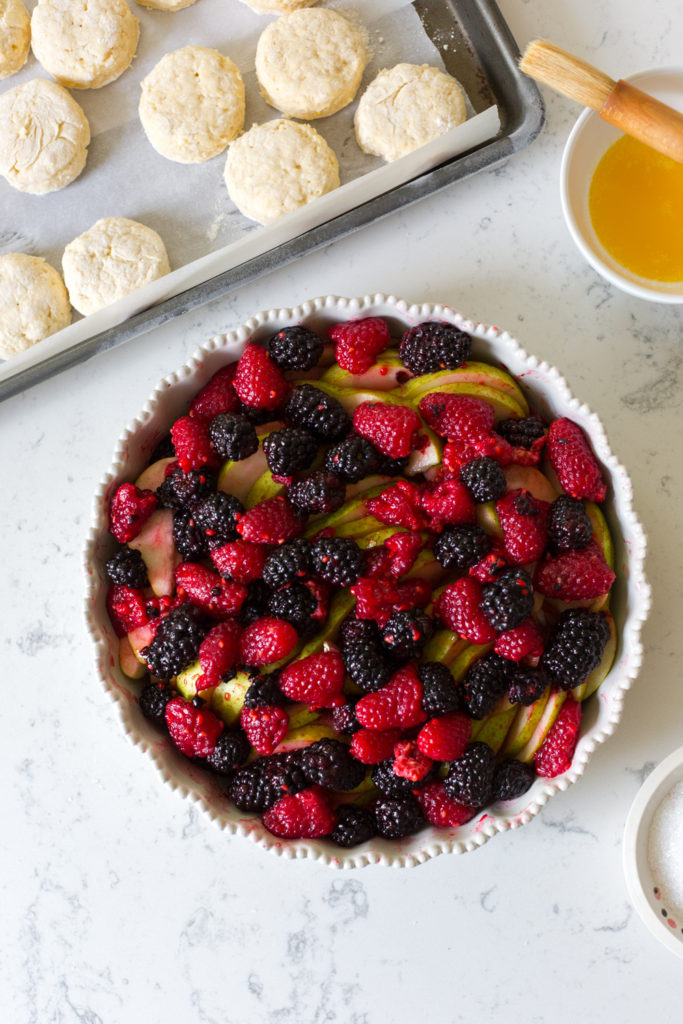
- Use a 2" round cookie or biscuit cutter to punch out biscuits as closely as possible. Dip the cutter in flour between cuts to get a clean slice. Transfer the baby biscuits to lined baking sheet. Gather up the dough scraps, pat together, re-roll the dough, and punch out the biscuits until you've used all of the dough. You should have about 18 - 20 biscuits. Place biscuits in freezer to chill until ready to use. Freezing the biscuits will also help them maintain their shape as they bake.
Pear Berry Filling & Assembly
- Place rack in the middle of oven and preheat to 400° F.
- Mix the berries, 2 tablespoons of granulated sugar, lemon juice, tapioca flour, vanilla extract and salt in a large bowl. Let the fruit hang out for 10-15 minutes until the juices begin to release and the tapioca flour melds with the juice.
- Place a 2-qt. baking dish, 9" cast iron skillet or 9"-diameter cake pan with 2" sides on a silpat or foil-lined baking sheet. Layer the pears into dish and fan them out. Then firmly press the pears into the dish to fill in any gaps. Sprinkle the remaining 2 tablespoons of granulated sugar over the pears.
- Spoon the berry mixture over the top of the pears and gently press the berries into the pan to fill in gaps. Pour the juice evenly over top.
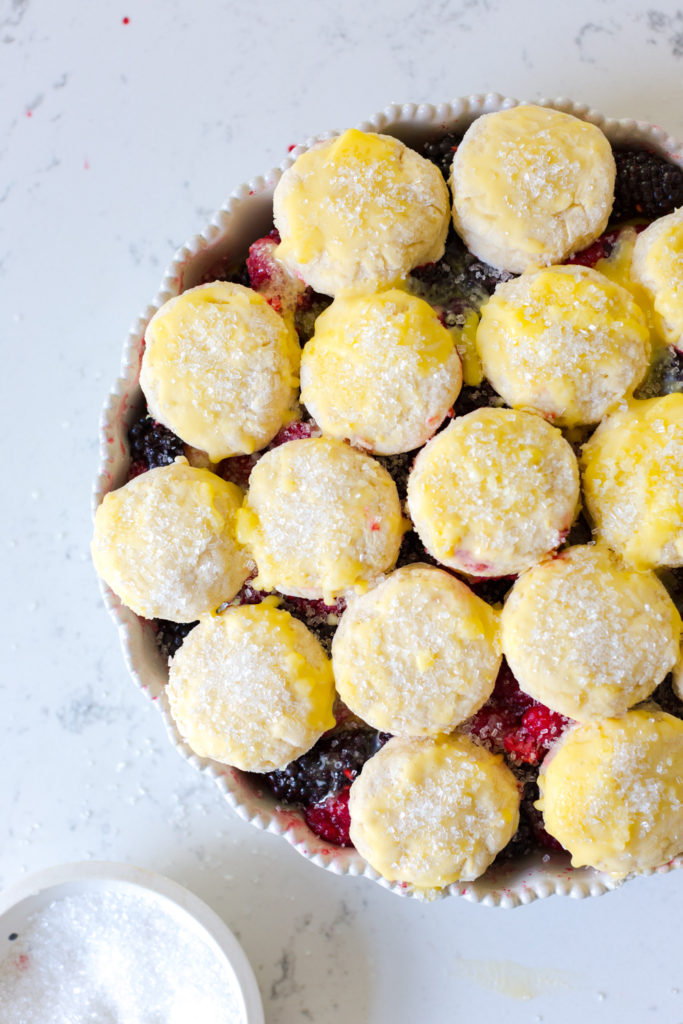
- Arrange the chilled baby biscuits over the pear berry filling. Snuggle them in tight so they’re touching with minimal gaps between. Using a pastry brush or a clean paper towel, generously brush with the melted butter, then sprinkle liberally with sparkling or raw sugar.
*Note, since the biscuits are frozen, the butter will chill up quick so work in batches, brushing then topping with sugar so the sugar will stick to the wet butter before it chills. - Bake the Pear Berry Cobbler for 15 minutes at 400°F, then reduce heat to 350° and continue to bake until biscuits are deeply bronzed and juices are bubbling, between 55 - 70 minutes more. You can use a skewer to check the doneness or the pears. They should be soft but have a little hint of firmness.
- Allow to cool for at least an hour before serving so the juices can set and thicken. Serve with ice cream or whipped cream.
- Prep Time: 25 minutes
- Cook Time: 1 hour 30 minutes
- Category: Dessert
Comments
No Comments