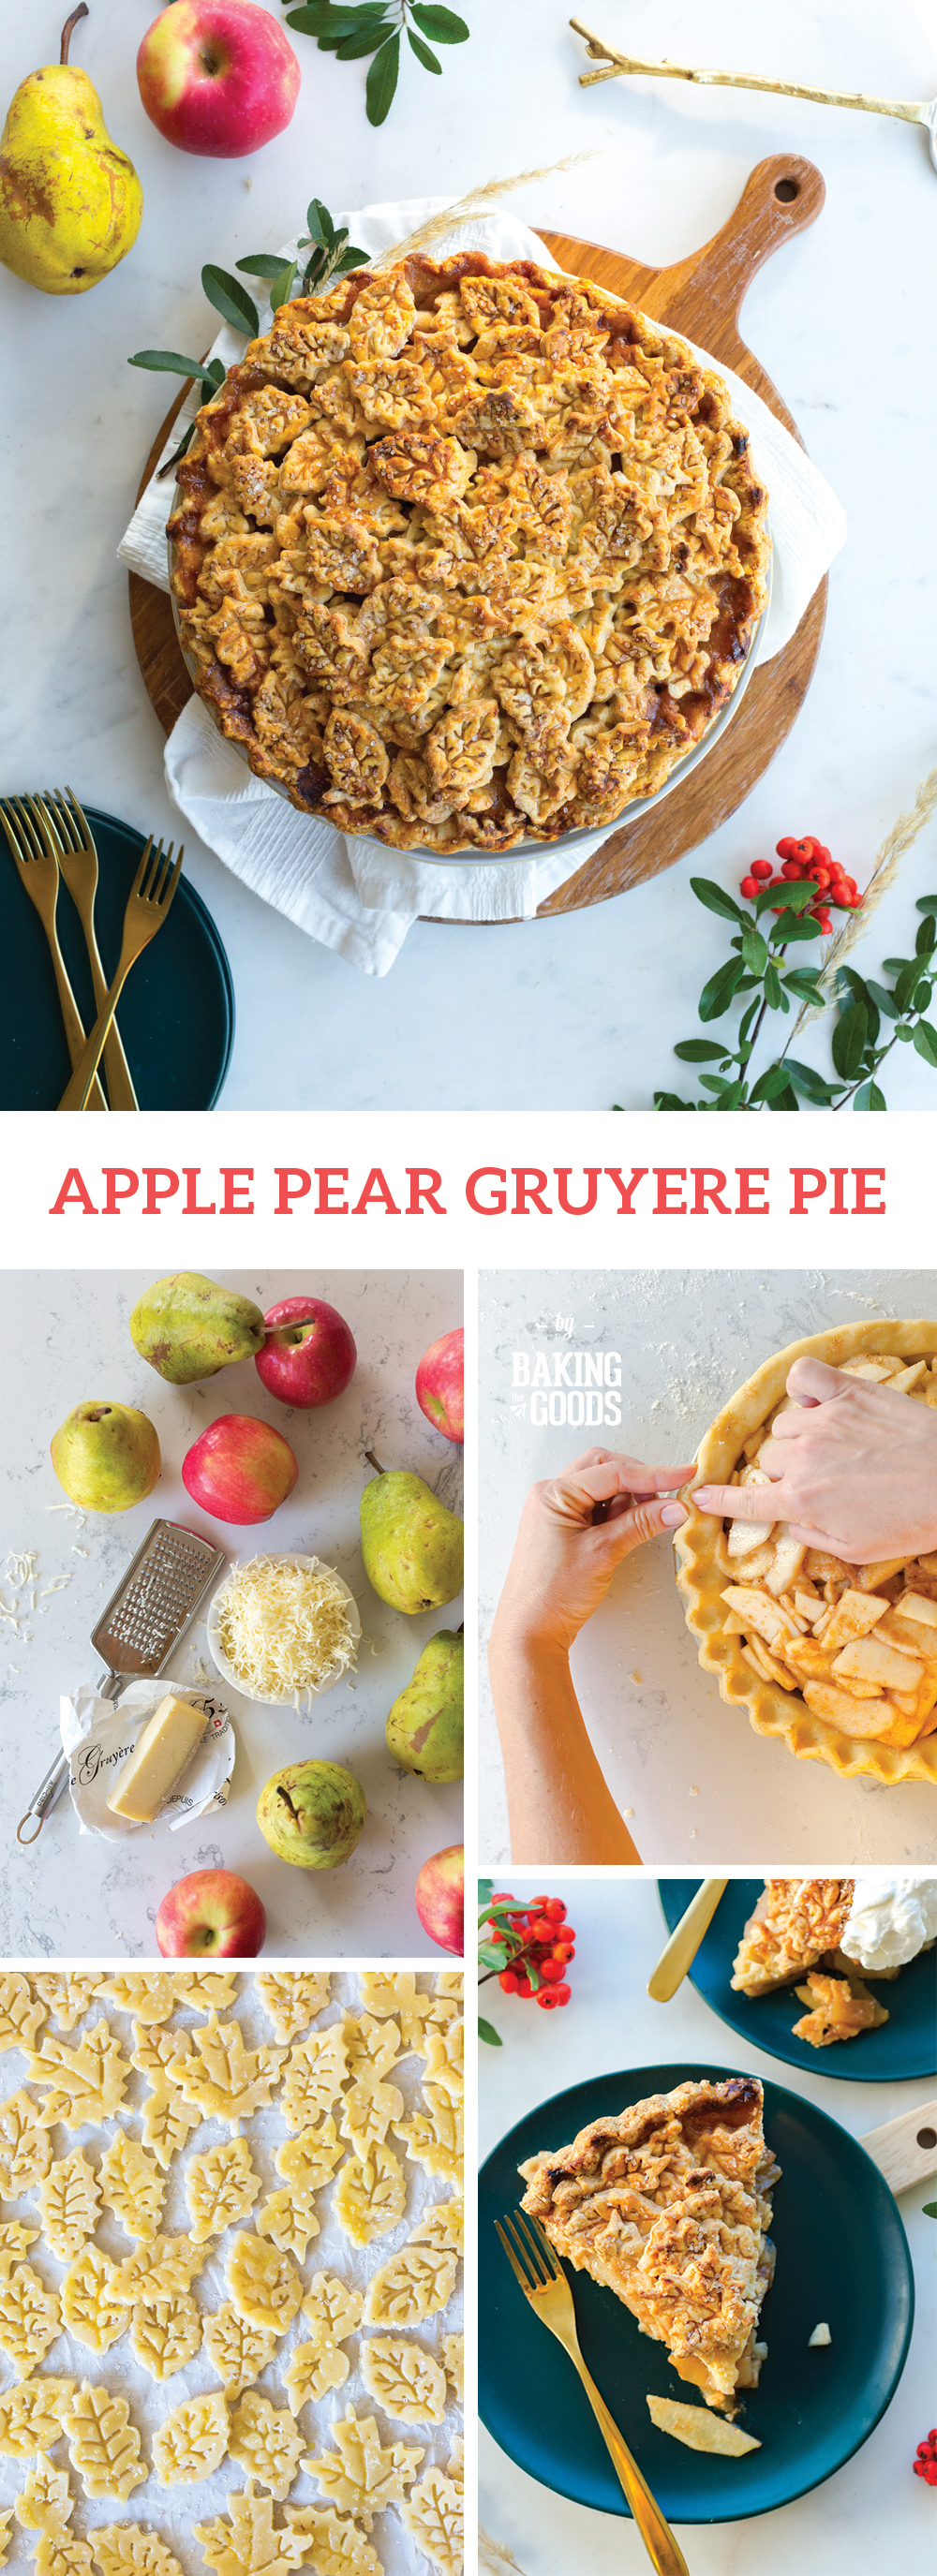
This Apple Pear Gruyere Pie is full of sweet, salty & slightly savory flavors that team up in a leaf-laden, show-stopping pie. Sweet pear & crisp apple filling gets sugared, spiced & tossed with vanilla browned butter. It bakes under a layer of flaky, all butter pie dough mixed with salty & nutty Gruyere cheese that bubbles up as it bakes.
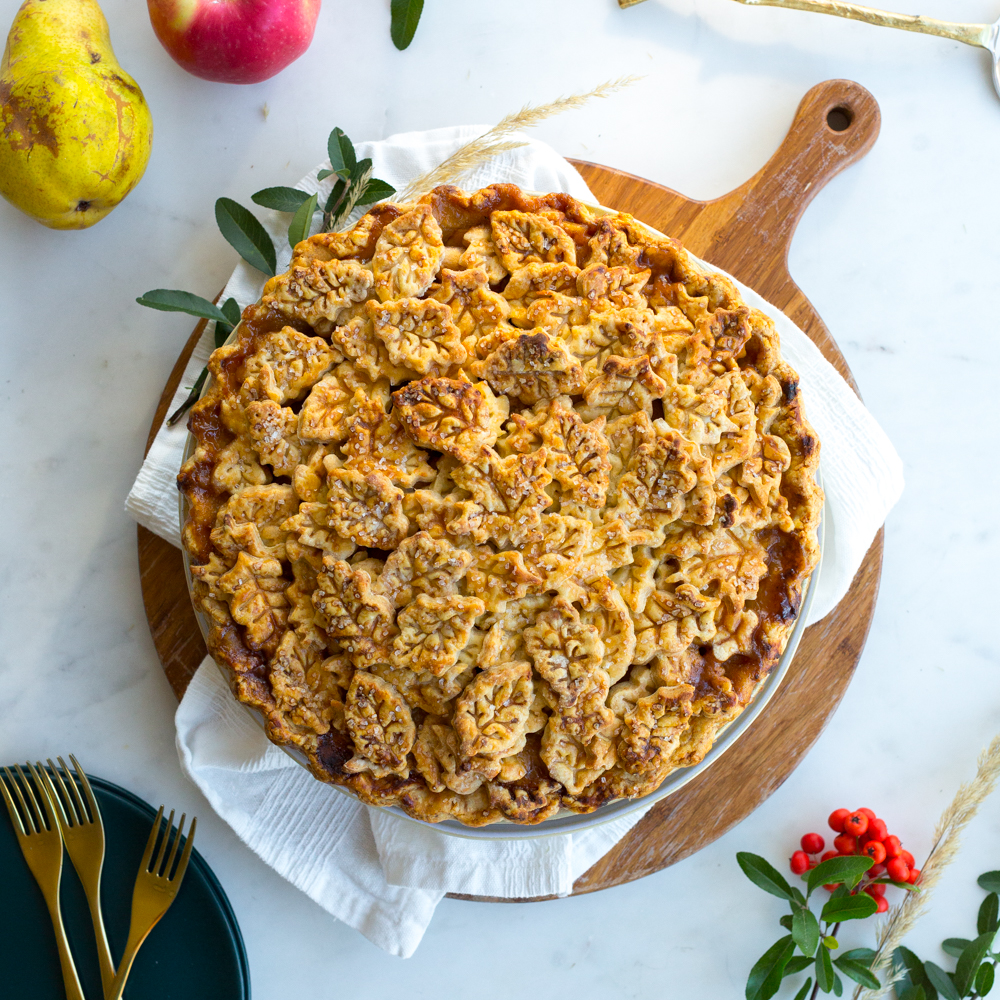
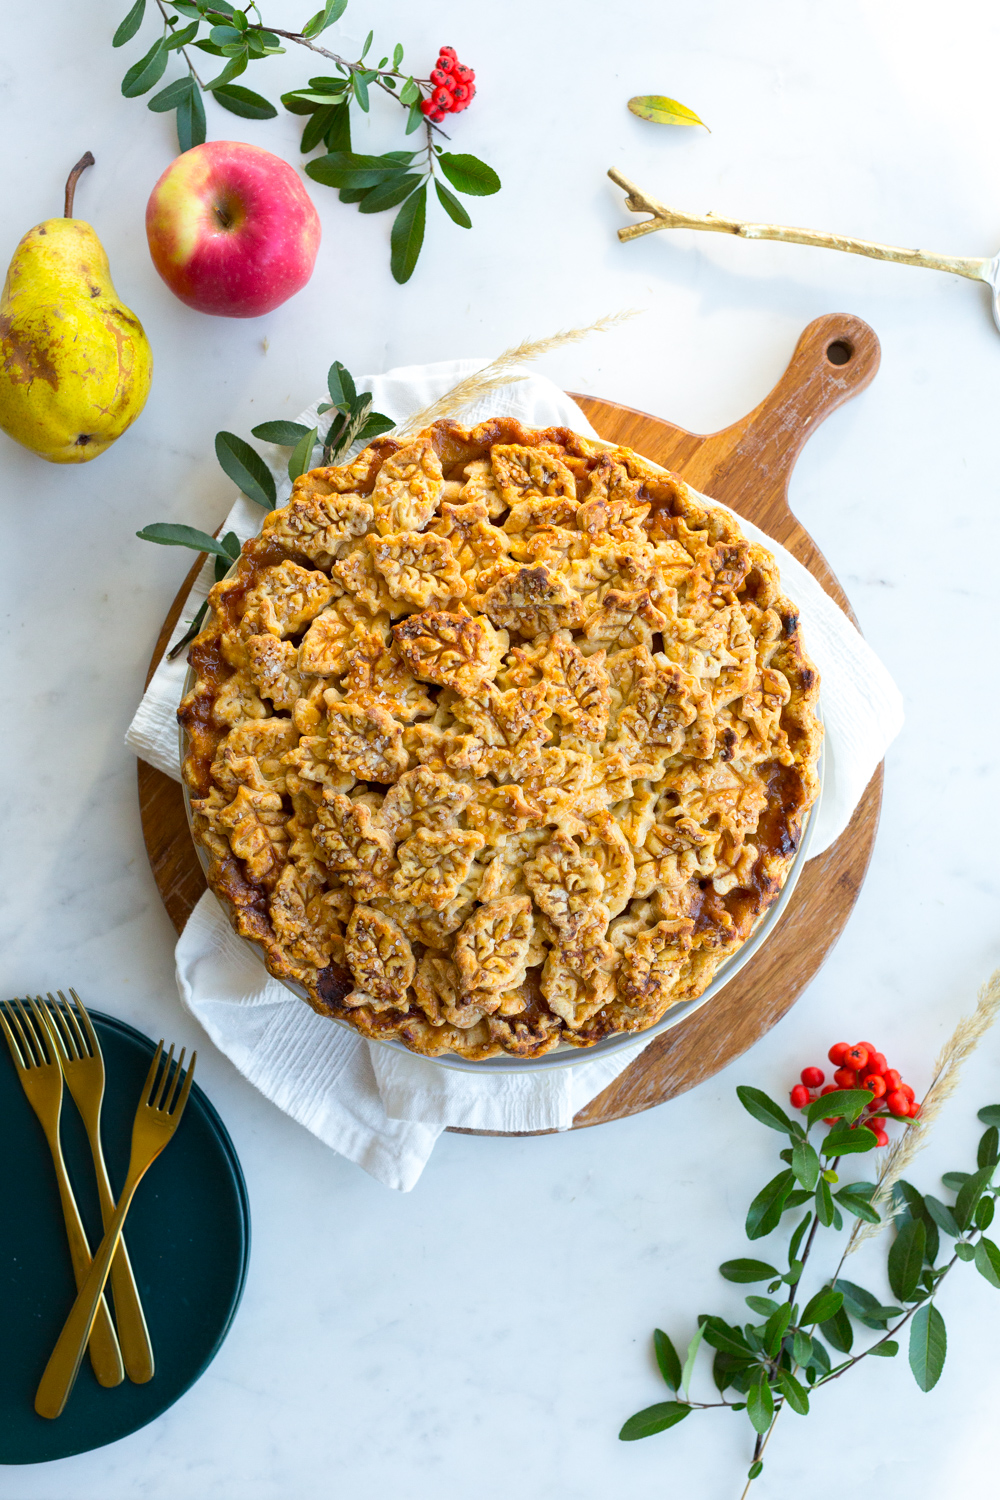
This morning I walked the dog and stopped in my tracks to admire the fallen leaves in the park. After 6 years in California, I'd nearly forgotten what a beautiful show the PNW puts on this time of year. The sun was low. The rays seemed to backlight the fallen leaves with a warm glow that can only happen here. This Apple Pear Gruyere Pie features a big ol' messy pile of crusty dough leaves inspired by the PNW late fall leaf magic.
Jump to:
- More comforting pie recipes from Baking The Goods
- This pie starts with All Butter Pie Dough
- Rolling and shaping the Gruyere Pie Dough
- How to balance sweet and savory
- Make the apple pear pie filling
- Assembling the Apple Pear Gruyere Pie
- Tip: assemble this Apple Pear Gruyere Pie ahead of time and freeze it
- Baking The Apple Pear Gruyere Pie
- Recipe
- Comments
Life has been bananas lately. I realize I say that a lot, but the past few months have been downright bonkers. I barely remember anything since August. We moved back to Portland in October. With moving, unpacking, and trying to get caught up on work during my busiest season, I am nearly catatonic.
And while I have zero time for it, I just had to get this recipe for my Apple Pear Gruyere Pie out to the world before Thanksgiving! I've been rolling it around in my brain for a while now. Yesterday the apples & pears at my local grocery store looked so pristine, I decided to make it happen! So without further ado, here is my Apple Pear Gruyere Pie in all its leaf laced glory.
If you've been following me for a while, you know that my all-time favorite recipe is my Apple Cheddar Pie. I've been baking it for at least 15 years now. Maybe 20. Let's go with 15 so I don't feel quite as old as I am. I've decided to explore a bit with that tried & true recipe and create this Apple Pear Gruyere Pie.
More comforting pie recipes from Baking The Goods

This pie starts with All Butter Pie Dough
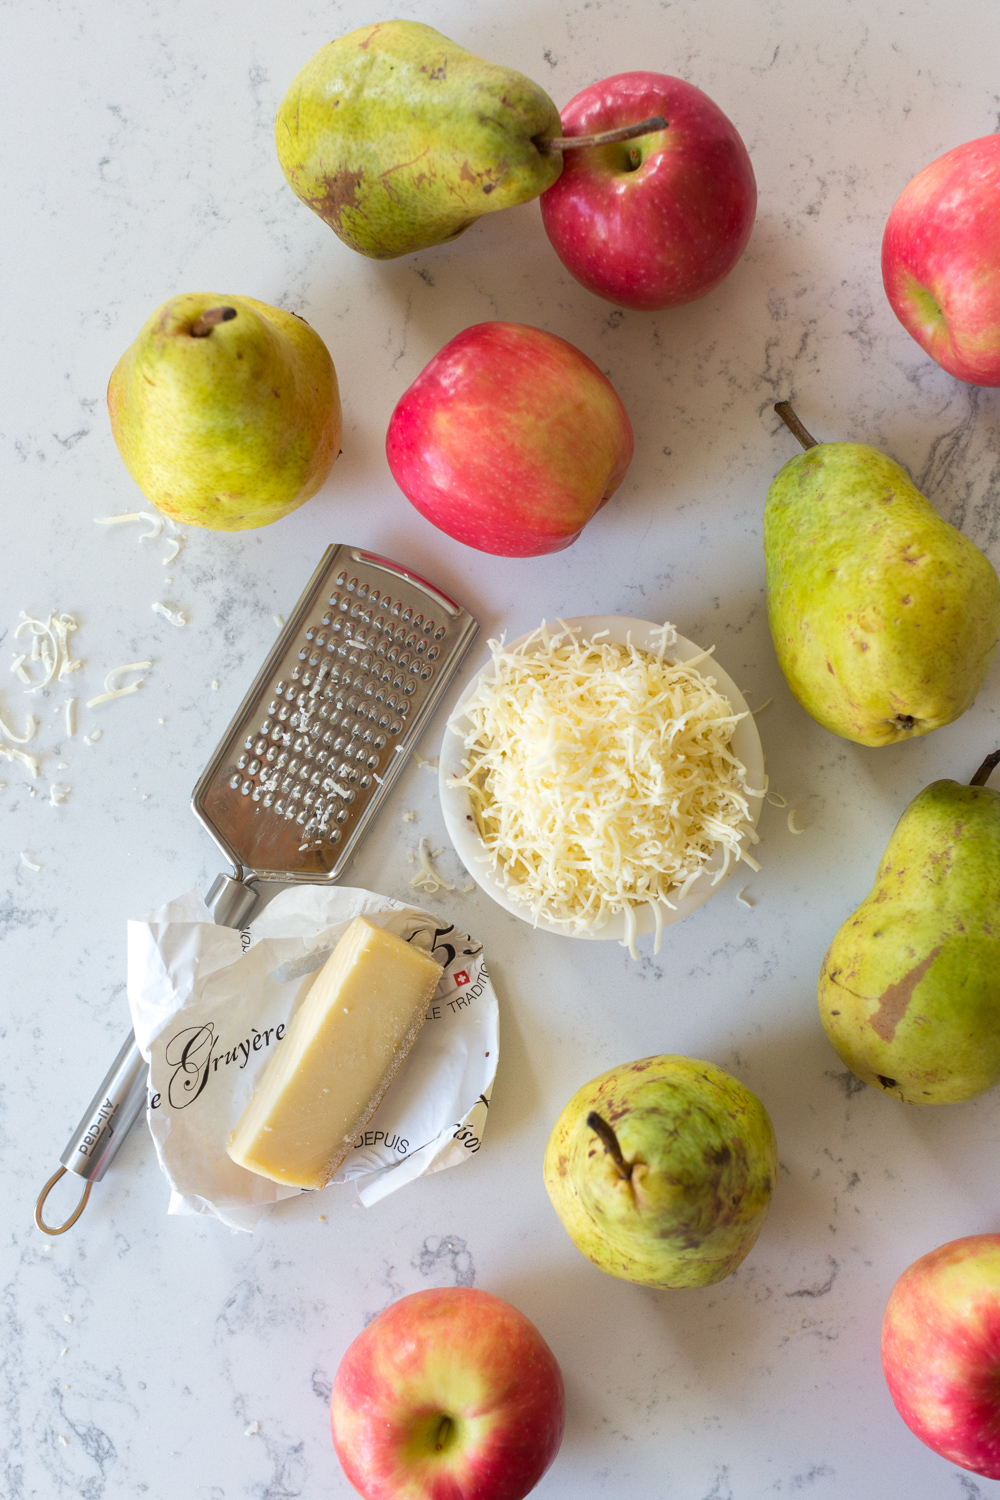
It starts with the same All Butter Vodka Pie Dough or my Basic All Butter Pie Dough recipe that I use in all of my pies. And like my Apple Cheddar Pie, it has cheddar cheese baked right into the crust! This time, I wanted to get a little more sophisticated with the flavors. I added some silky pears to the filling and Gruyere cheese to the crust.


The pie dough hydration squeeze test
Over-hydrated pie dough can turn out tough and dense. But if there isn't enough hydration happening, it will crumble to bits when you try and roll it out. Having the right ratio of hydration will ensure a pliable pie dough that bakes up tender and flaky.


Allow pie dough to rest in the fridge before rolling
Once the Gruyere Pie Dough is mixed, it's gathered into 2 disks. Then the pie dough needs a little time in the fridge to "rest". This will give the dough a chance to meld. Allowing the flour to absorb the moisture and the ingredients to get comfortable with each other. Giving the glutens time to relax so the dough is easier to work with.


Rolling and shaping the Gruyere Pie Dough
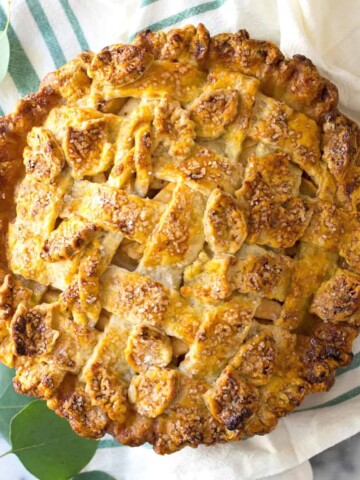
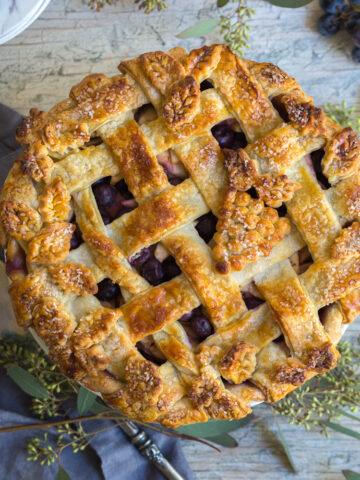
This Apple Pear Gruyere Pie has a unique leaf motif made by punching out leafy shapes with leaf pie stamps. As stunning as this design looks, it's really simple to make thanks to the festive pie stamps. I have made pies many ways, with intricate woven lattice, braided elements and leaves gracing the top. However, with this Apple Pear Gruyere Pie I prefer to keep it easy and just pile the leaves right on top randomly, much like a mound of raked leaves that signify fall.


How to balance sweet and savory
This Apple Pear Gruyere Pie teeters on that magic spot between sweet and savory. The nutty, saltiness from the gruyere is amped up when it bakes into the buttery, flaky crust. The filling is a simple mix of sliced and chopped apples & pears. I personally like pears but I don't love pears. So the blend of crisp Pink Lady Apples & Bartlett Pears strikes the right balance in flavor and texture for me personally. You could go all pear or all apple if you prefer just one.
Make the apple pear pie filling
The fruit gets are all dolled up with sugars & spices. I've also browned some butter and infused it with a vanilla bean to give the filling a deeper, more intense flavor. The rich browned butter is a welcome contrast against the sweet and spiced fruit filling. While the vanilla bean brings a bit of familiar baker's comfort, unifying all of the flavors.


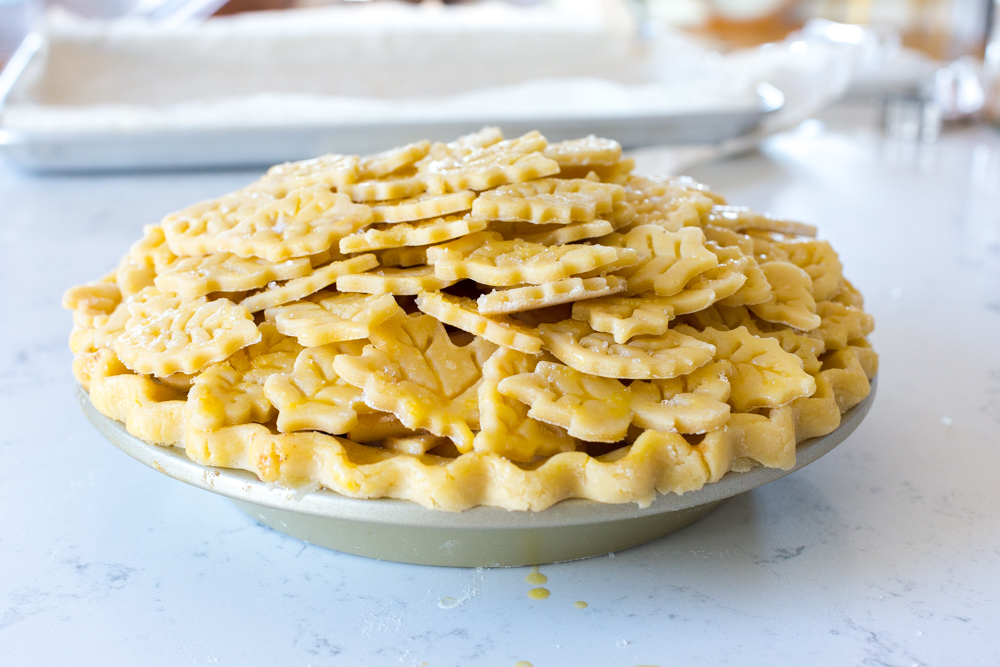
Assembling the Apple Pear Gruyere Pie
Since you've already prepped the pie shell and stamped out your leaves for the upper crust, assembling the Apple Pear Gruyere Pie is quite easy! Simply fill your pie shell. Then top it in the leaves in whatever fancy pie design your heart desires. I kept this one really simple and randomly piled the pie leaves on the top, giving it a rustic "freshly raked" vibe.


Tip: assemble this Apple Pear Gruyere Pie ahead of time and freeze it
I don't know how I did it, but I am so glad I got this Apple Pear Gruyere Pie up on the blog for you before the holidays hit. I suggest prepping and assembling the pie few days ahead. Keep it safe in the freezer and bake it up the night before. This will make your life tremendously easier.
Baking The Apple Pear Gruyere Pie
The Apple Pear Gruyere Pie will initially bake at 400° F for 20 minutes. This helps bake the outer shell of the pie quickly so it holds its beautiful shape. Once the crust has set, the temperature is turned down to 350°F and bake for another 45-55 minutes, until the filling is bubbly and the crust turns a deep golden color. However, if you are baking the pie from fully frozen, may take 15-25 minutes longer to bake than an unfrozen pie. So plan accordingly.
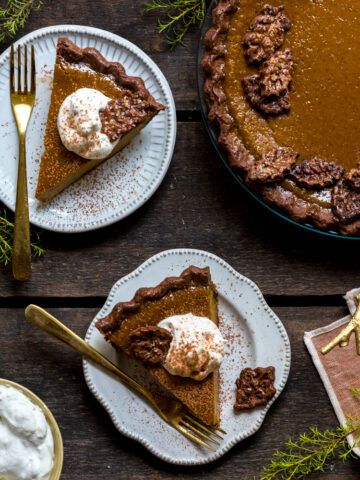
It's important to allow the Apple Pear Gruyere Pie to cool fully before slicing in, giving the filling a chance to fully set. Otherwise it might gloop out and get messy. But, if you can't wait, I completely understand and would never judge you for it. I love a warm slice of pie so I always rewarm my. individual slice before topping with vanilla ice cream and having a blissfully balanced hot/cold pie moment, all to myself.


Know that once this Apple Pear Gruyere Pie is baking, it's hard to resist. It fills the whole house with the bubbly scent of melting gruyere, wintery spice and buttery goodness. So be ready, it goes quickly. Promise me you will save yourself a slice of this Apple Pear Gruyere Pie to quietly savor for breakfast the day after Thanksgiving. There is no better indulgence than pie for breakfast. The simultaneously salty and sweet and semi-savory flavors of this Apple Pear Gruyere Pie is enough to skip the whole Thanksgiving to-do and head straight for dessert!
PrintRecipe
Apple Pear Gruyere Pie
- Total Time: 2 hours 30 minutes
- Yield: 1 pie 1x
Description
Sweet pear & crisp apple filling gets sugared, spiced & tossed with vanilla browned butter. It bakes under a layer of flaky, all butter pie dough mixed with salty & nutty Gruyere cheese that bubbles up as it bakes. This Apple Pear Gruyere Pie is full of sweet, salty & slightly savory flavors that team up in a leaf-laden, show-stopping pie.
Ingredients
GRUYERE PIE DOUGH
- 2 ½ cups all purpose flour
- 1 cup unsalted butter, cold & cut into ¼" cubes
- 1 tablespoon granulated sugar
- 1 teaspoon fine sea salt
- 3-4 tablespoons ice cold vodka
- 2-3 tablespoons ice water
- 1 cup Gruyere cheese, finely grated
APPLE PEAR FILLING
- 2 tablespoons unsalted butter
- 1 whole vanilla bean, split & scraped (or 2 teaspoons vanilla extract)
- 4 Pink Lady Apples, or similar, peeled & sliced into ¼" thick slices
- 4 Bartlett Pears, or similar, peeled & sliced into ¼" thick slices
- ½ of 1 large lemon, juiced
- ½ cup brown sugar
- ¼ cup granulated sugar
- 1 ½ - 2 tablespoons tapioca flour, or cornstarch or all purpose flour
- 2 teaspoons ground cinnamon
- ½ teaspoon ground nutmeg
- ½ teaspoon fine sea salt
- 1 whole egg
- 2 tablespoons Sparkling or Demerara sugar, optional
Instructions
GRUYERE PIE DOUGH
- Whisk the flour, sugar and salt in a mixing bowl.
- Cut the cold butter cubes into the dry ingredients using a food processor, pastry blender or the butter knife method. Stop mixing when the texture of the flour changes from silky to mealy and has pea sized granules. Don’t worry if a few larger chunks of butter remain.
- Using a food processor, drizzle the vodka in while gently pulsing, a little bit at a time. Or if using a pastry blender or fork to blend in, add about 1 tablespoon at a time, blending as you go. Check the hydration of the dough between each addition of vodka or water by gathering a small fistful; if it holds together, it’s ready. If the dough is still too dry, slowly add the ice cold water; 1 tablespoon at a time, testing the dough by pinching it occasionally.
Be careful to add only as much hydration as it takes for the dough to just hold together. The exact amount of moisture can vary depending upon the moisture content of the flour, the quality of the butter, and the weather. When it has the proper amount of water, the dough will come together without much effort or deliberate packing. If you need to add more water, make sure the ingredients are still cold.
- Add the finely grated Gruyere and use pastry blender or fork to roughly blend in the cheese until just incorporated. Form the dough into two disks and wrap them in plastic wrap. Chill for at least 1-2 hours before rolling and forming. Or store in the freezer, tightly wrapped, up to 3 months.
ROLL THE DOUGH
- Remove the dough disks from refrigerator. They may need to sit at room temperature for 20-ish minutes to soften up a bit. If frozen, allow to thaw in the refrigerator overnight or on the counter for 90-ish minutes.
- Whisk an egg together with a splash of water for the egg wash.
- Roll the first dough disk into a round shape ¼" - ⅛" thick. Use a cookie stamp or cookie cutter to cut out the leaf shapes, transfer them to a baking sheet.
- Using a pastry brush, gently brush each leaf with egg wash. Then sprinkle lightly with sparkling sugar. Chill in the freezer until ready to use.
- On a lightly floured surface, roll out the second pie dough disk onto into a 12" round about ¼" - ⅛" thick.
- Gently transfer the dough disk into a 9" pie pan, leaving a 1-2" overhang all the way around. Tuck the edge underneath itself to form a ring around the edge of the pie plate and use a your fingers or a fork to create a crimped design around the edge. Gently brush the crimped edges with the egg wash. Place in the freezer or refrigerator while you prep the filling.
APPLE PEAR FILLING
- Split and scrape a whole vanilla bean. Add the butter to a small saucepan warming over medium heat.
Slowly whisk or swirl the butter until it begins to turn a warm chestnut color and tiny brown flecks start to form on the bottom of the pan. This is a delicate process, so stay vigilant. You want the butter browned but not burnt. Just before it's ready the butter will start to foam up. - Remove from the the heat and add the scraped vanilla beans and bean pod. Stir together and set aside to cool.
- Combine the thinly sliced apples and pears in a large mixing bowl. I also like to roughly chop a handful of the apple and pear slices to help fill in the gaps between the slices for a fuller filling. Toss with juice of ½ a lemon.
- Add brown sugar, granulated sugar, cinnamon, nutmeg and salt. Toss to combine and coat. Then add the vanilla browned butter & gently stir. Set aside and allow to sit for 15 minutes for the juices to release from the fruit.
- Add the tapioca flour and toss to combine.
- Transfer the fruit filling into the chilled pie shell, forming a mound that is taller in the center of the pie.
- Top with the frozen dough leaves in desired pattern. I just randomly layered them on like a big ol' pile of leaves but you can be more organized with it if you want. Just be sure to layer the leaves so that natural vents are formed for the steam and heat to release while baking.
BAKING THE PIE
I prefer to freeze my pies before baking so they will hold their shape better as they bake. Stick the whole pie in the freezer to firm up for at least an hour before baking. You can also wrap it tightly with plastic wrap and foil and keep it frozen solid for up to 3 months.
- If baking immediately, preheat oven to 400° F and bake for 20 minutes, then lower the temperature to 350°F and bake for another 45-55 minutes, rotating the pan halfway through. Bake until the filling is bubbly and the crust turns a deep golden color, you may need to cover the edges and or/tent the pie to keep from over-browning.
If baking a frozen pie, preheat the oven to 400° F and go directly from the freezer to oven without thawing. Bake for 20 minutes, then lower the temperature to 350° F and bake for another 55-75 minutes, rotating the pan halfway through. The frozen pie may take 15-25 minutes longer to bake than an unfrozen pie. Bake until the filling is bubbly and the crust turns a deep golden color. You may need to move to the lower rack and cover the edges and or/tent the pie to keep from over-browning, if that bothers you. I personally love a deeply golden crust.
- Allow to cool on a rack for at least 1 (probably 2) hour(s) before cutting, I know it's hard. In the meantime, if you had leftover crust leaves, bake them at 350°F for 10-15 minutes until golden brown. They will hold you over until the pie has cooled.
Notes
- Pie dough can be frozen once it's been shaped into the dough disks. Wrap it up tightly in plastic wrap or a freezer baggie and store in the freezer up to 3 months.
- To defrost frozen dough disks, allow to thaw in the refrigerator overnight and rest on the counter at room temperature for about 20 minutes before rolling. Or go directly from the freezer to the counter and allow to thaw at room temp for 90-120 minutes.
- This pie can be prepped & assembled ahead of time and frozen for up to 3 months. Just wrap it tightly in plastic wrap and foil. To bake a whole frozen pie, go straight from freezer to oven, do not defrost. It may take up to an additional 15-25 minutes to bake a frozen pie.
- If freezing your pie, I recommend using a metal pie pan as opposed to a ceramic or glass pie pan. The dramatic change in temperature poses a risk of cracking.
- If you don't like mixing pears and apples, feel free to use just one or the other. Same goes for the spices, use whatever spices you like in the filling.
- If you don't want to use vodka in the pie crust, you can replace it with either apple cider vinegar or ice cold water.
- Prep Time: 1 hour 15 minutes
- Cook Time: 1 hour 15 minutes
- Category: Dessert
- Cuisine: pie
Comments
No Comments