This simple Savory Tart Dough bakes up flaky and crisp with just enough salt and a hint or peppery warmth to highlight all kinds of savory tart fillings. It's a versatile tart dough that works for everything from classic 9" tarts to mini tartlets or even as the base of a quiche.

Jump to:
My recipe for the best Basic Tart Dough has been a go-to, ace in the hole for years. Recently however, I wanted to make something with a tart shell that dialed the sweetness way down and added a saltier experience. This Savory Tart Dough is based on the original recipe but contains a couple of minor changes that bend it towards the savory angle.
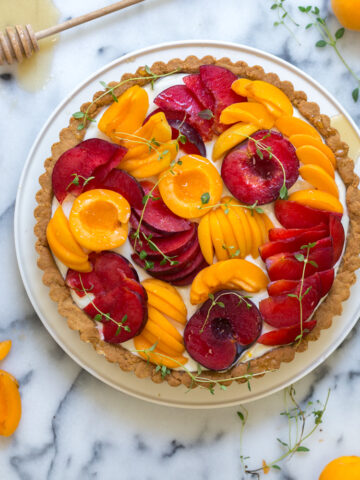
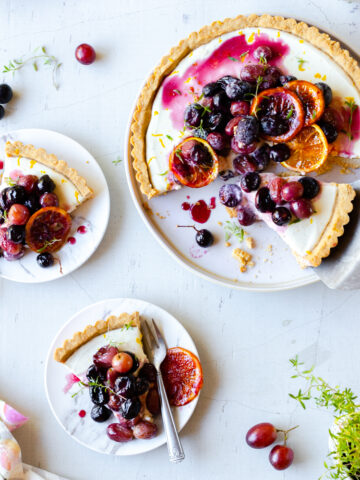
I personally love a recipe that swings both ways, offering both sweet and savory elements. Who's with me? My Brown Butter Chocolate Chip Cookies with Sea Salt, Apple Cheddar Pie and this stunning Apricot Plumcot Goat Cheese Tart are all a testament to bakes that blend both. These are some of the most popular and loved recipes on my site, so I know there are many sweet on savory lovers like me out there. I see you, tastebuddies.
For sweet tarts, use my Basic Tart Dough
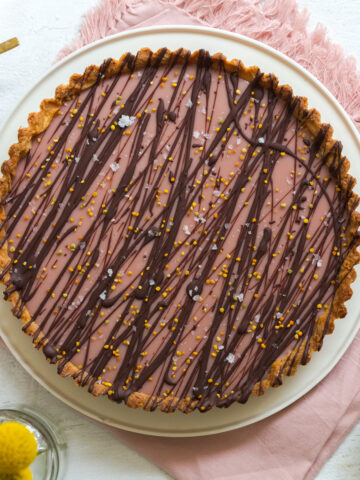
However, there are occasions when we just want to keep it classically sweet. My Basic Tart Dough does work well for pretty much any tart recipe out there. It holds up well to fruit filled tarts, cream filled tarts or rich chocolate tarts like my Ruby Cacao Ganache Tart. But the Basic Tart Dough definitely leans more sweet with its sugar cookie characteristics. On the other hand, this Savory Tart Dough recipe is strictly savory. Both are great options and have their place.
Savory Tart Dough is perfect for salty and savory tart recipes
I brought the sweetness way down in this recipe. While there is still a teaspoon of sugar for balance, you don't really notice it. Adding just enough sweetness to enhance the savory elements of this tart dough.
This Savory Tart Dough also has an extra hit of salty goodness, which helps give it a more satiating savory quality. And to really take it to another level, I've added freshly ground pepper. While not completely necessary, it adds a nice warming quality to the tart shell. Depending on your tart filling, that warmth can really accent the other flavors going on inside. If you aren't down with the peppery addition, go ahead and omit it.
A simple base for versatility
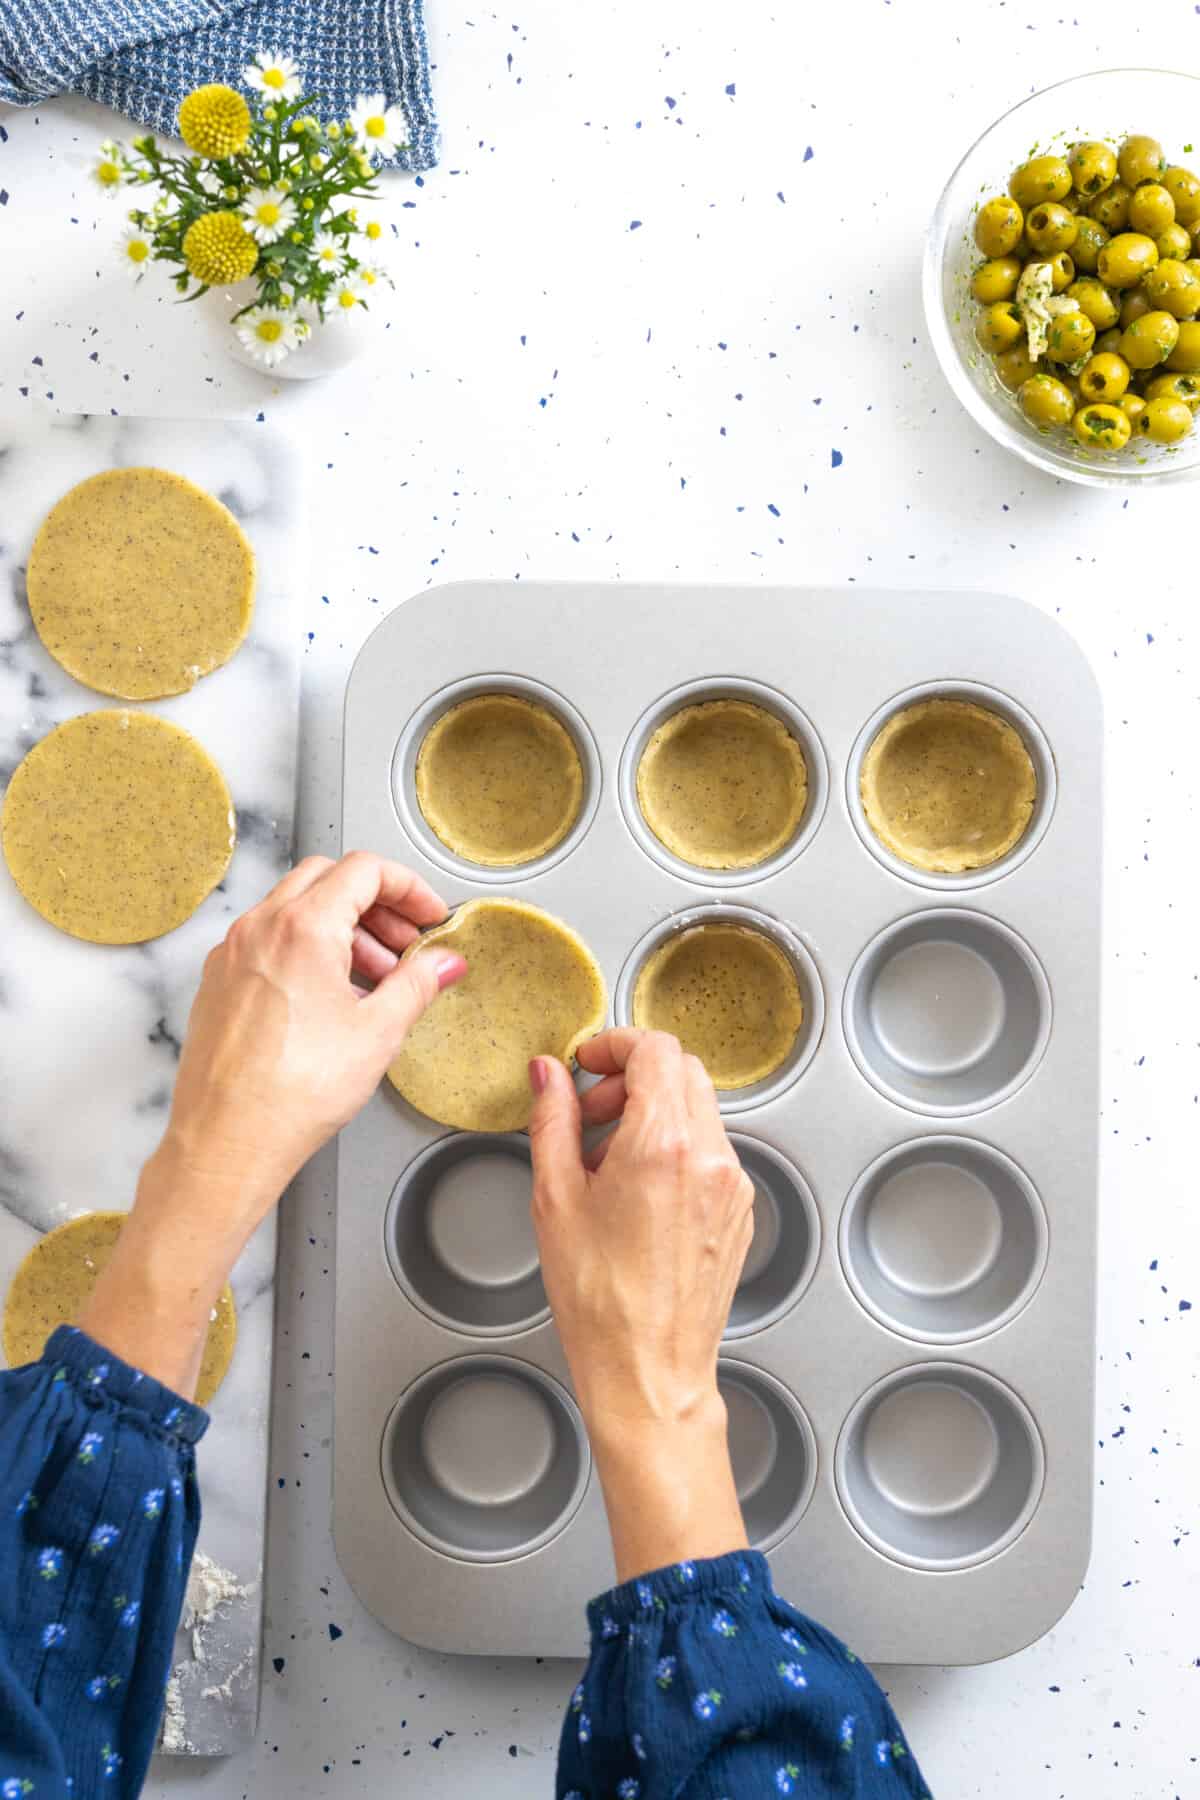
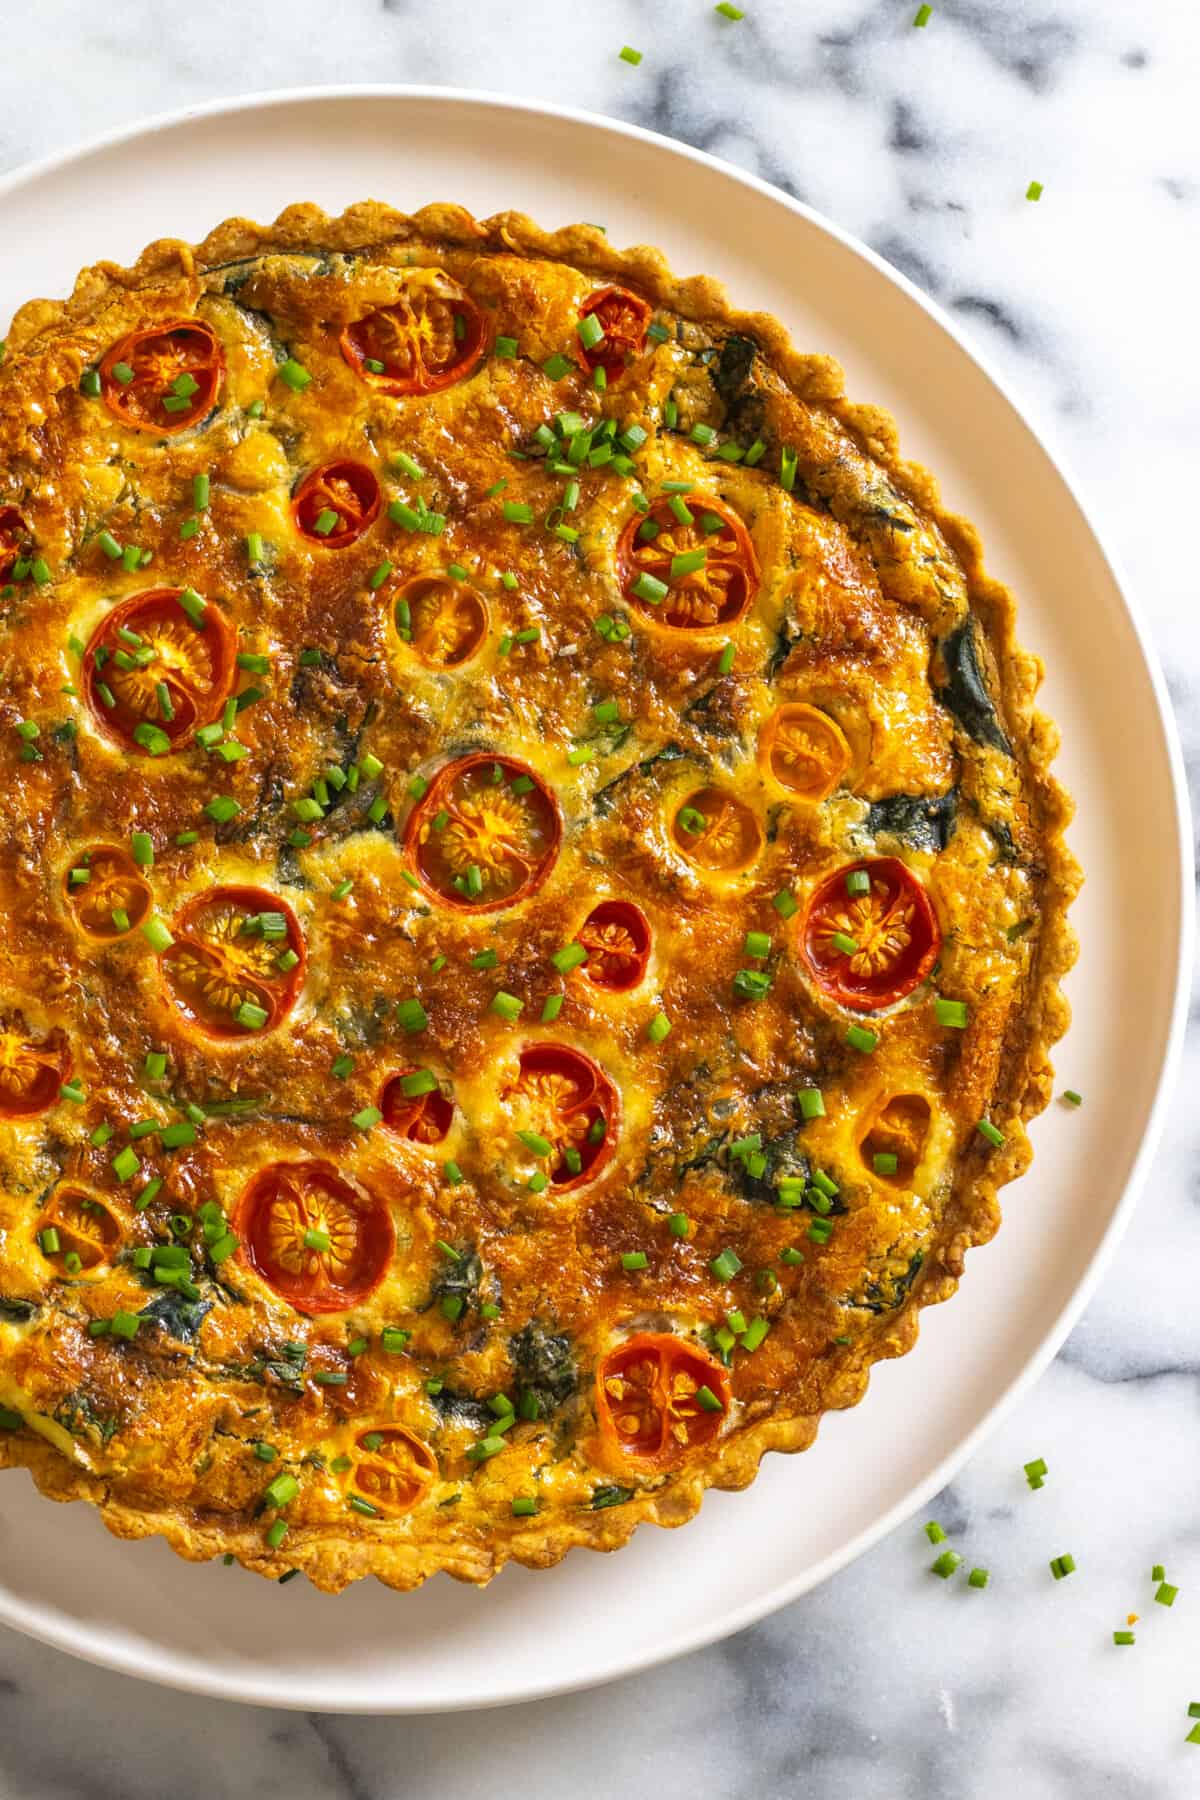
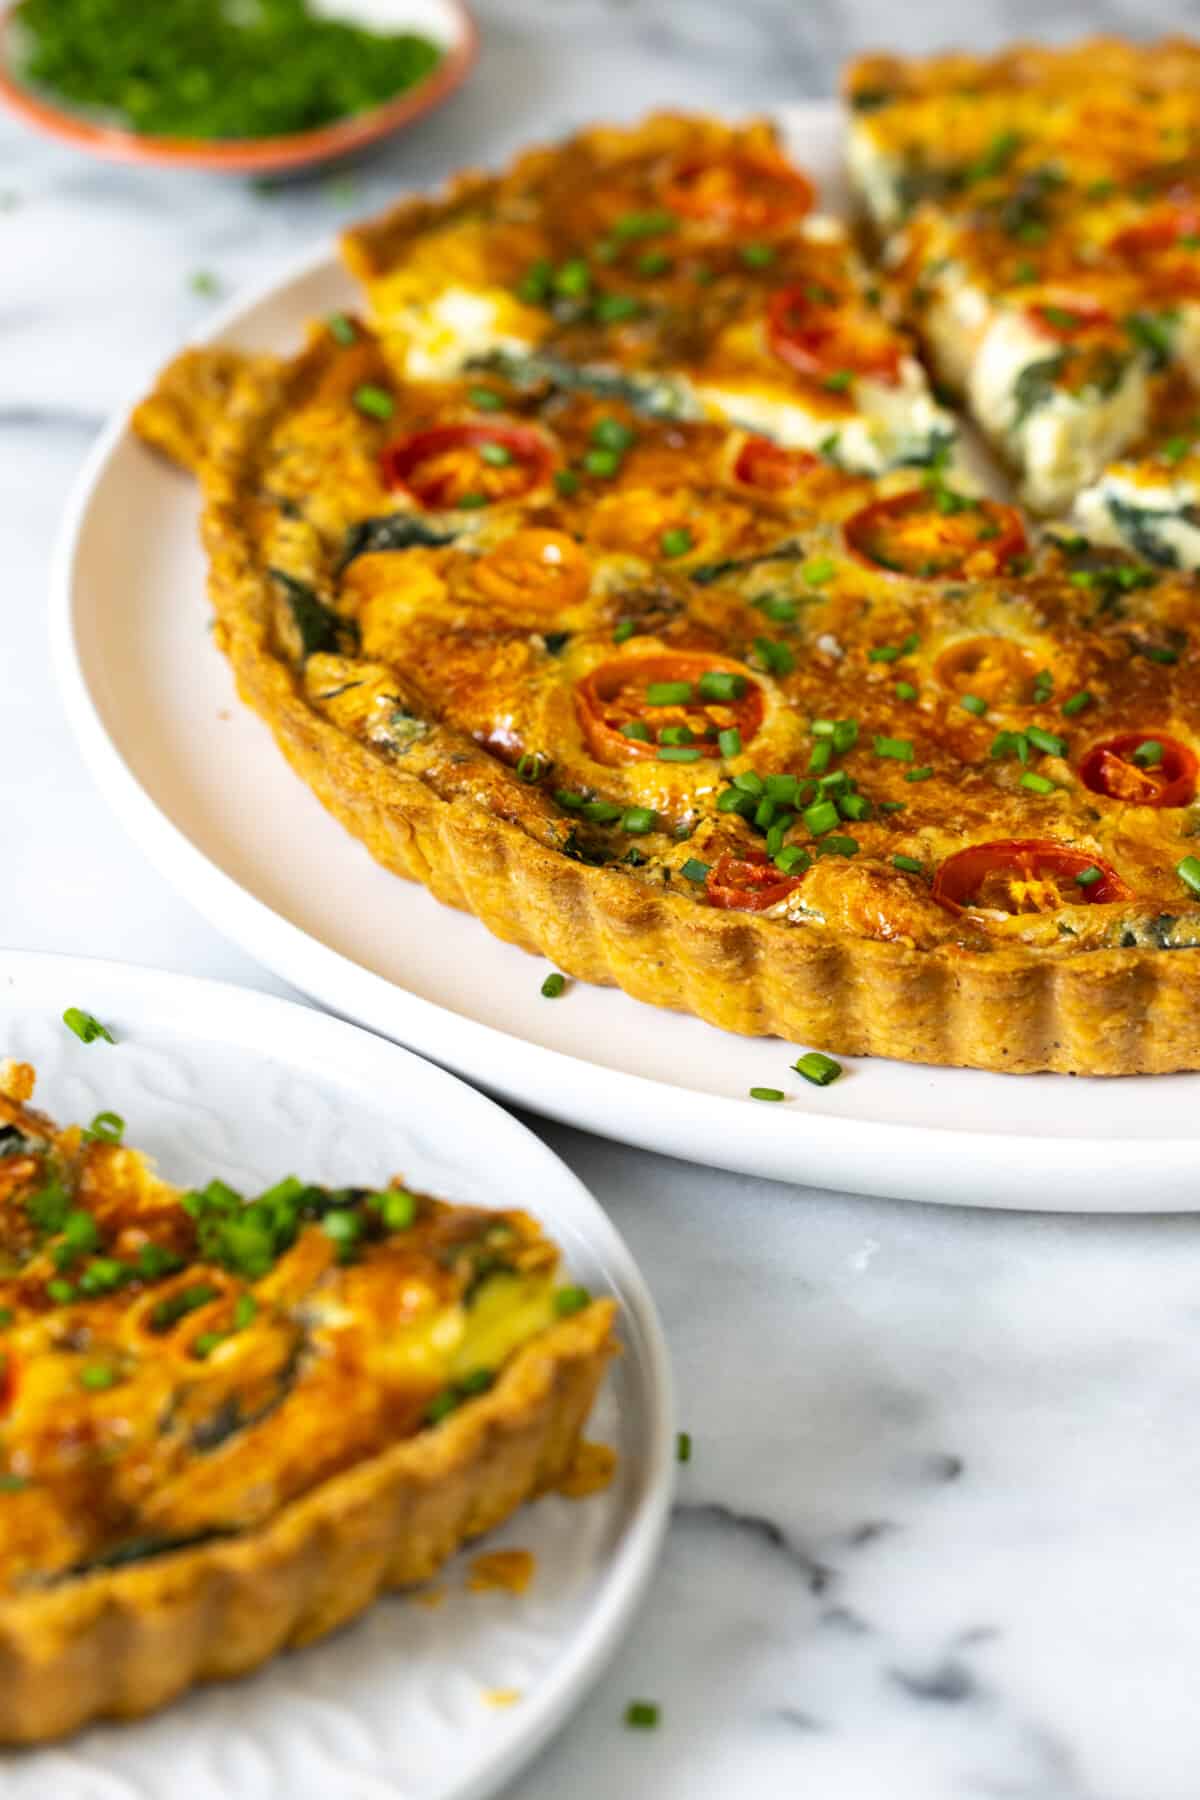
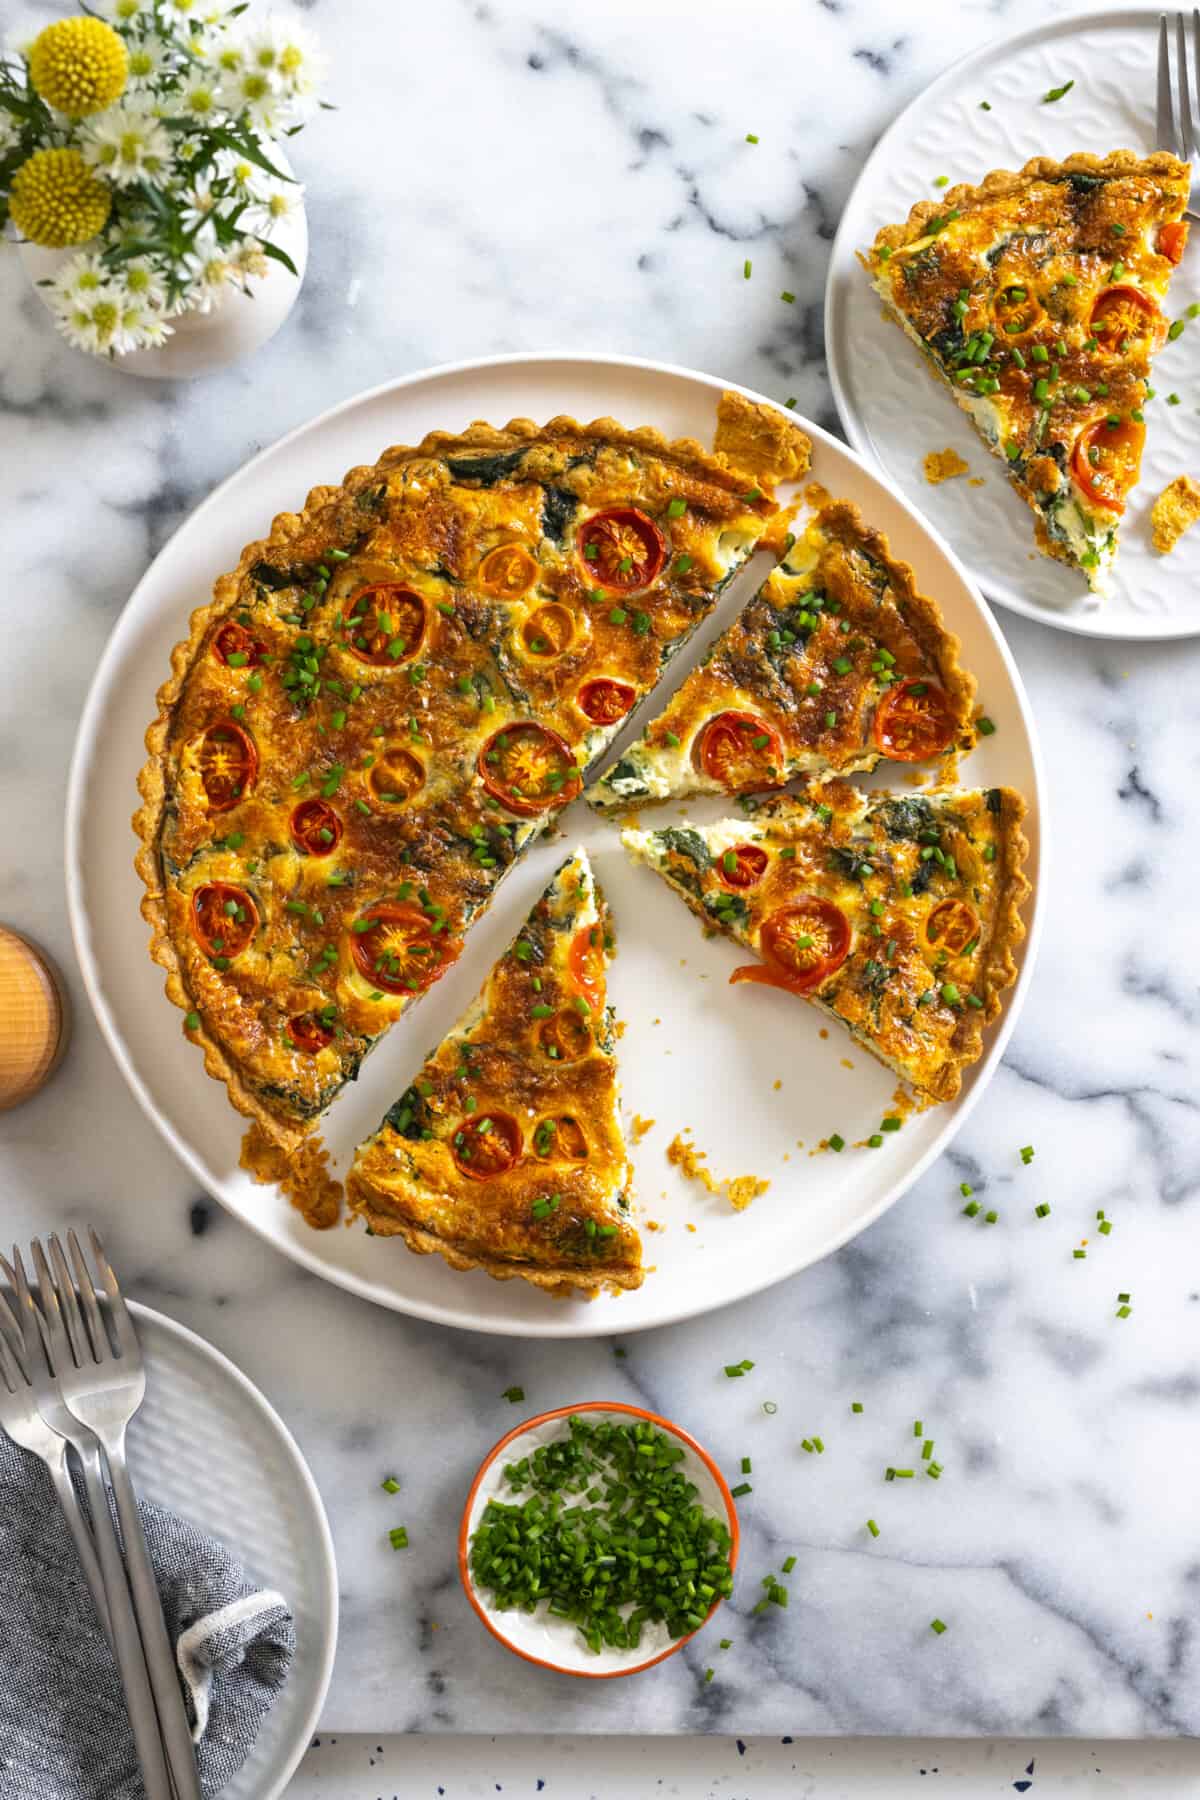
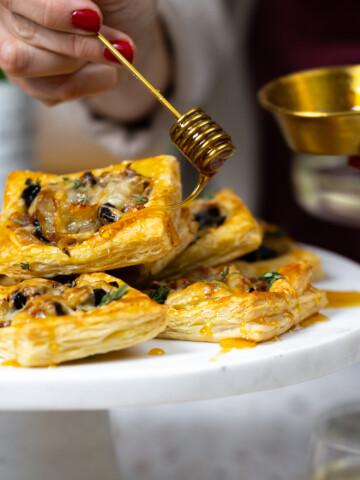
With a simple base, you can go in all different directions. This Savory Tart Dough can be used for tarts, tartlets or even as a quiche base. It's a flexible recipe that can be made in a single, 9" or 9 ½" tart pan. Alternatively, a It can also be divided up for mini tarts. Try it in a rectangular or square tart pan. Or, check out my Herby Olive Goat Cheese Tarts to see how this Savory Tart Dough makes 12 mini tartlets using a standard 12 cup muffin pan!
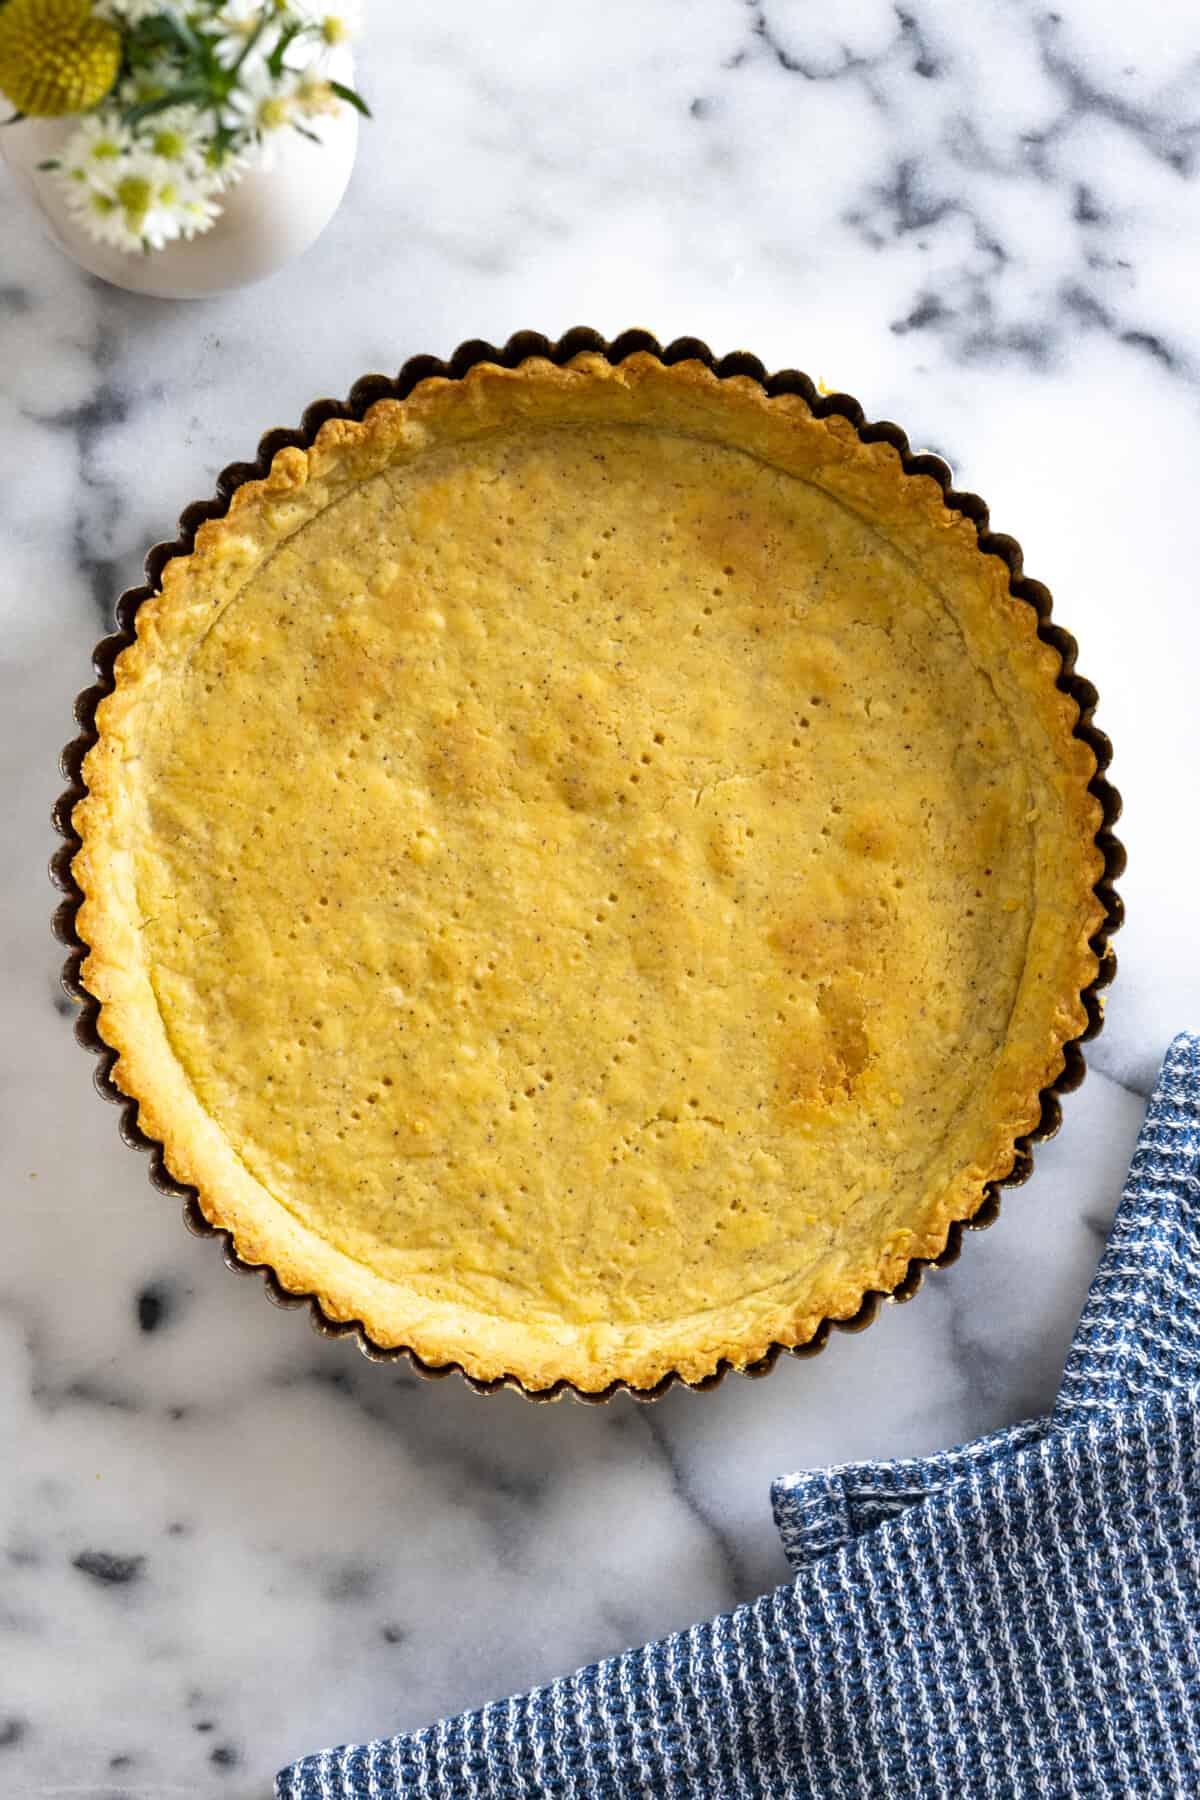
When making full sized tarts, I prefer using tart pans with removable bottoms. The tart shells will keep that sharp shape and fluted edge well and pop out of the pan with ease.
Tips for mixing tart dough
Keep your cool
Much like pie dough, the flaky texture of a good tart dough is due in part to the cold ingredients getting cut into the dry ingredients. Cold, cubed butter is cut into the flour until it forms a mealy texture with chunky buttery granules still remaining. Those butter pockets react under the heat of the oven, puffing up and creating that coveted, shattering flake we all know and love.
4 mixing methods for making tart doughs
When it comes to mixing tart dough and pie doughs, you've got lots of different options! Don't stress if you don't have many baking tools, this simple Savory Tart Dough and all of my pie and tart dough recipes can be made using just your hands.
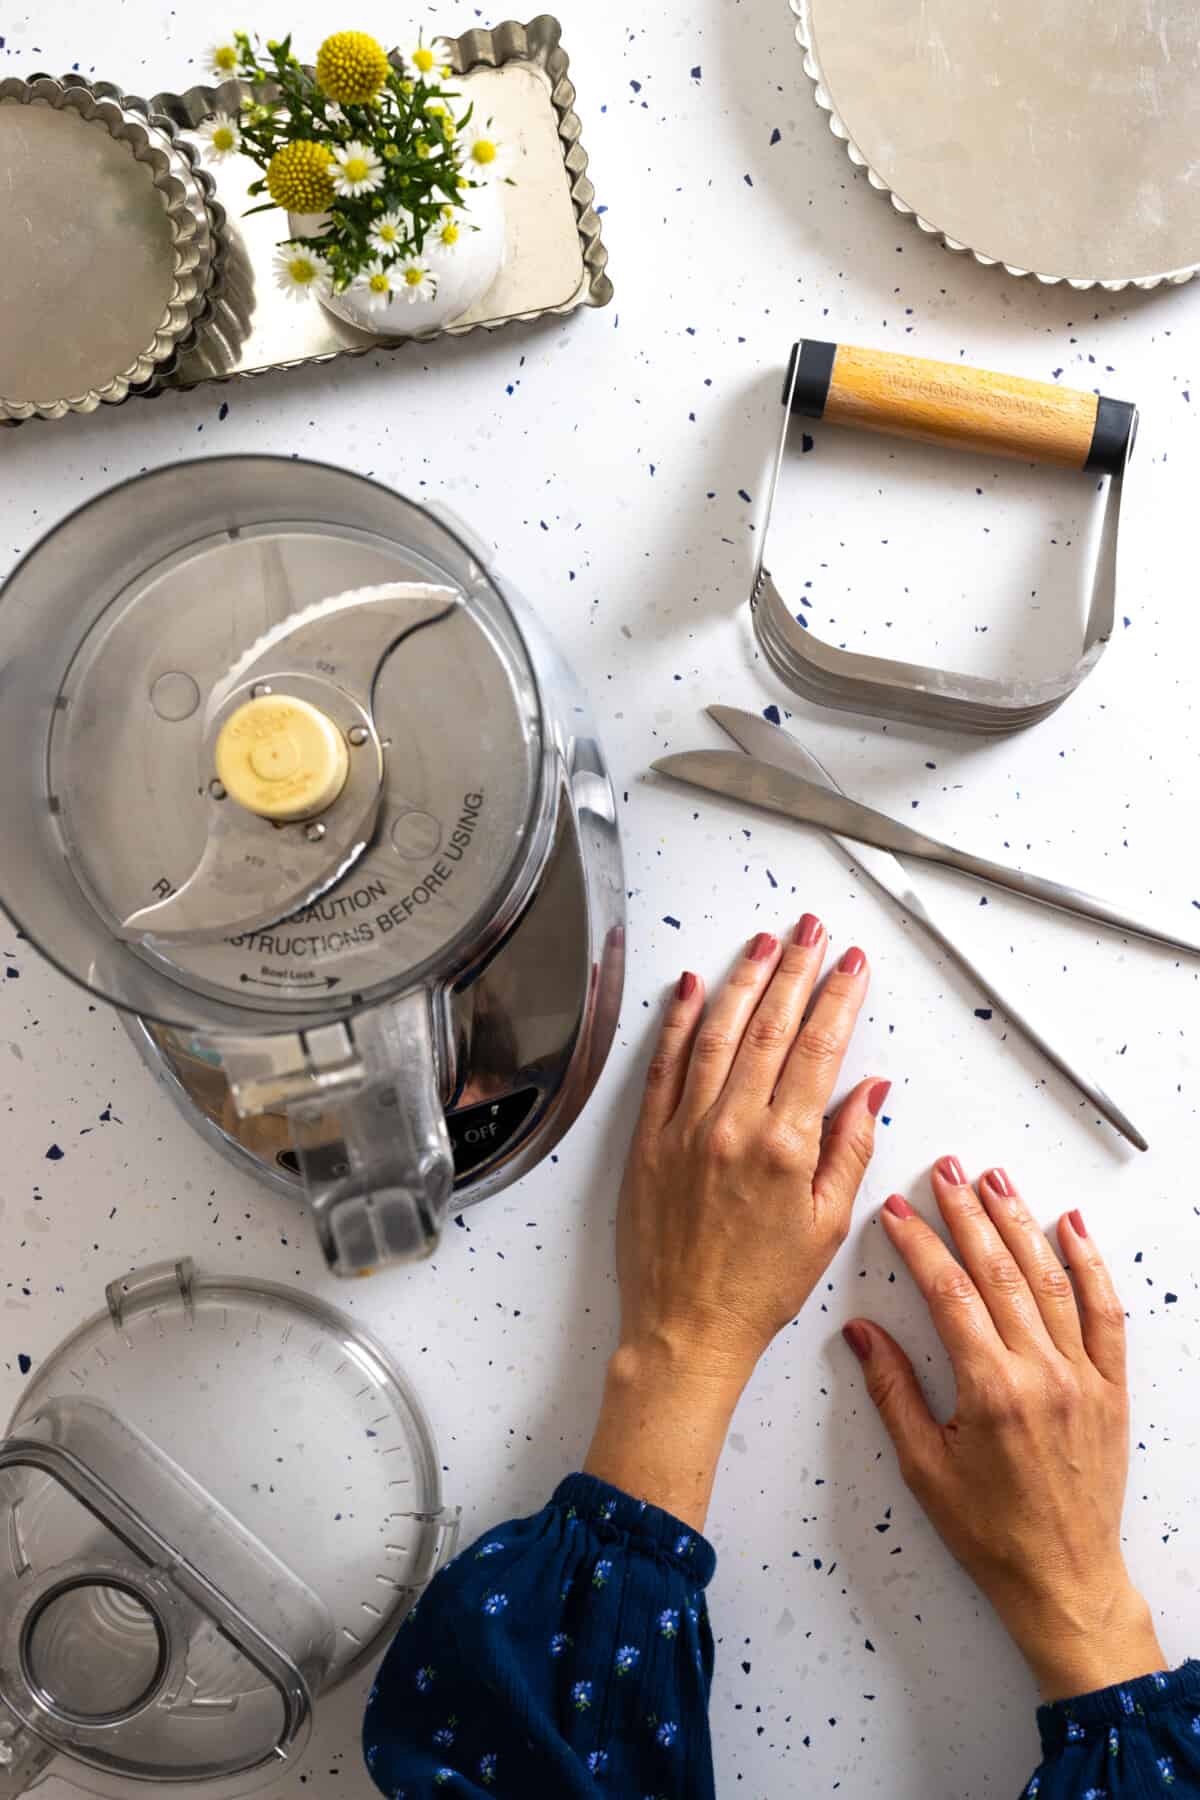
1. Pastry Blender
2. Two Butter Knives
3. Food Processor
4. Your hands
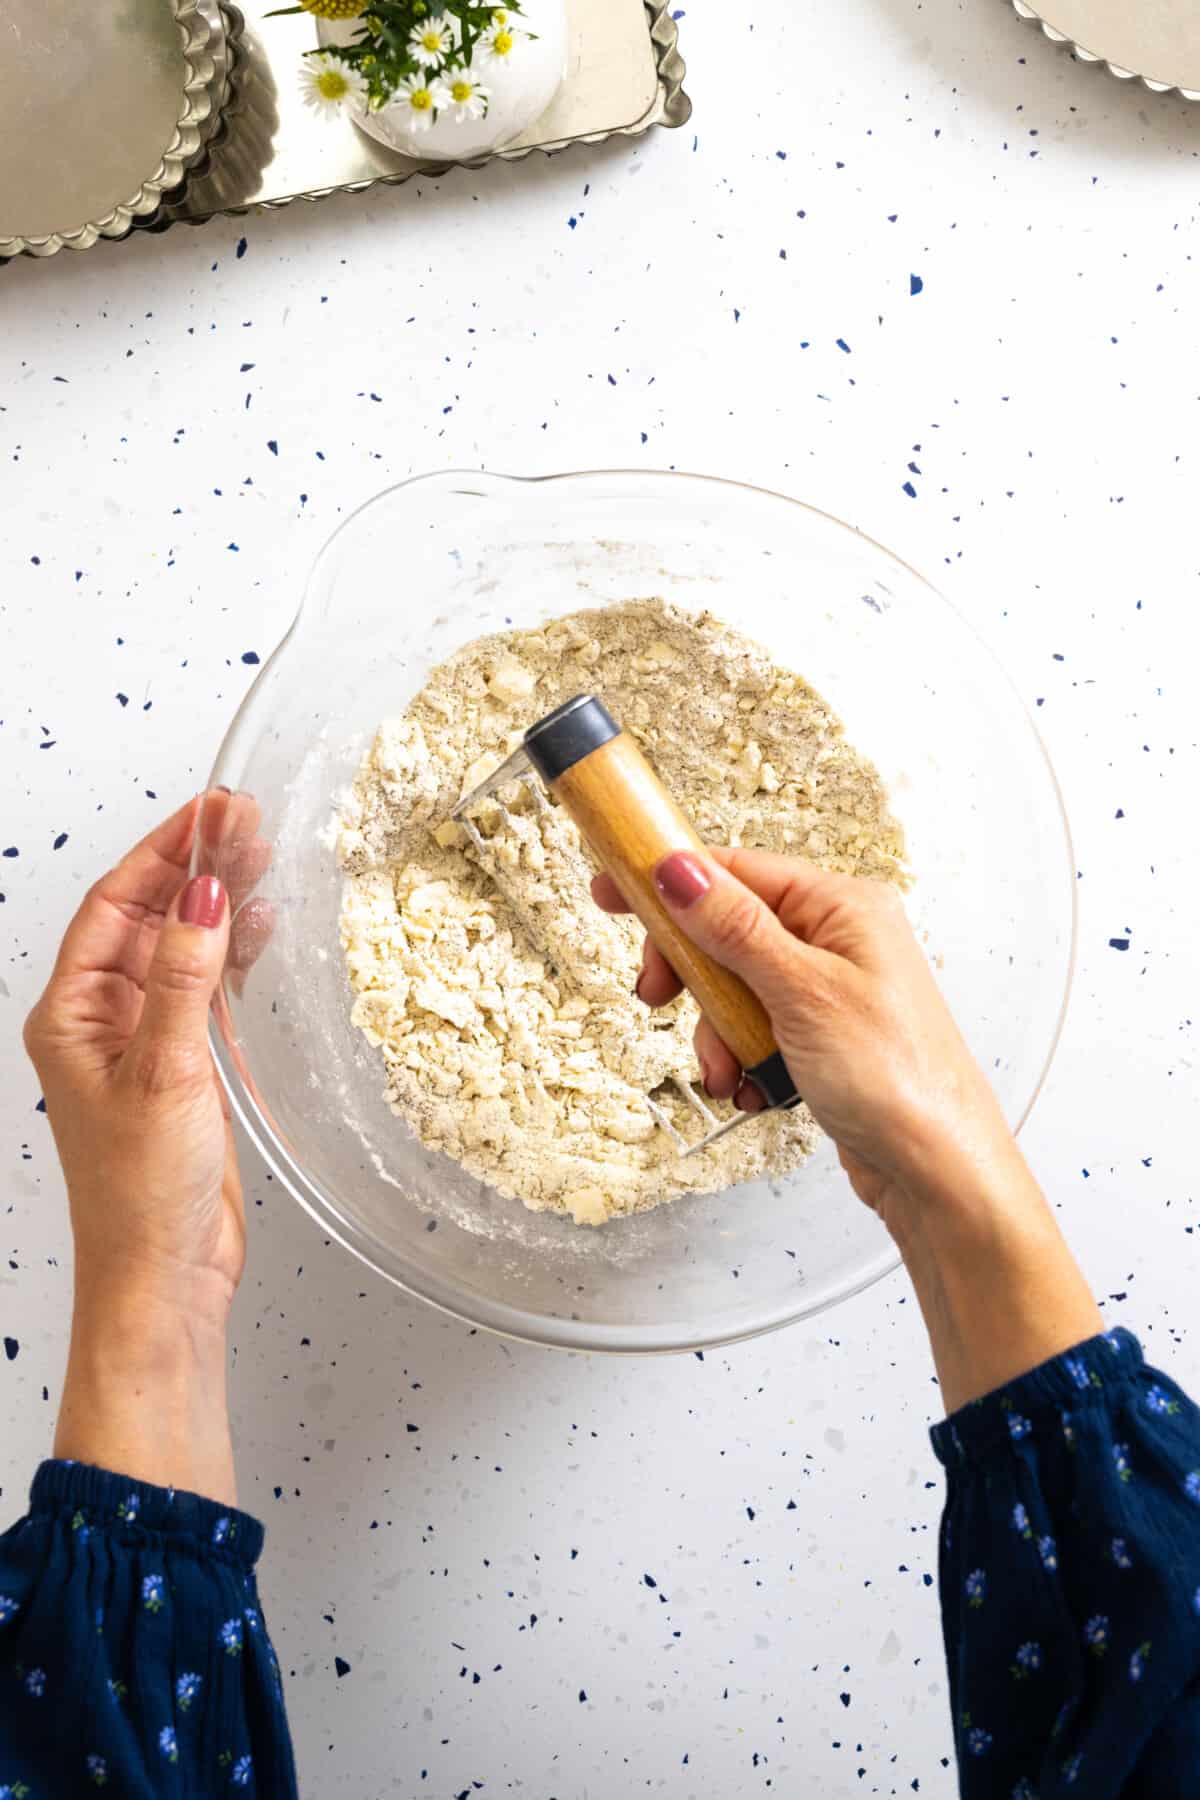
Method 1: Pastry Blender
I've always been a big fan of using a pastry blender because I like the ease and control it gives me. Its quick and satisfying work. You still get your hands in there and connect with the dough. A pastry blender is a handy tool for making tart dough, pie dough, scones and biscuits.
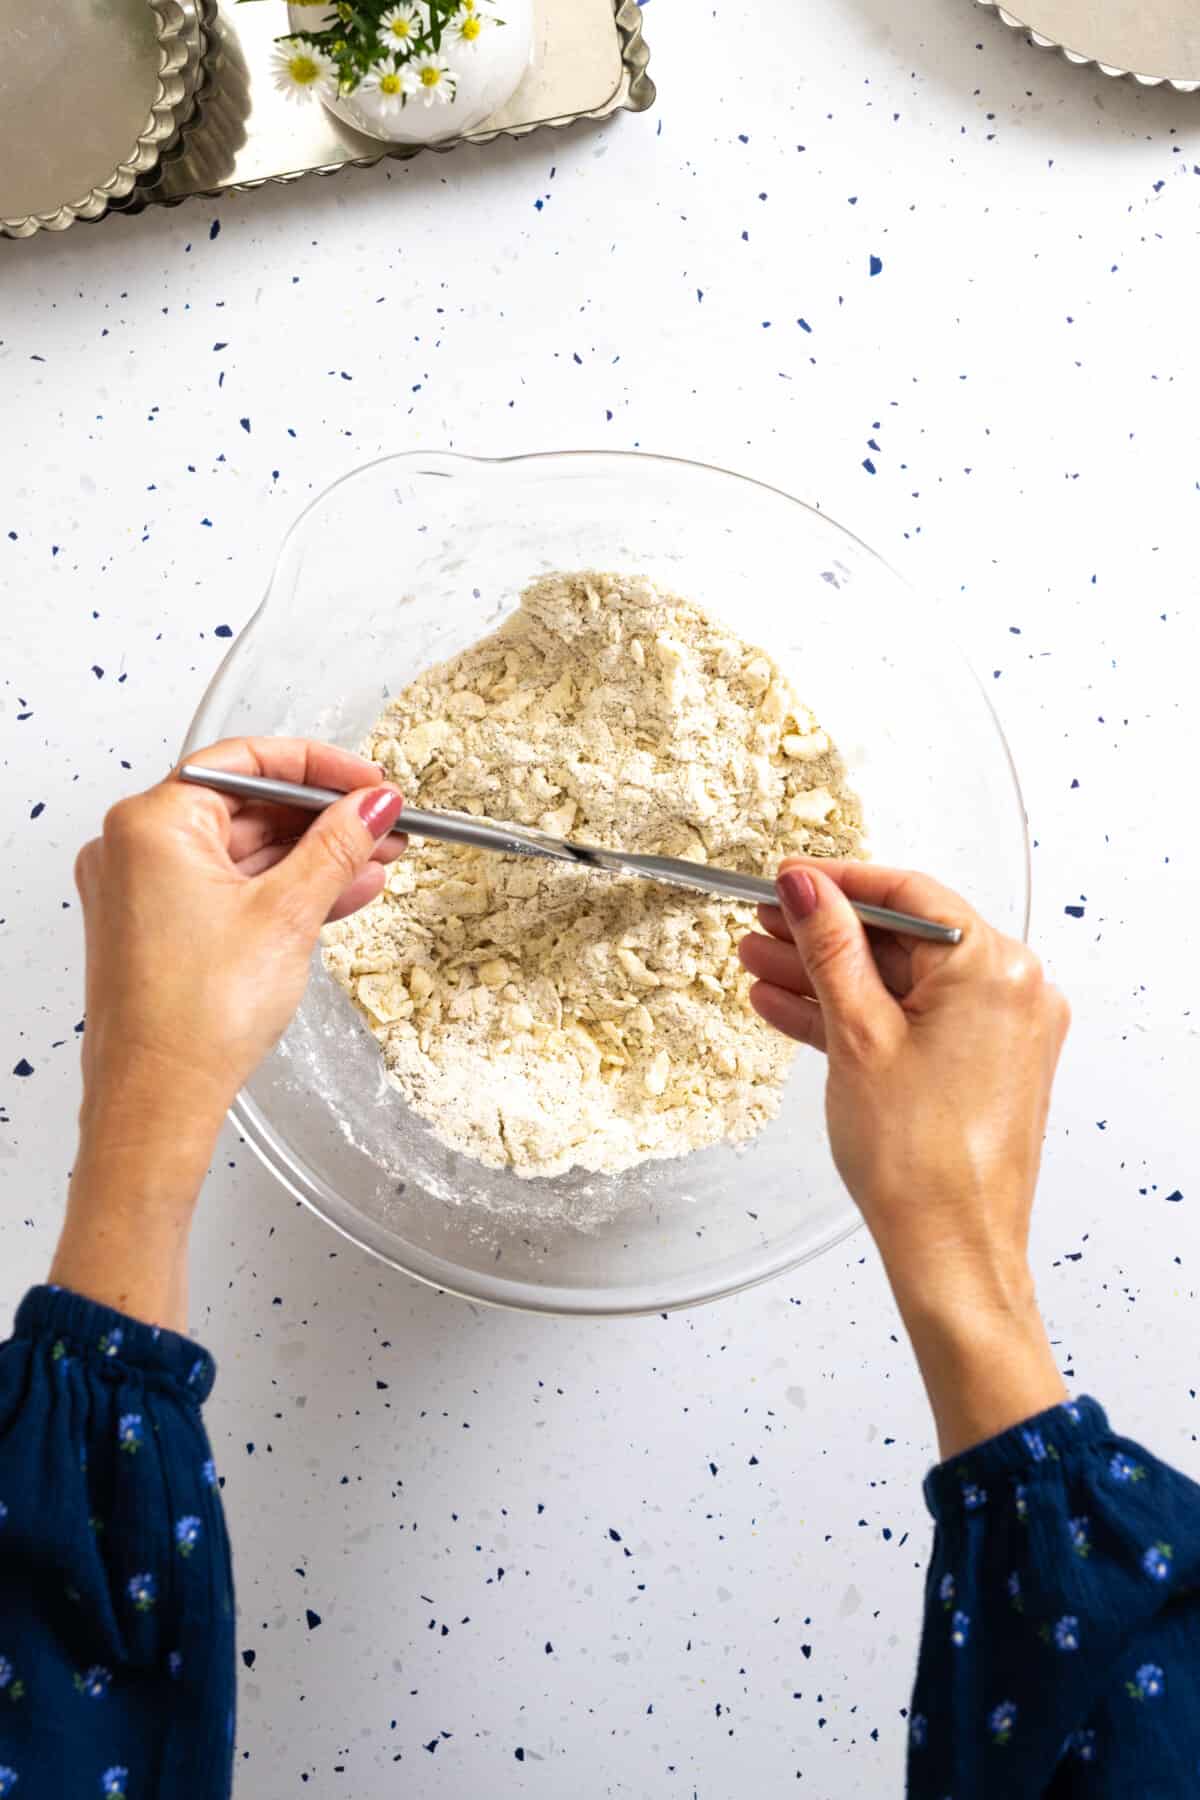
Method 2: Butter Knives
You can literally cut butter into flour with 2 butter knives. Holding a butter knife in each hand, scissor cut the butter by crossing the butter knives over and over again until the dough becomes mealy. It takes a little longer but it works well!
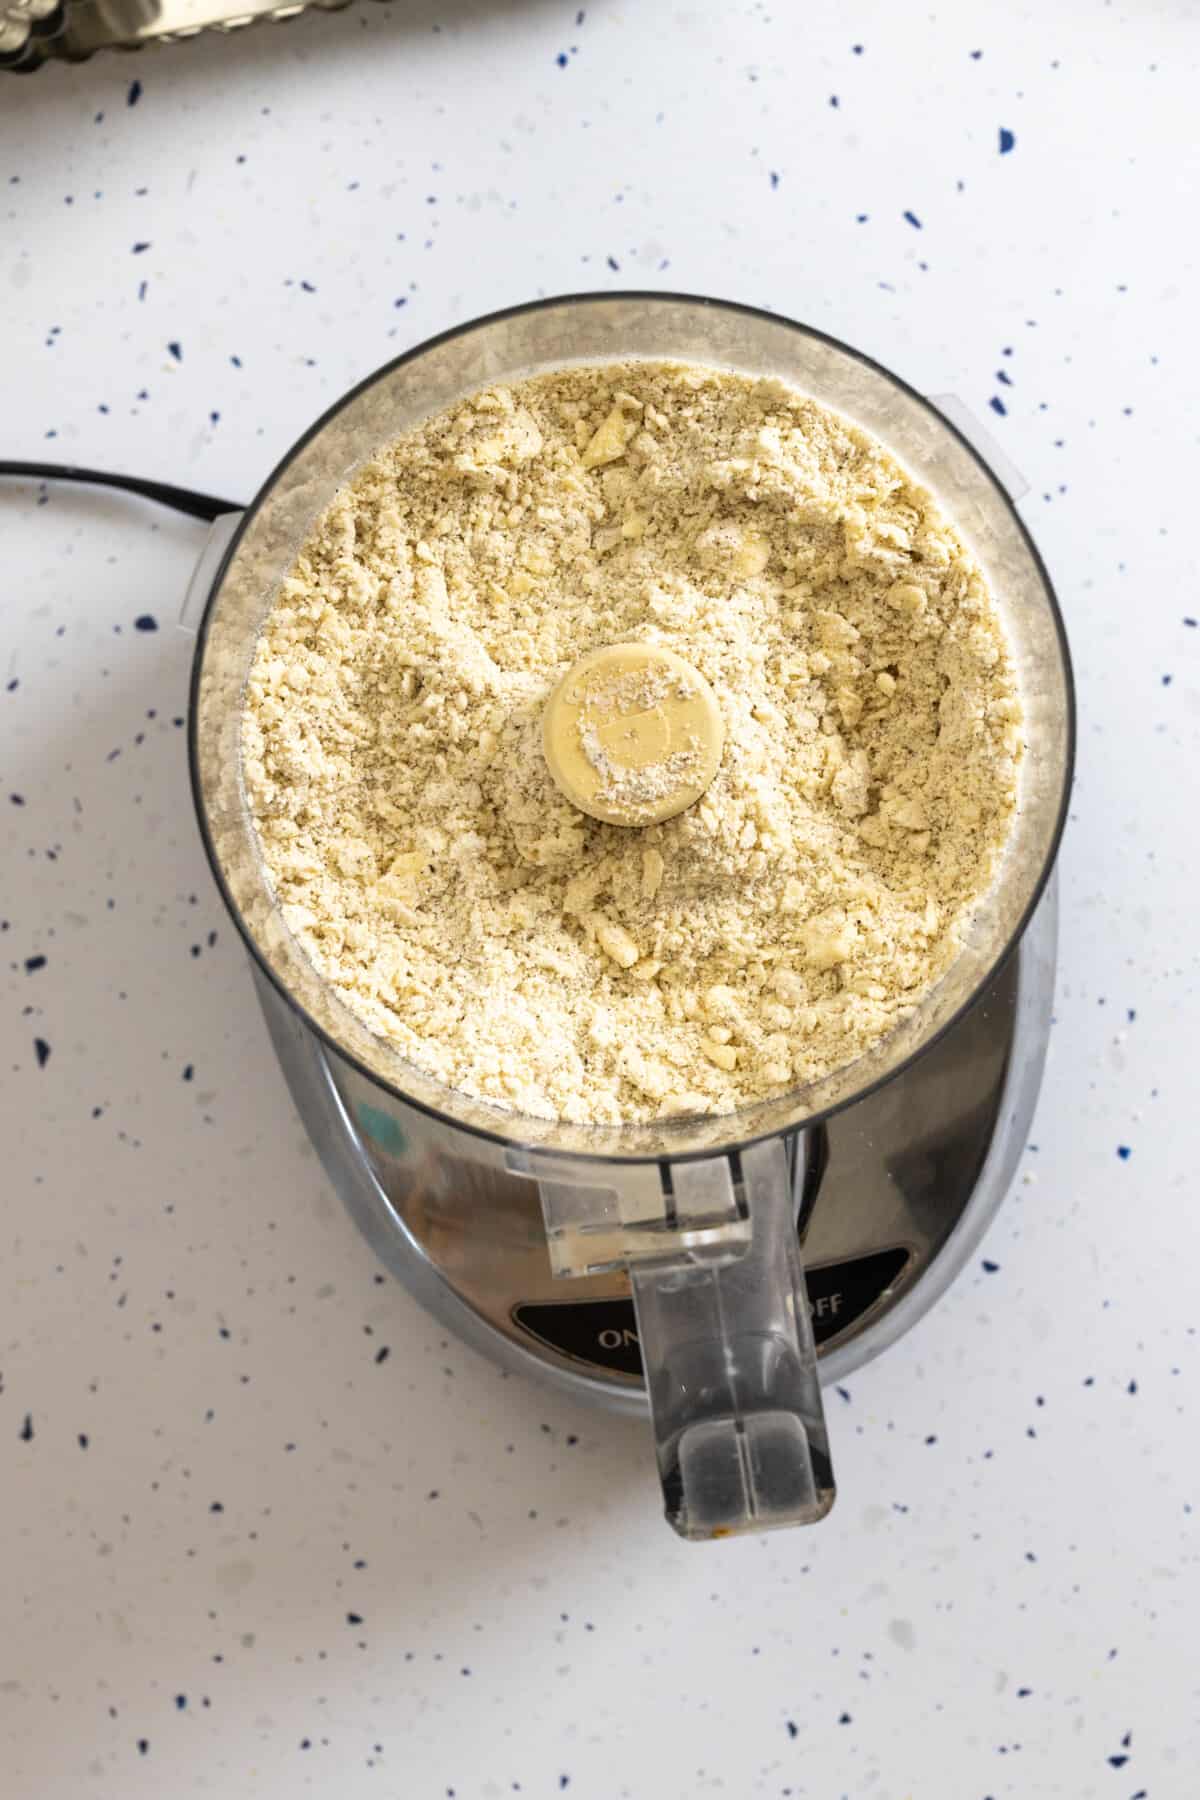
Method 3: Food Processor
A food processor is the quickest way to mix tart doughs and pie dough. The sharp blade will cut through that cold butter in a jiff. You just need to be cautious that you don't over mix when using a food processor. Which can be easy to do since it cuts so quickly! I only use the pulse mode when mixing my doughs in a food processor. That way I can keep a close eye on the blend. And when I hit the hydrating stage. I transfer the dough from food processor into a big bowl and hydrated my dough with vodka, ice water, milk or cream using a fork, so I don't accidentally over mix.
Using a food processor to mix multiple batches of tart dough or pie dough is a big time saver. Around the holidays, I will mix up multiple batches of pie dough in my food processor at once and it is a lifesaver.
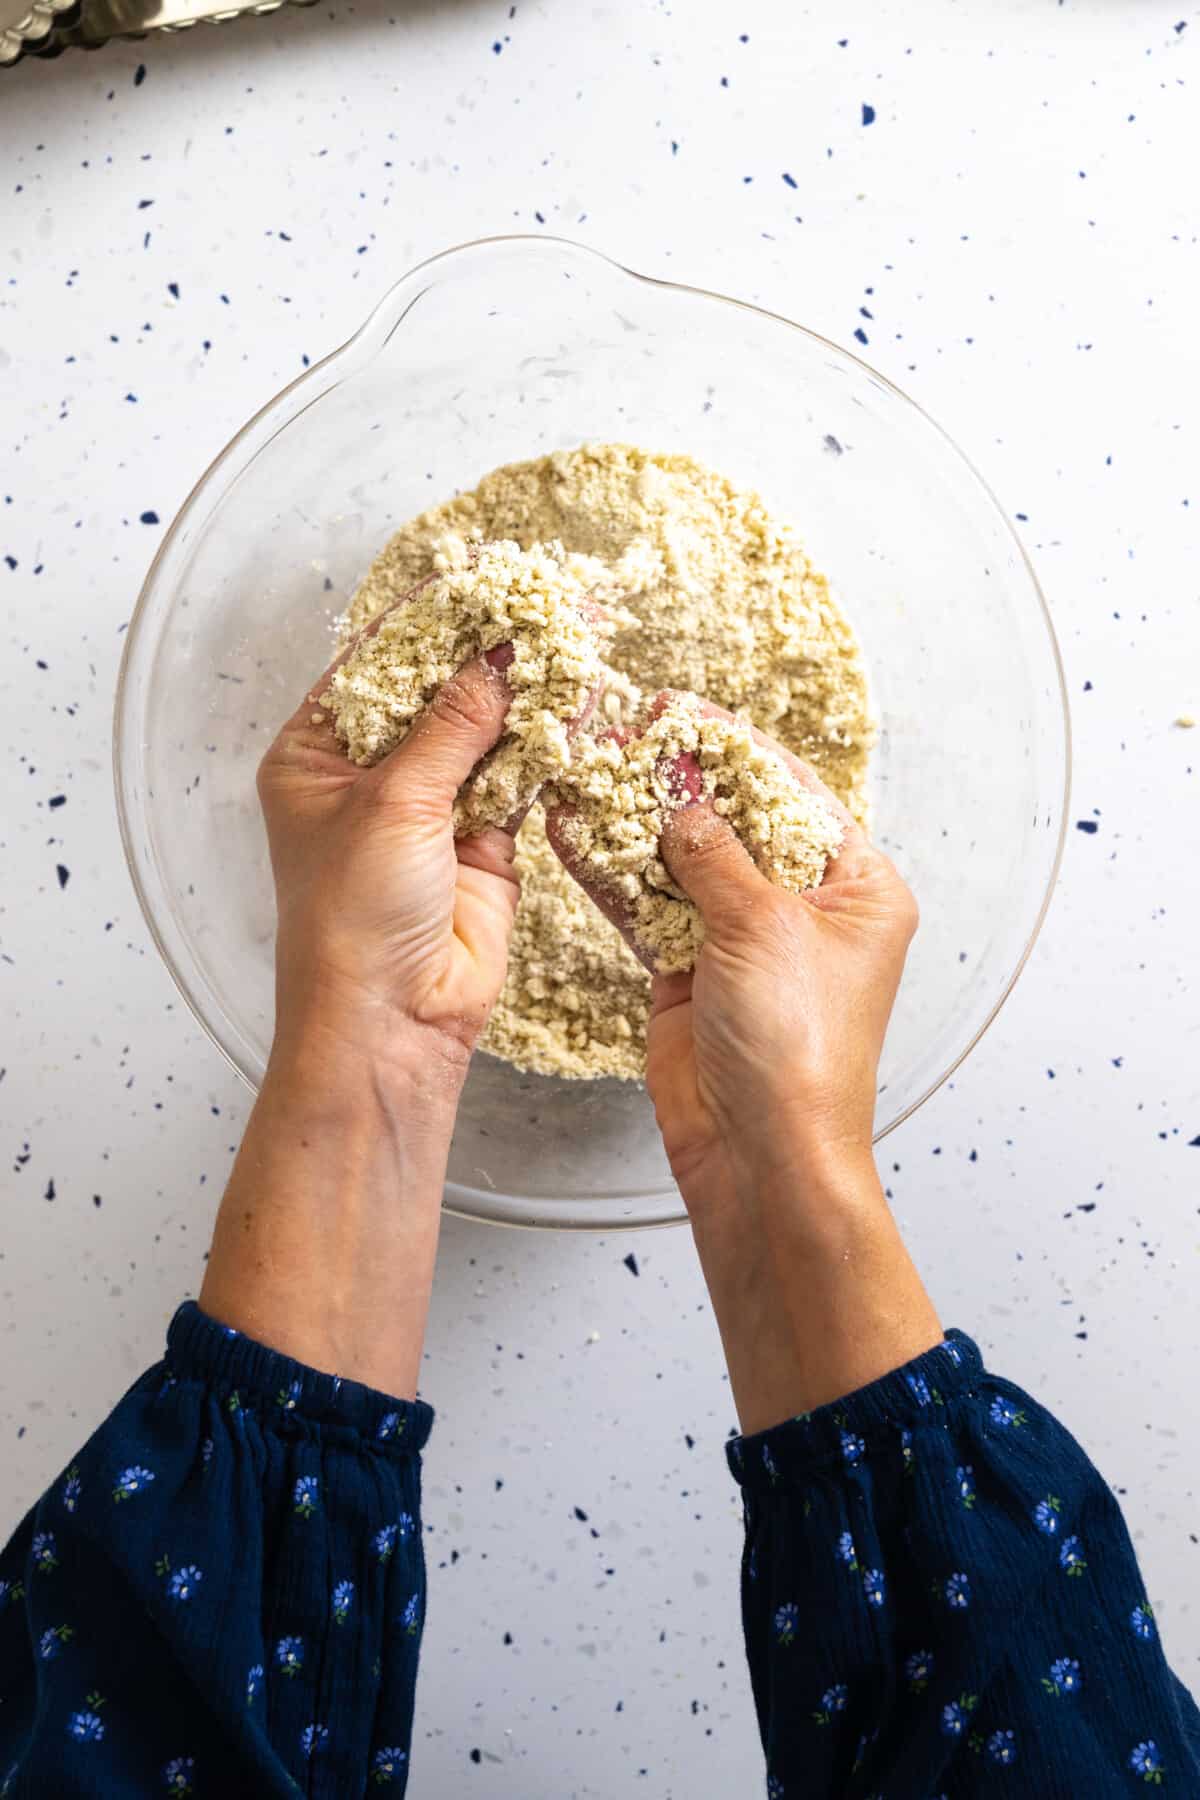
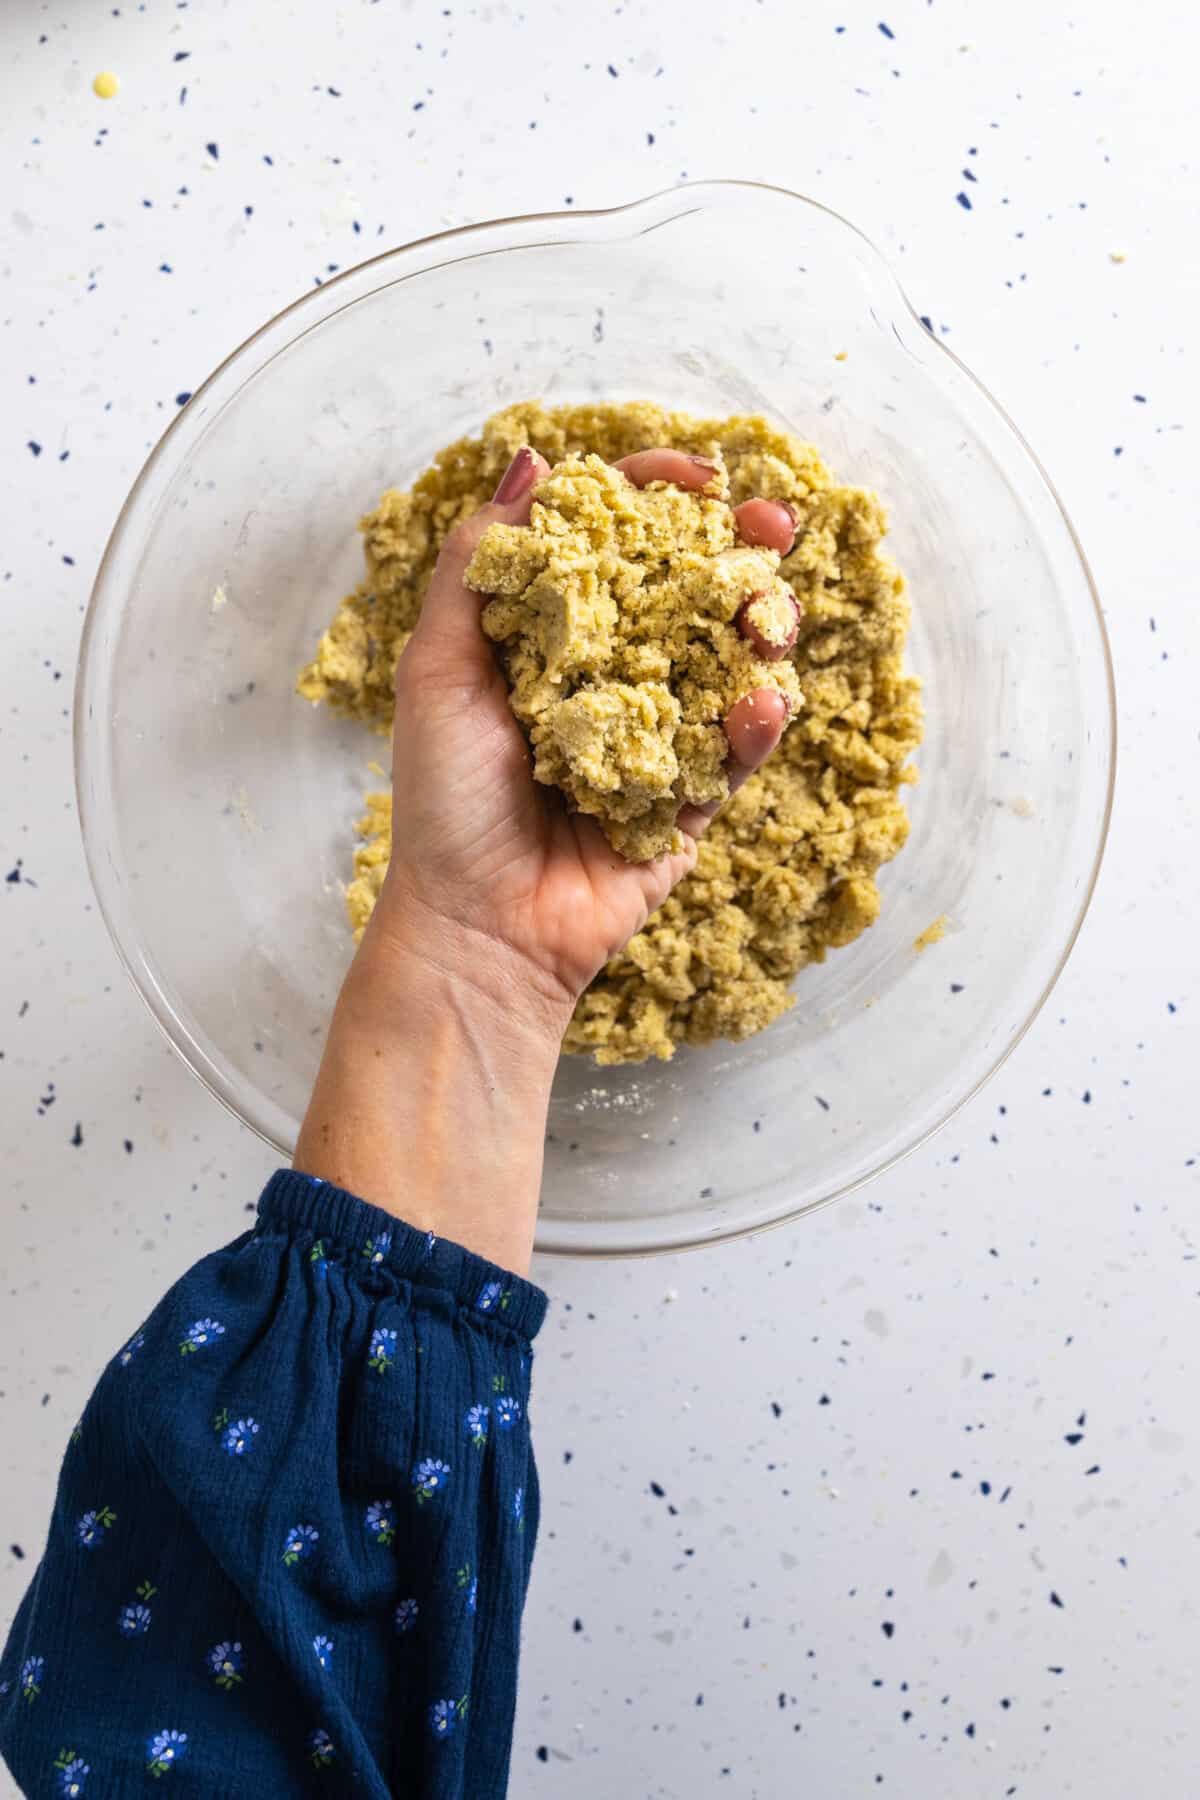
Method 4: Hands on
Like I said above, you can use your hands to mix the tart dough together. Simply squish the butter chunks into the flour between your fingers, until the dough becomes coarse and mealy. However, you want that butter to stay as cold as possible. So if your hands run hot, try and work quickly. If the butter starts to melt and get greasy during the process, stop and place the bowl in the refrigerator for a few minutes for the butter to firm back up before proceeding.
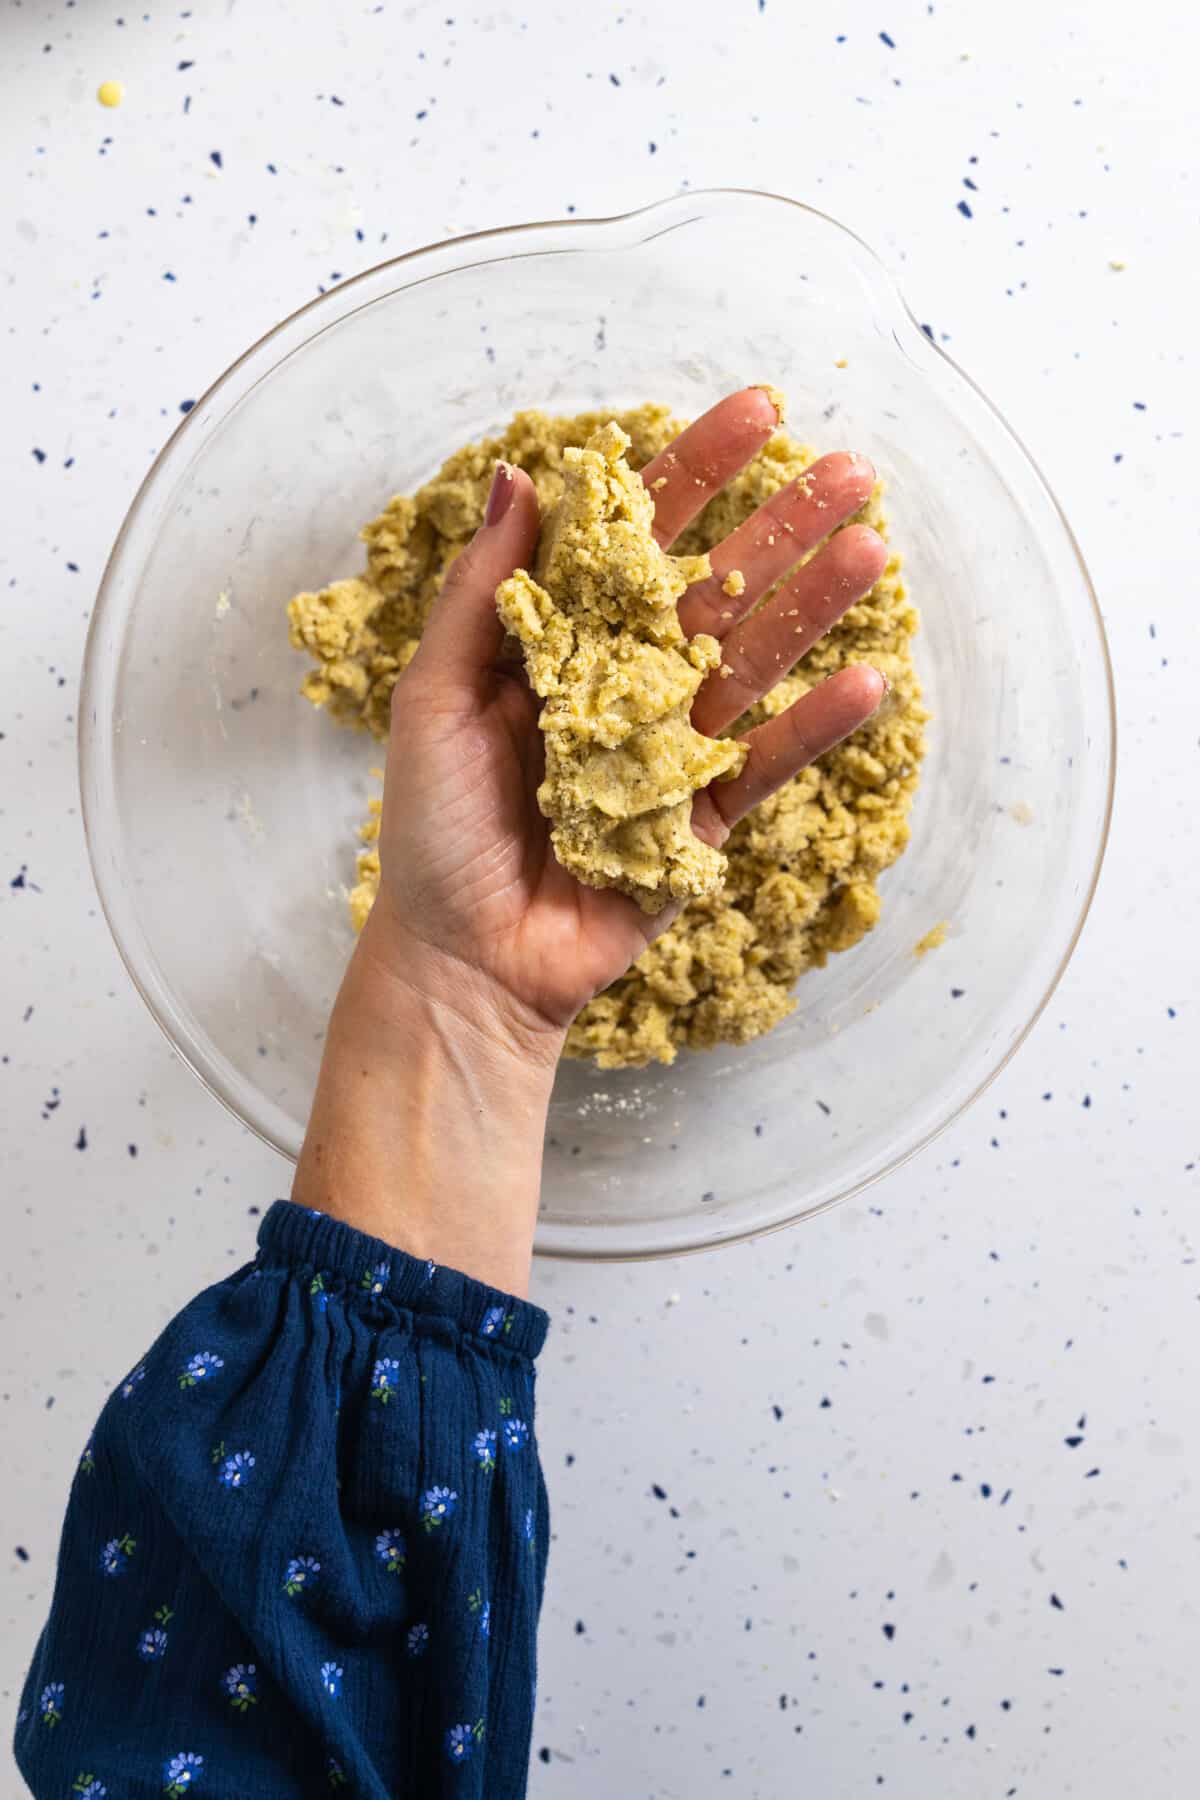
A method to test hydration in tart dough
Getting the hydration levels just right in pie dough or tart dough recipes is key. If the dough is too dry it won't stick together. But if the dough has too much moisture it will be weighed down and could bake up dense. In order to get that coveted flaky crust, tart dough needs just enough moisture to hold it together. This simple hydration test method will ensure perfectly flaky tart crusts.

Roll out or press-in method for shaping tart shells
Versatility is a common thread in this Savory Tart Dough recipe. And when it comes to the stage of getting that dough into the tart pan, you've got options!
Roll out
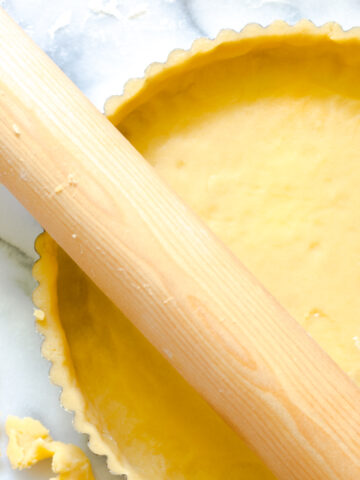
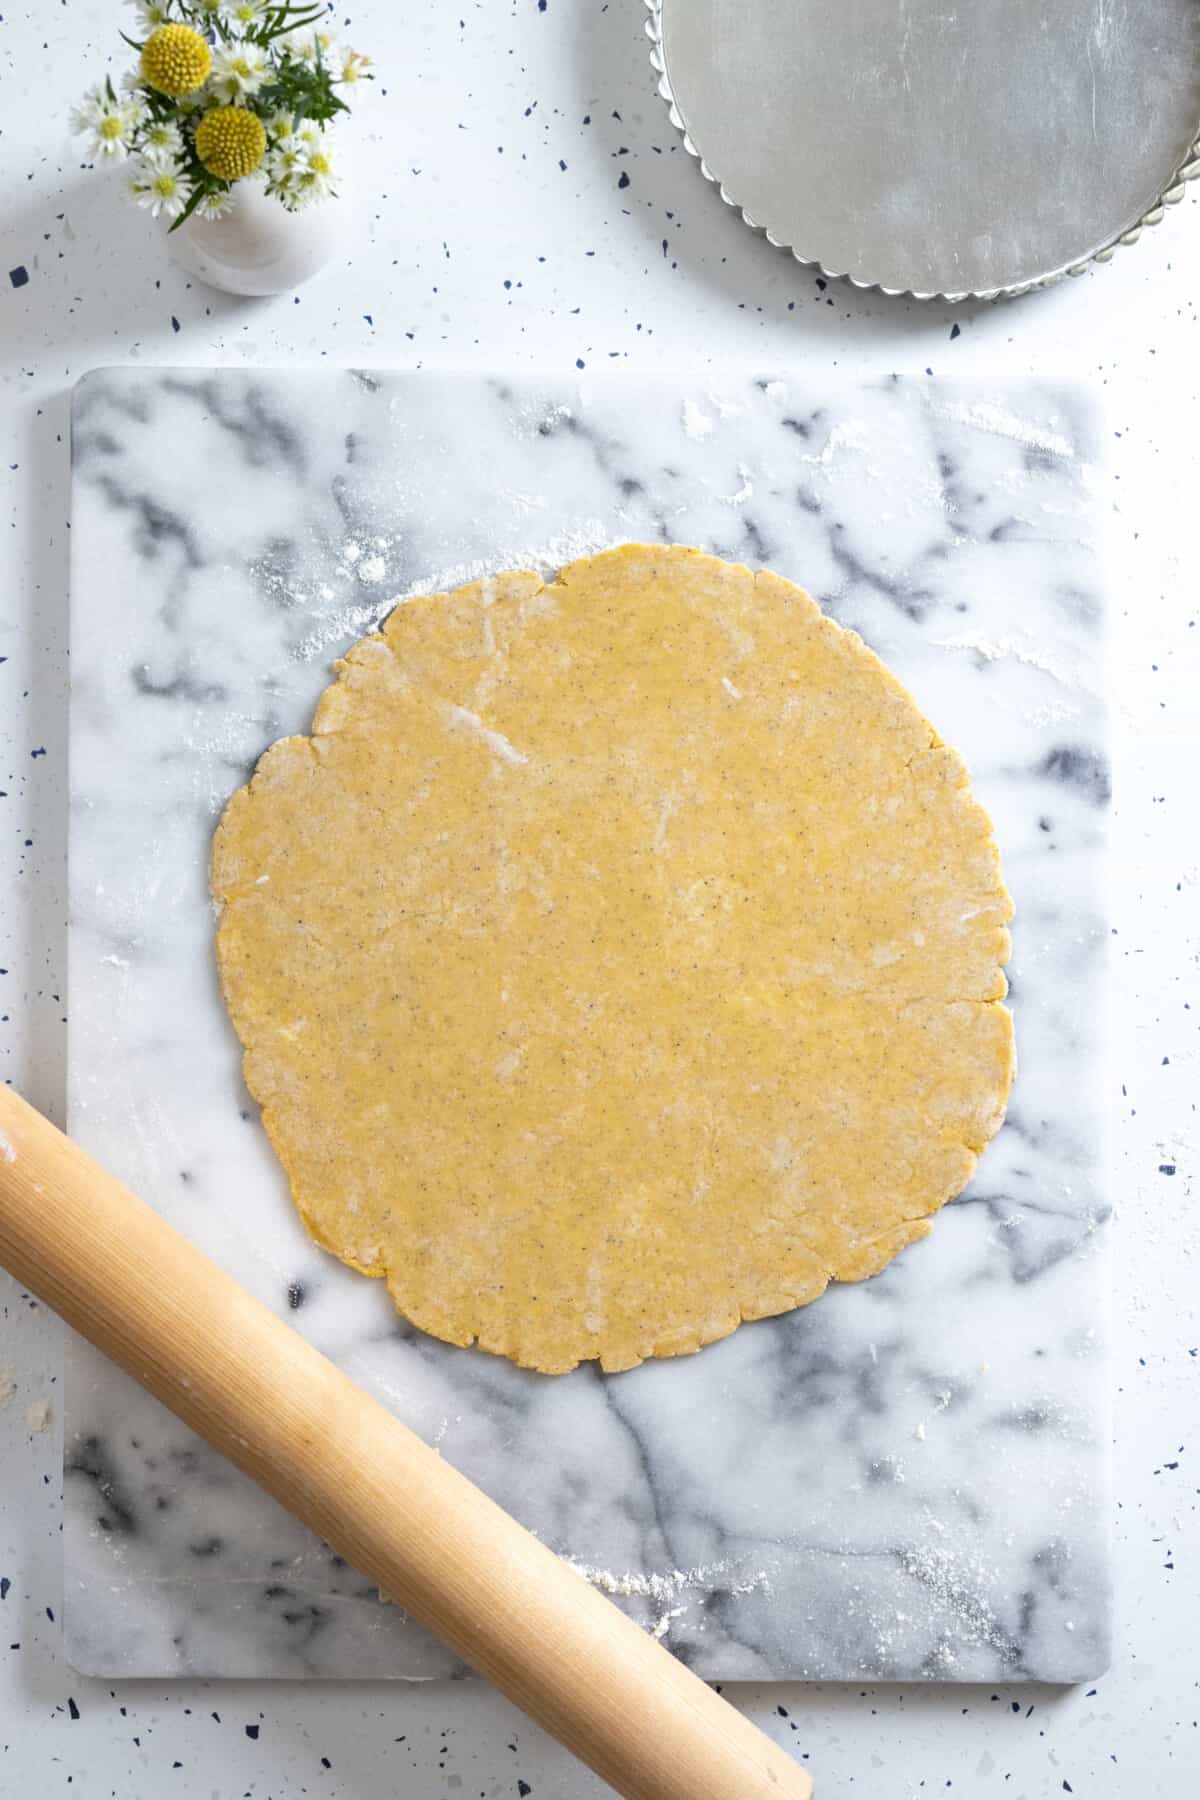
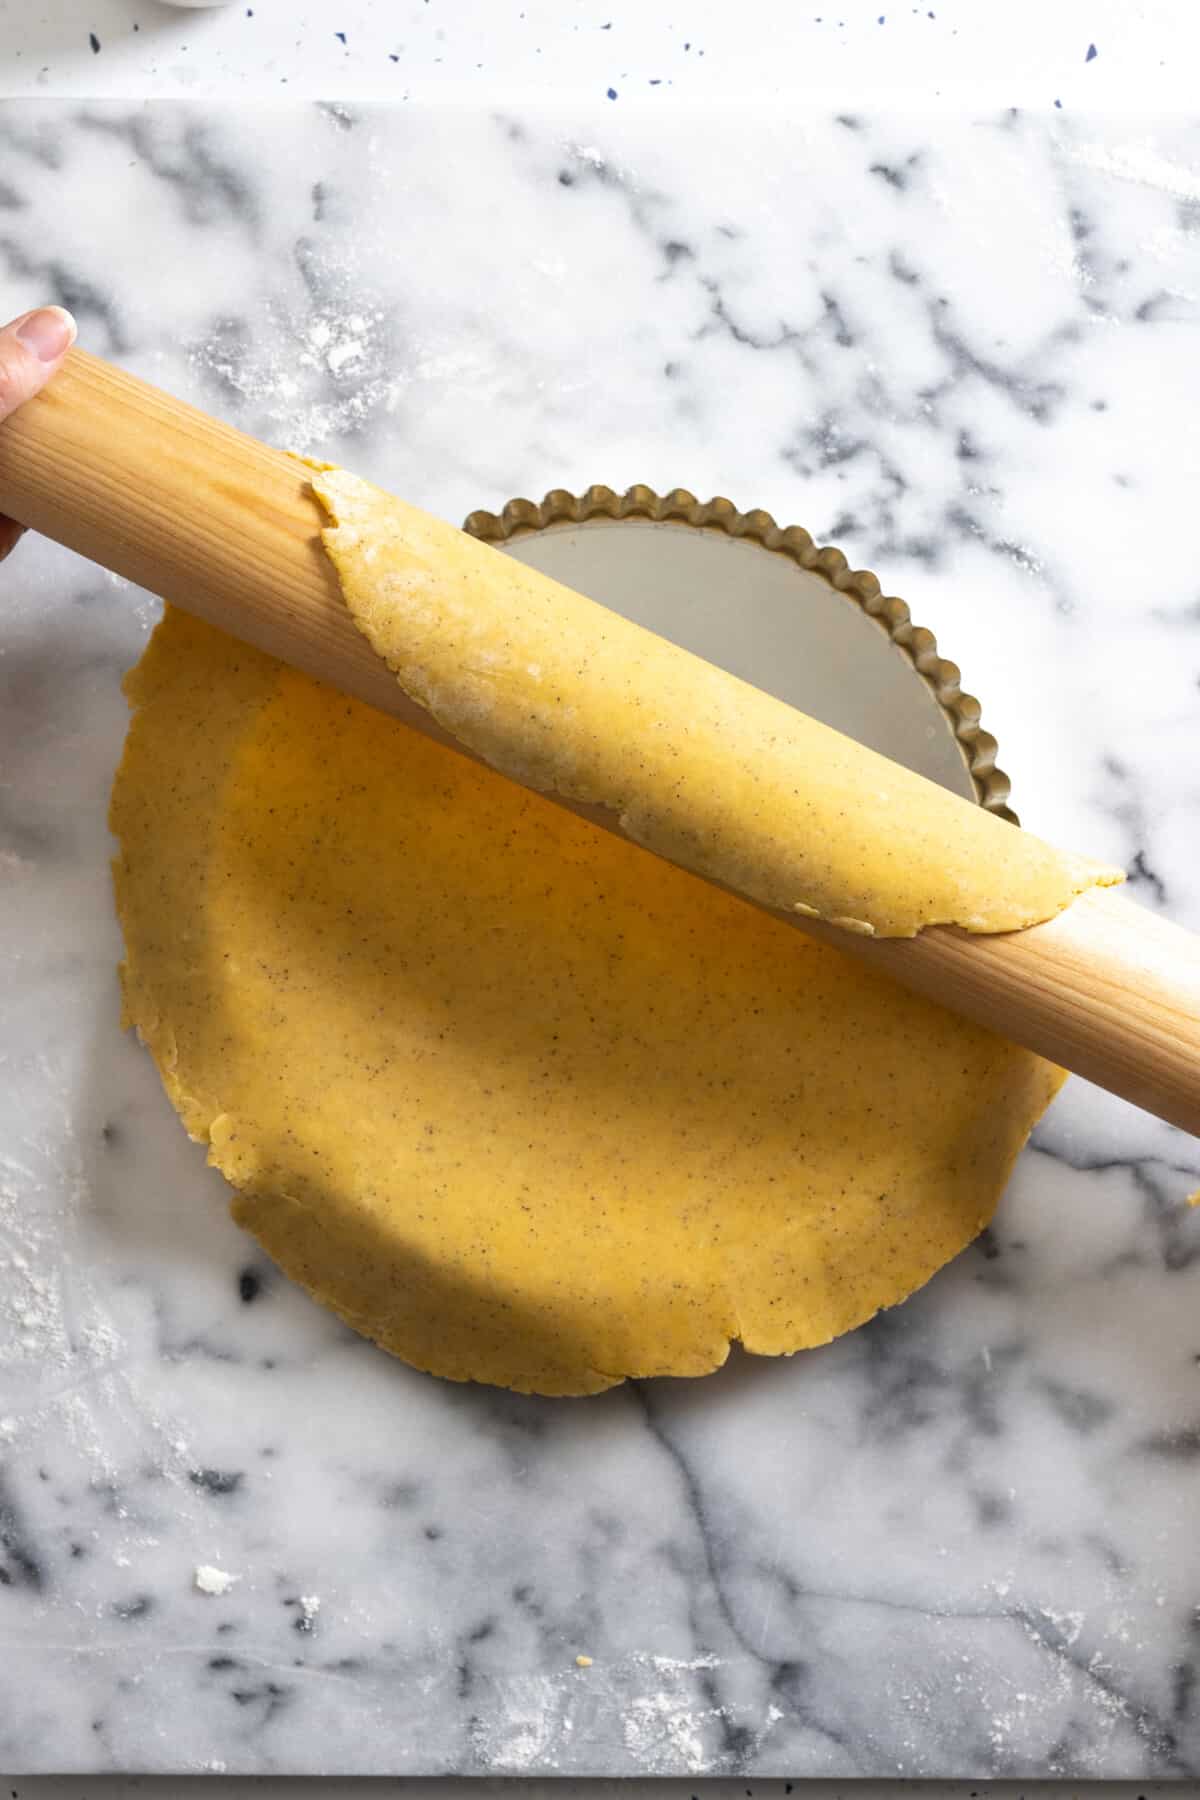
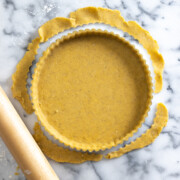
Rolling the tart dough gives you a nice, even base which looks super professional and fancy. It's similar to a pie dough but, the egg yolk makes it a bit more pliable and less crumbly than pie dough. This Savory Tart Dough rolls out evenly and luxuriously and it's pretty easy to work with and transfer into your pan.
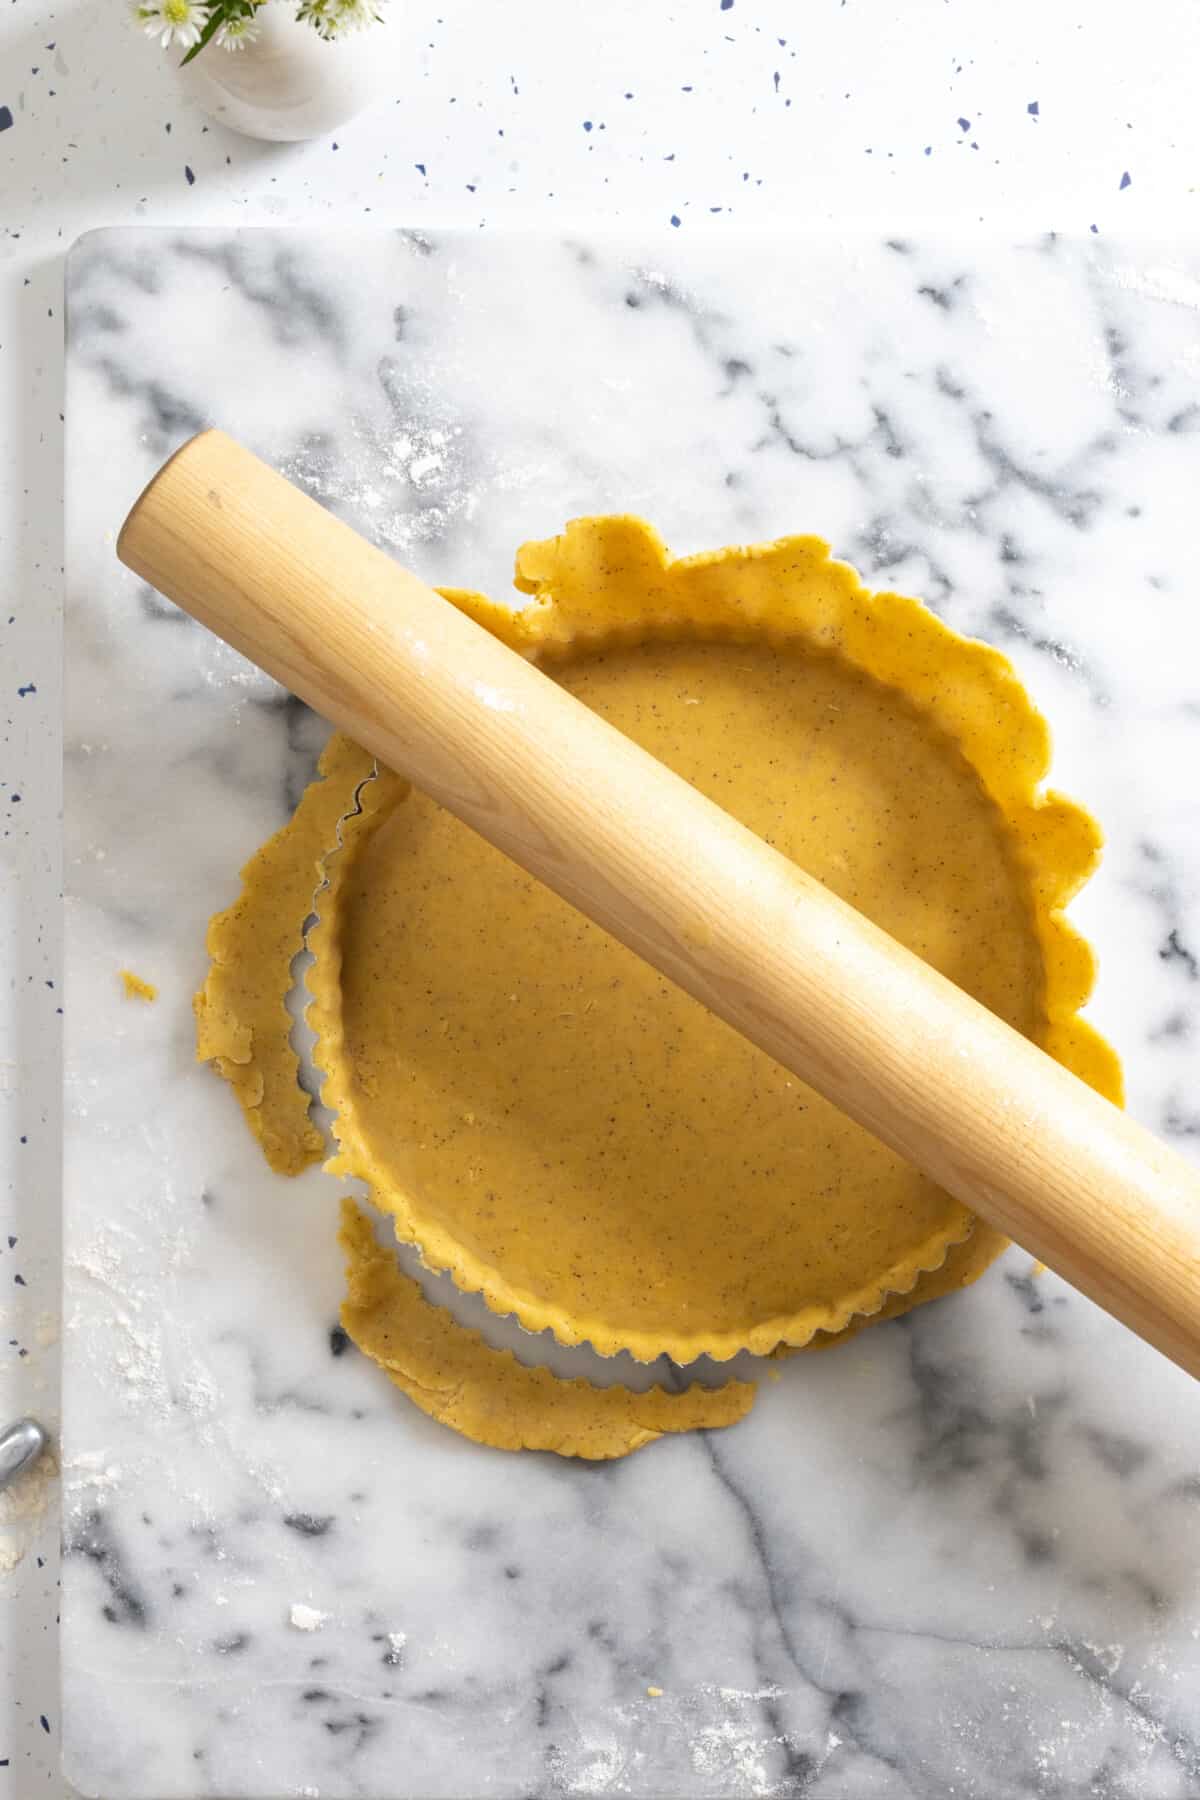
Plus, the little rolling the pin over the top edge to make an even fluted crust trick is one of the most satisfying techniques in baking, IMO.
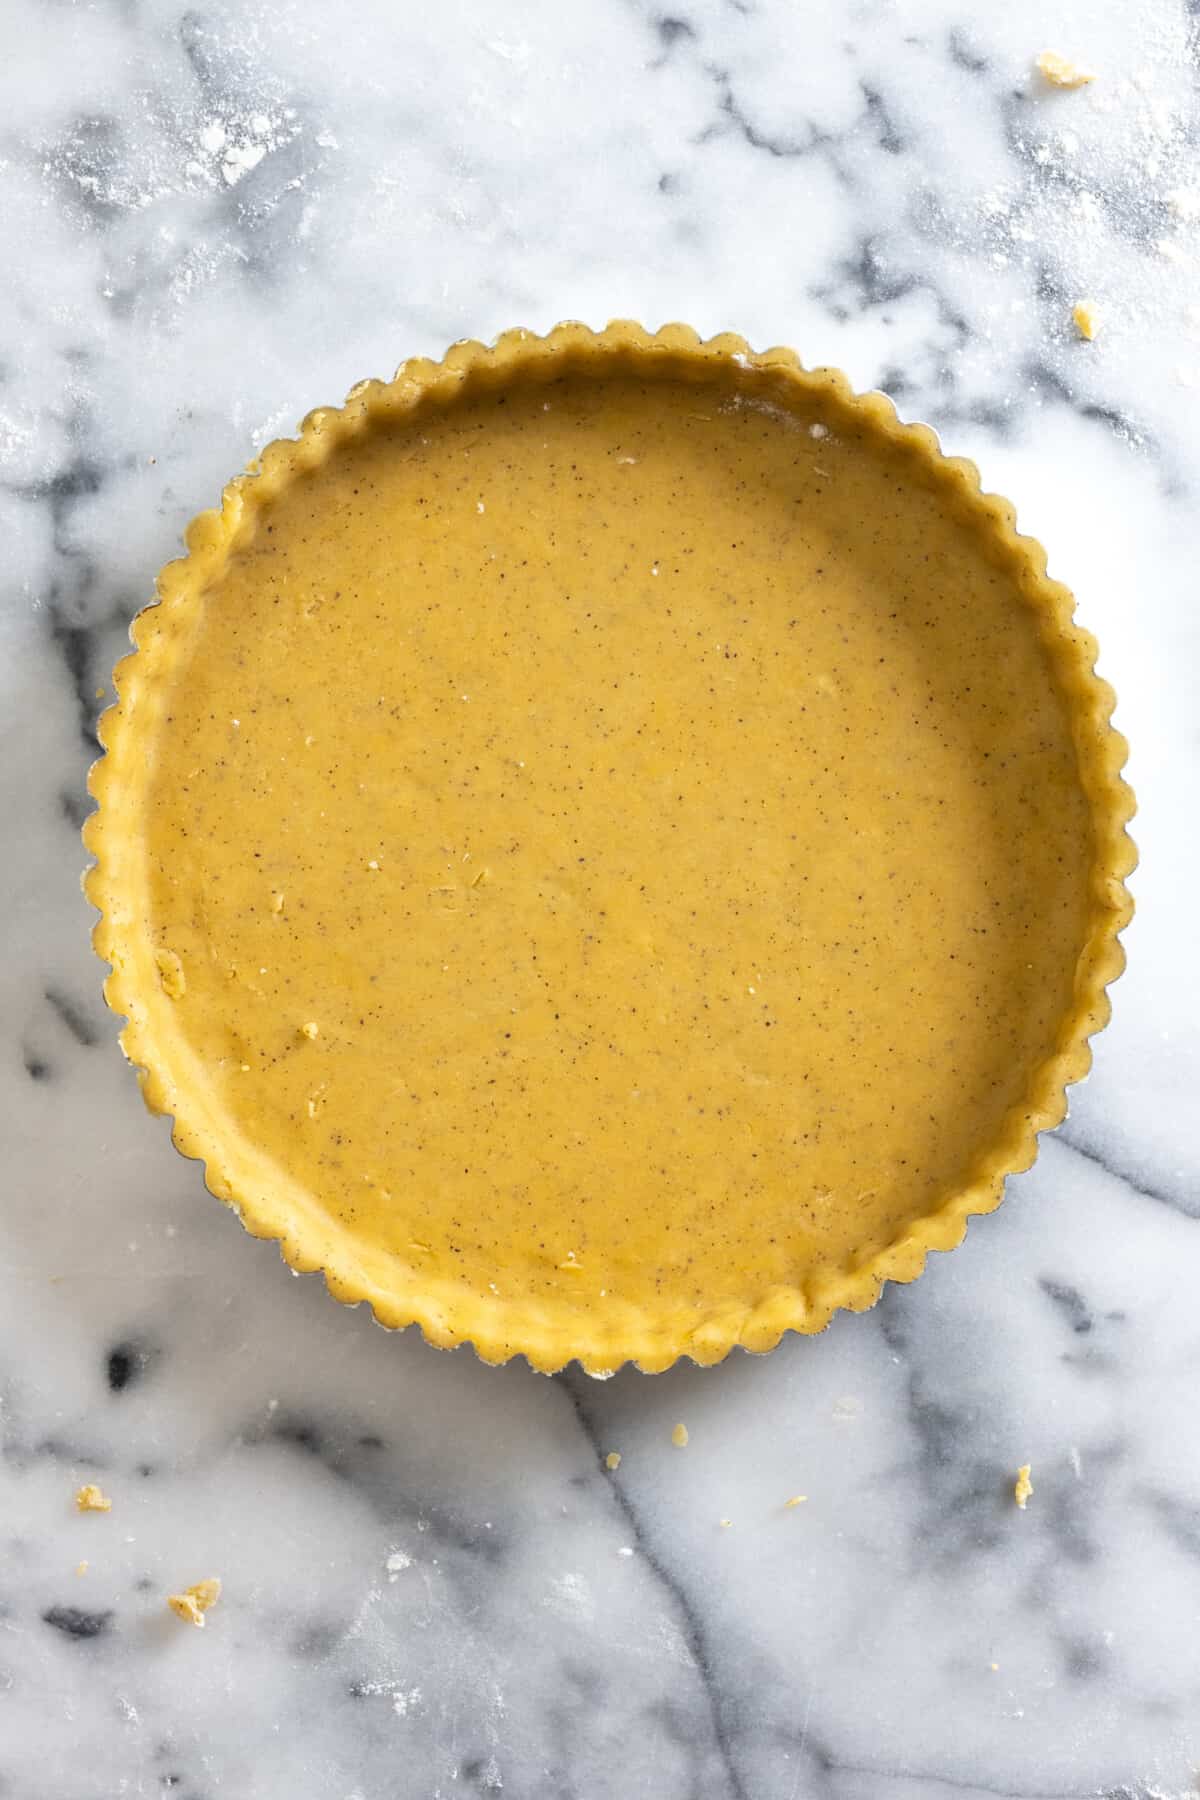
Press-in
Instead of rolling the tart dough and transferring it into a pan. Alternatively, press the crumbly dough directly into a tart pan. No need to gather the dough into a disk. Simply mix the dough together and sprinkle it into the tart pan. Then evenly press the dough up the sides and over the bottom of the pan. Once it's sufficiently pressed, the dough will chill in the tart pan. Easy.
The press-in option is a more rustic approach but it tastes the same. Honestly isn't that all that matters? Anyway, you've got some flexibility in your tart crust shaping.

How to blind bake tart dough
Blind baking may seem intimidating but it's really quite simple, I promise. Consider it pre-baking your pie or tart shells before they are filled. This process is used for recipes like pumpkin or pecan pies, cream pies and most tarts or quiches. By blind baking a shell, you are creating a base and giving the shell it's structure and shape.
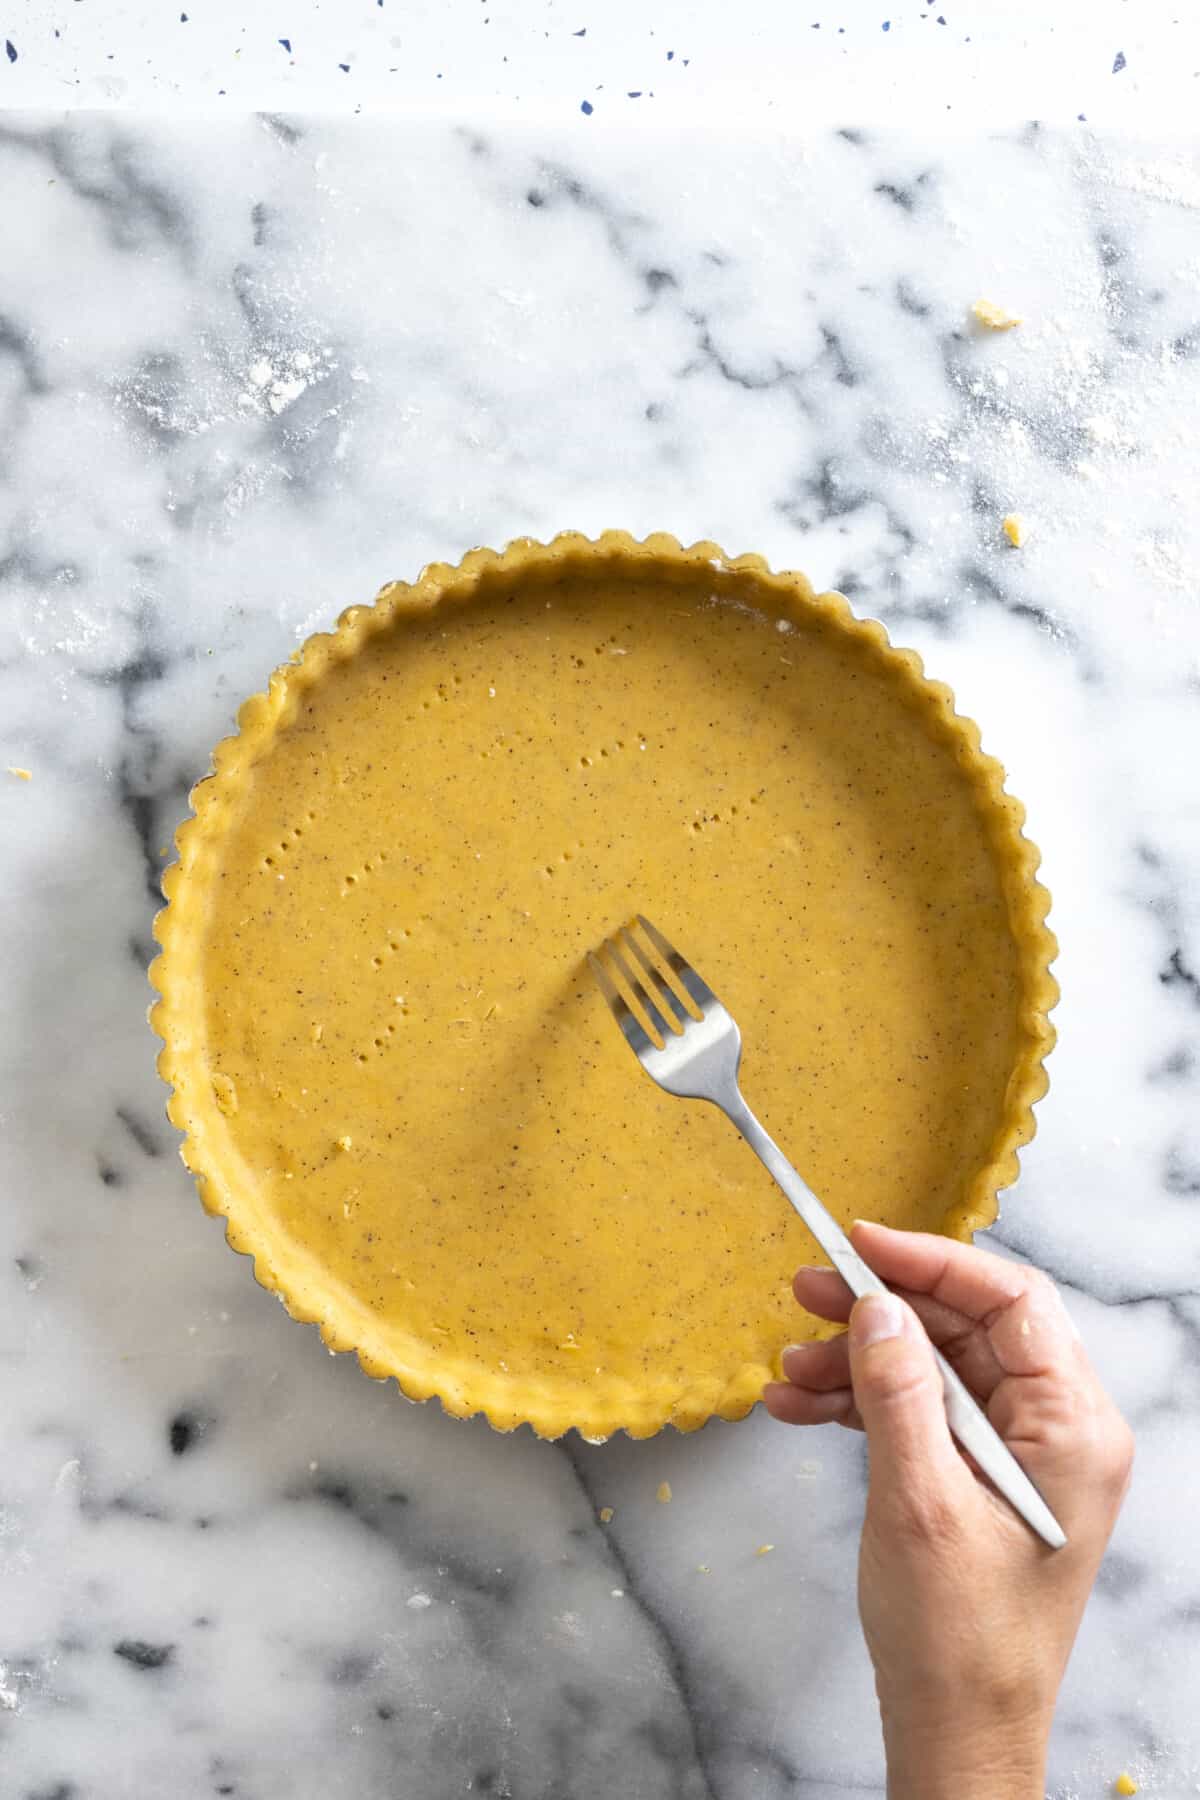
Once the tart dough shell is shaped in the pan, it gets docked, aka pricked, with a fork. This step creates little holes for the stream to release as the tart shell bakes. Preventing it from puffing up like a balloon as it bakes. Weighing the dough down with weights helps the tart shell keep its shape and prevent shrinkage while baking.
Use pie weights, dry beans or dry uncooked rice for blind baking tart shells
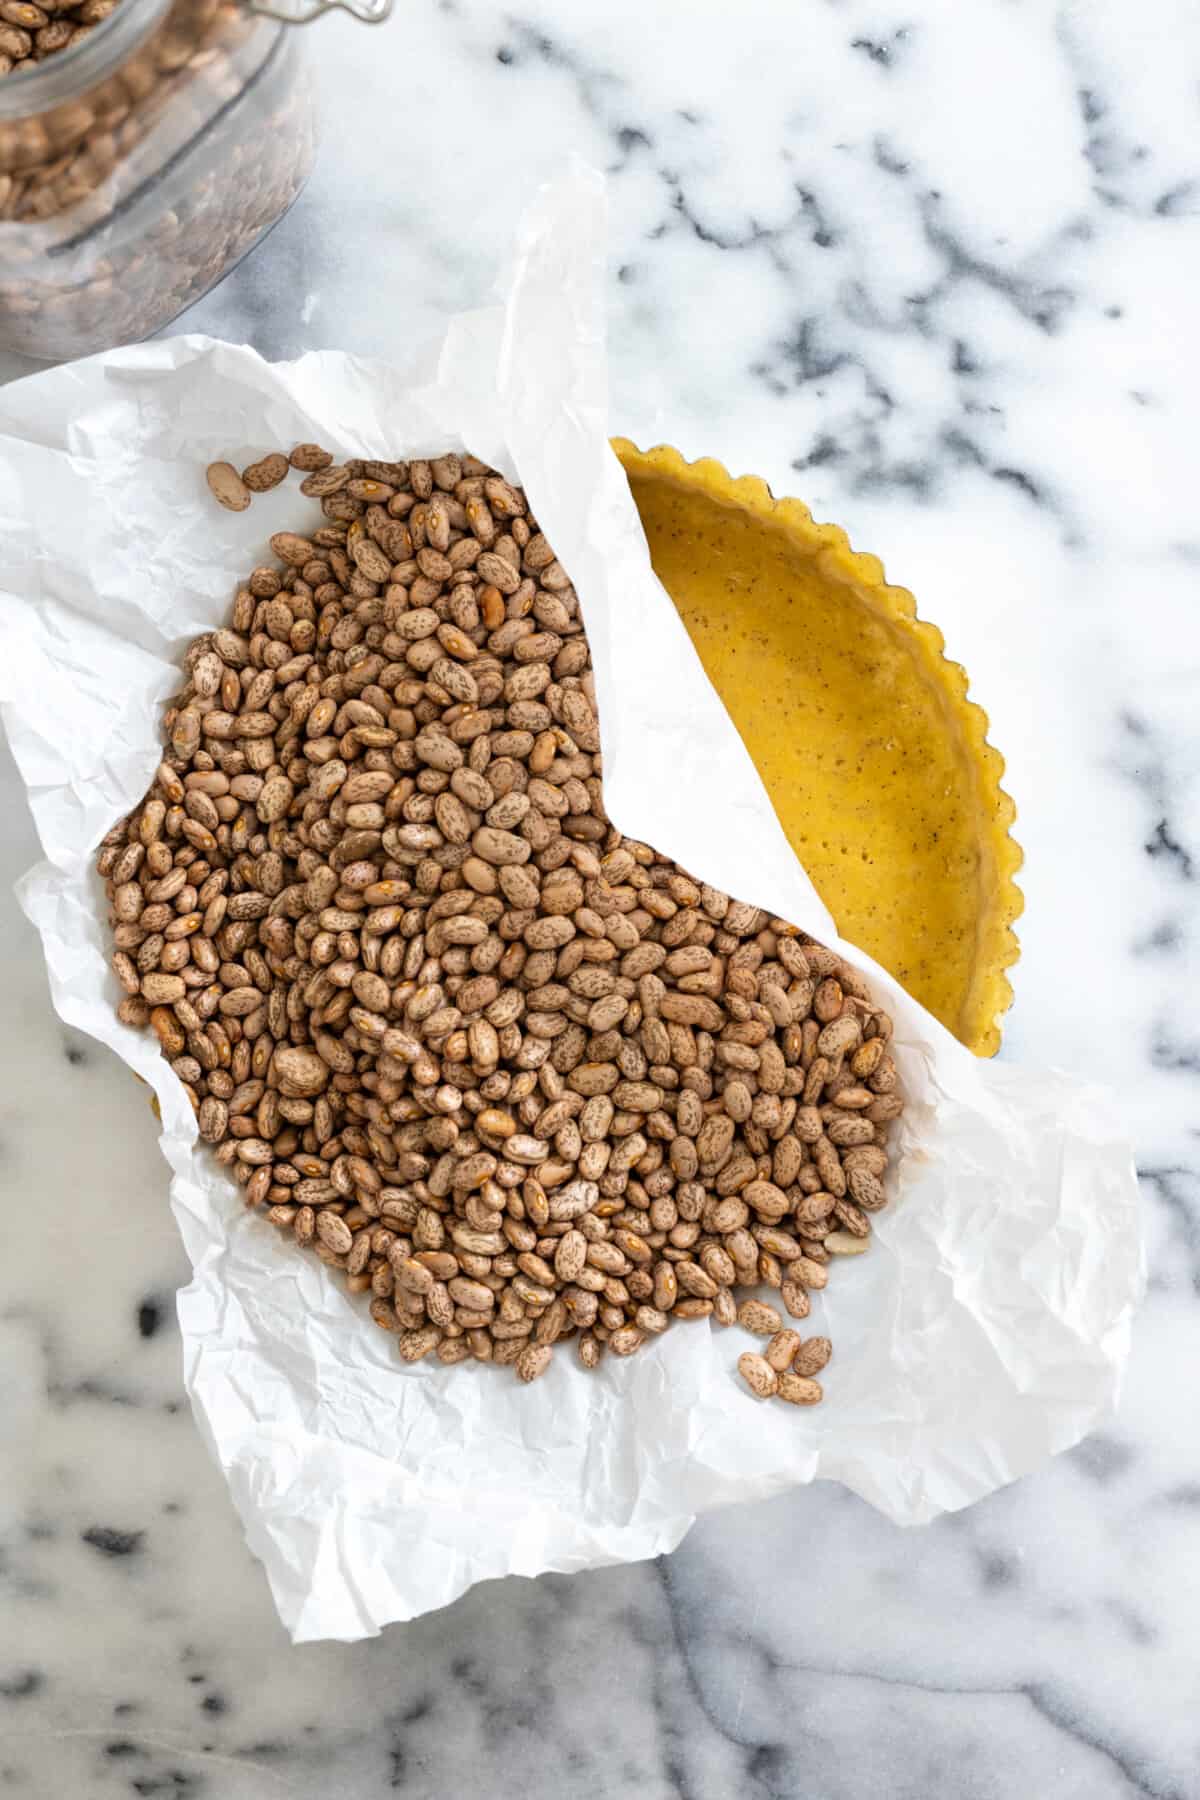
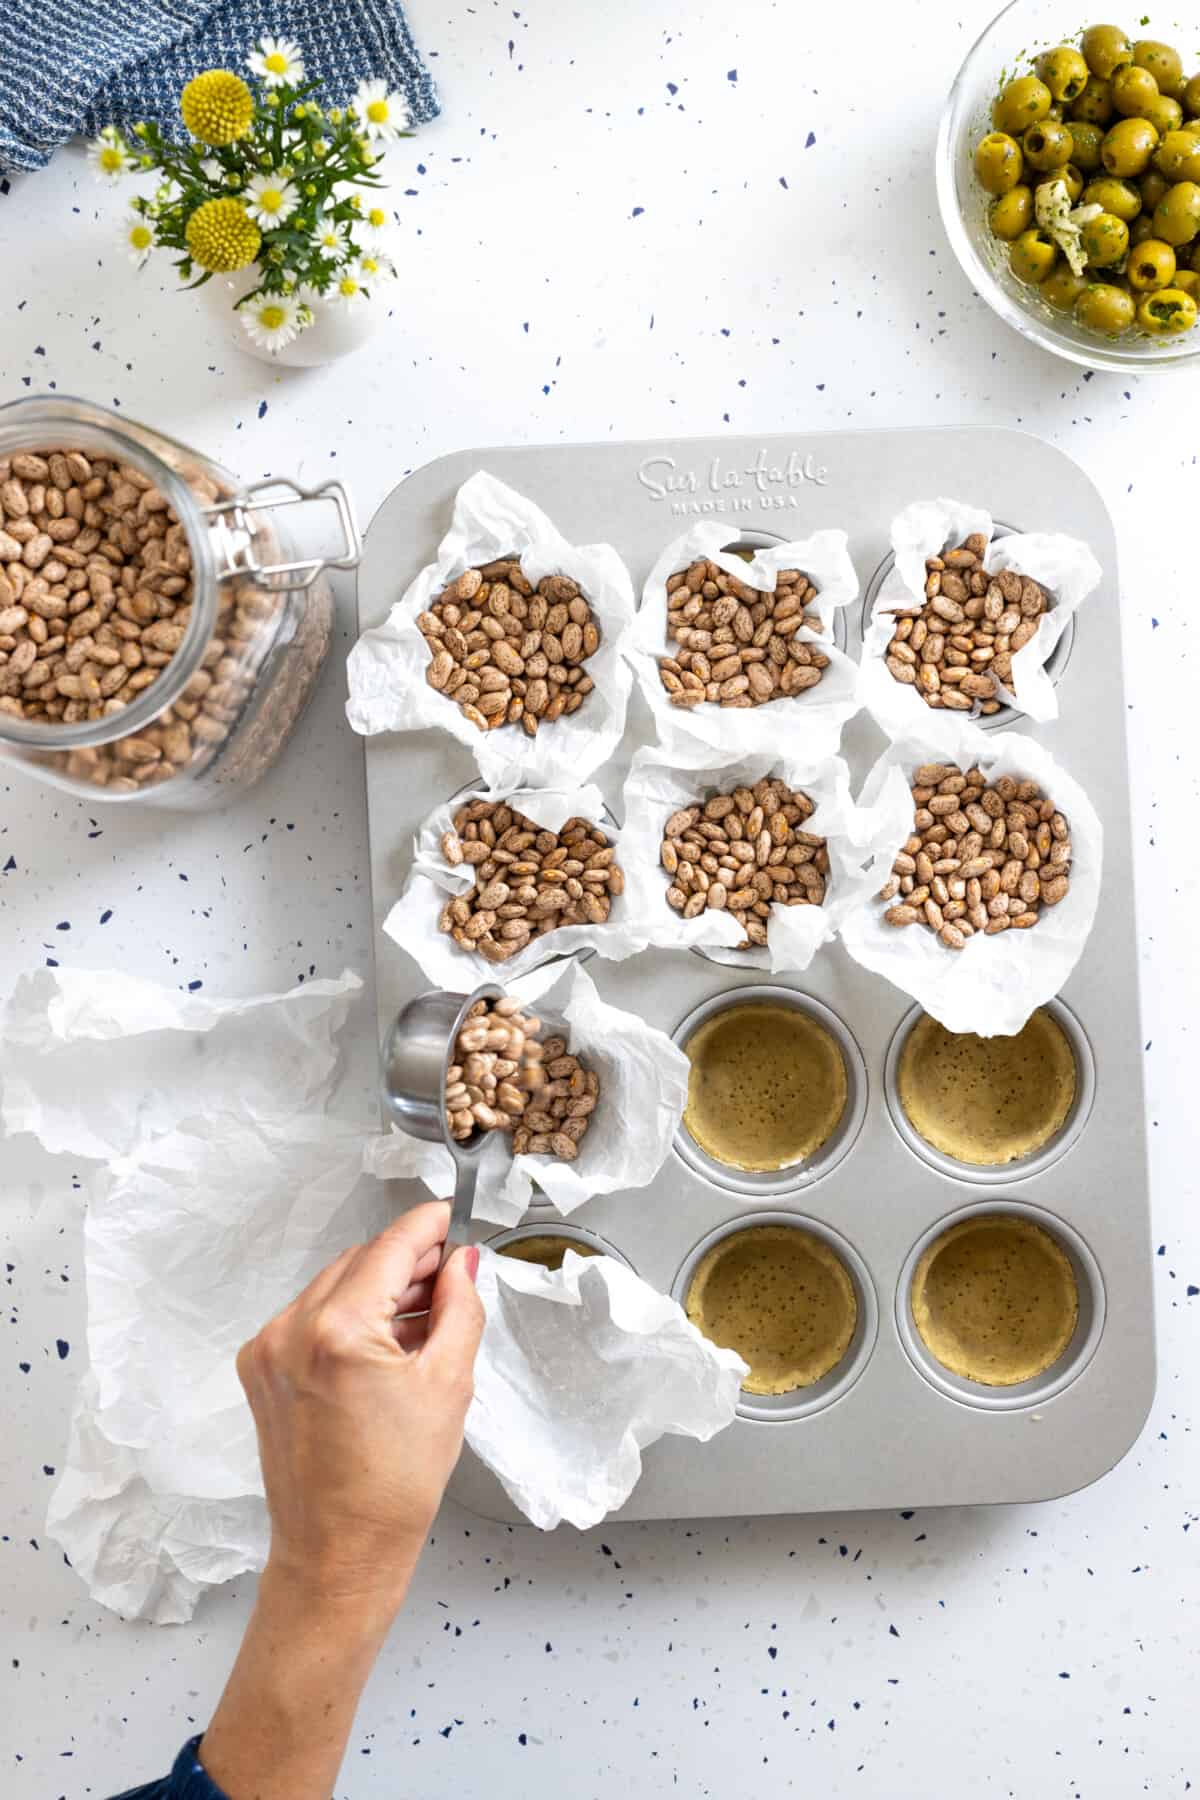
- Line the tart shell with either parchment paper or foil. It should be larger than the shell, so after the bake you can use the paper or foil to lift the weights from the shell. I like to crinkle up the parchment or foil so it will nestle nicely into the shell.
- Fill the lined tart shell with pie weights, dry beans or uncooked rice. The weights should evenly distributed and fill the shell entirely.
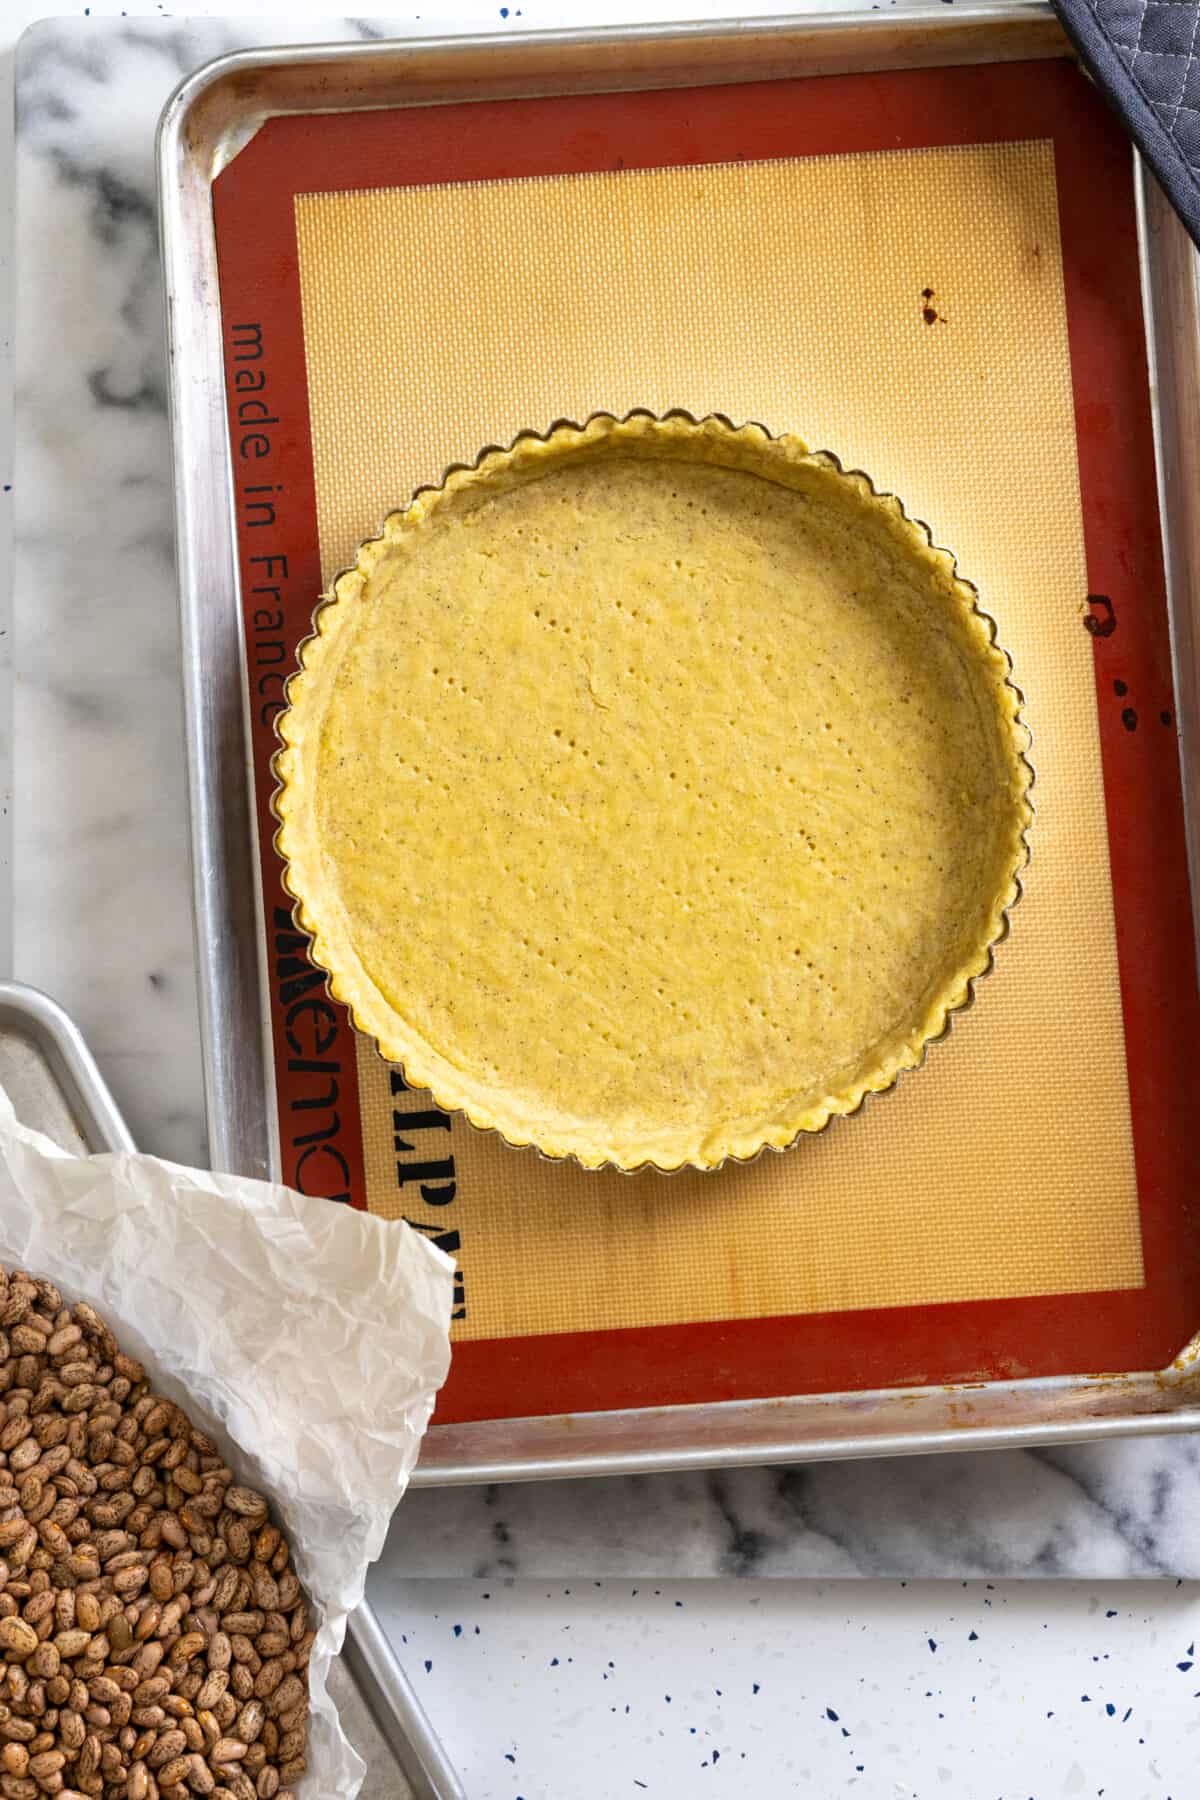
- This is a 2 step baking process. First bake the lined and weighted shell until it starts to turn golden and the liner no longer sticks to the dough. This may take anywhere from 15-20 minutes depending on what size tart shell you are baking.
- Then, remove the shell from the oven and carefully grab the parchment or foil liner to steadily remove the weights. Place the tart shell back in the oven to finish baking.
- Once baked, if your tart crust has puffed up at all, don't fret. Just use a fork to gently poke it so the air can release. If it's still puffy, you can use the bottom of a measuring cup to lightly smooth it out.
Tarts can be made in all shapes and sizes. This Savory Tart Dough can also be used for tartlets using the same methods. When blind baking the tartlets, just individually line and fill each muffin cup.
This is a thorough and deep dive into every step of mixing and baking a basic tart shell. All of this detail is meant to empower and educate you. So your tart shells come out of the oven looking like a million bucks, ready to be filled with whatever savory filling you've dreamt up!
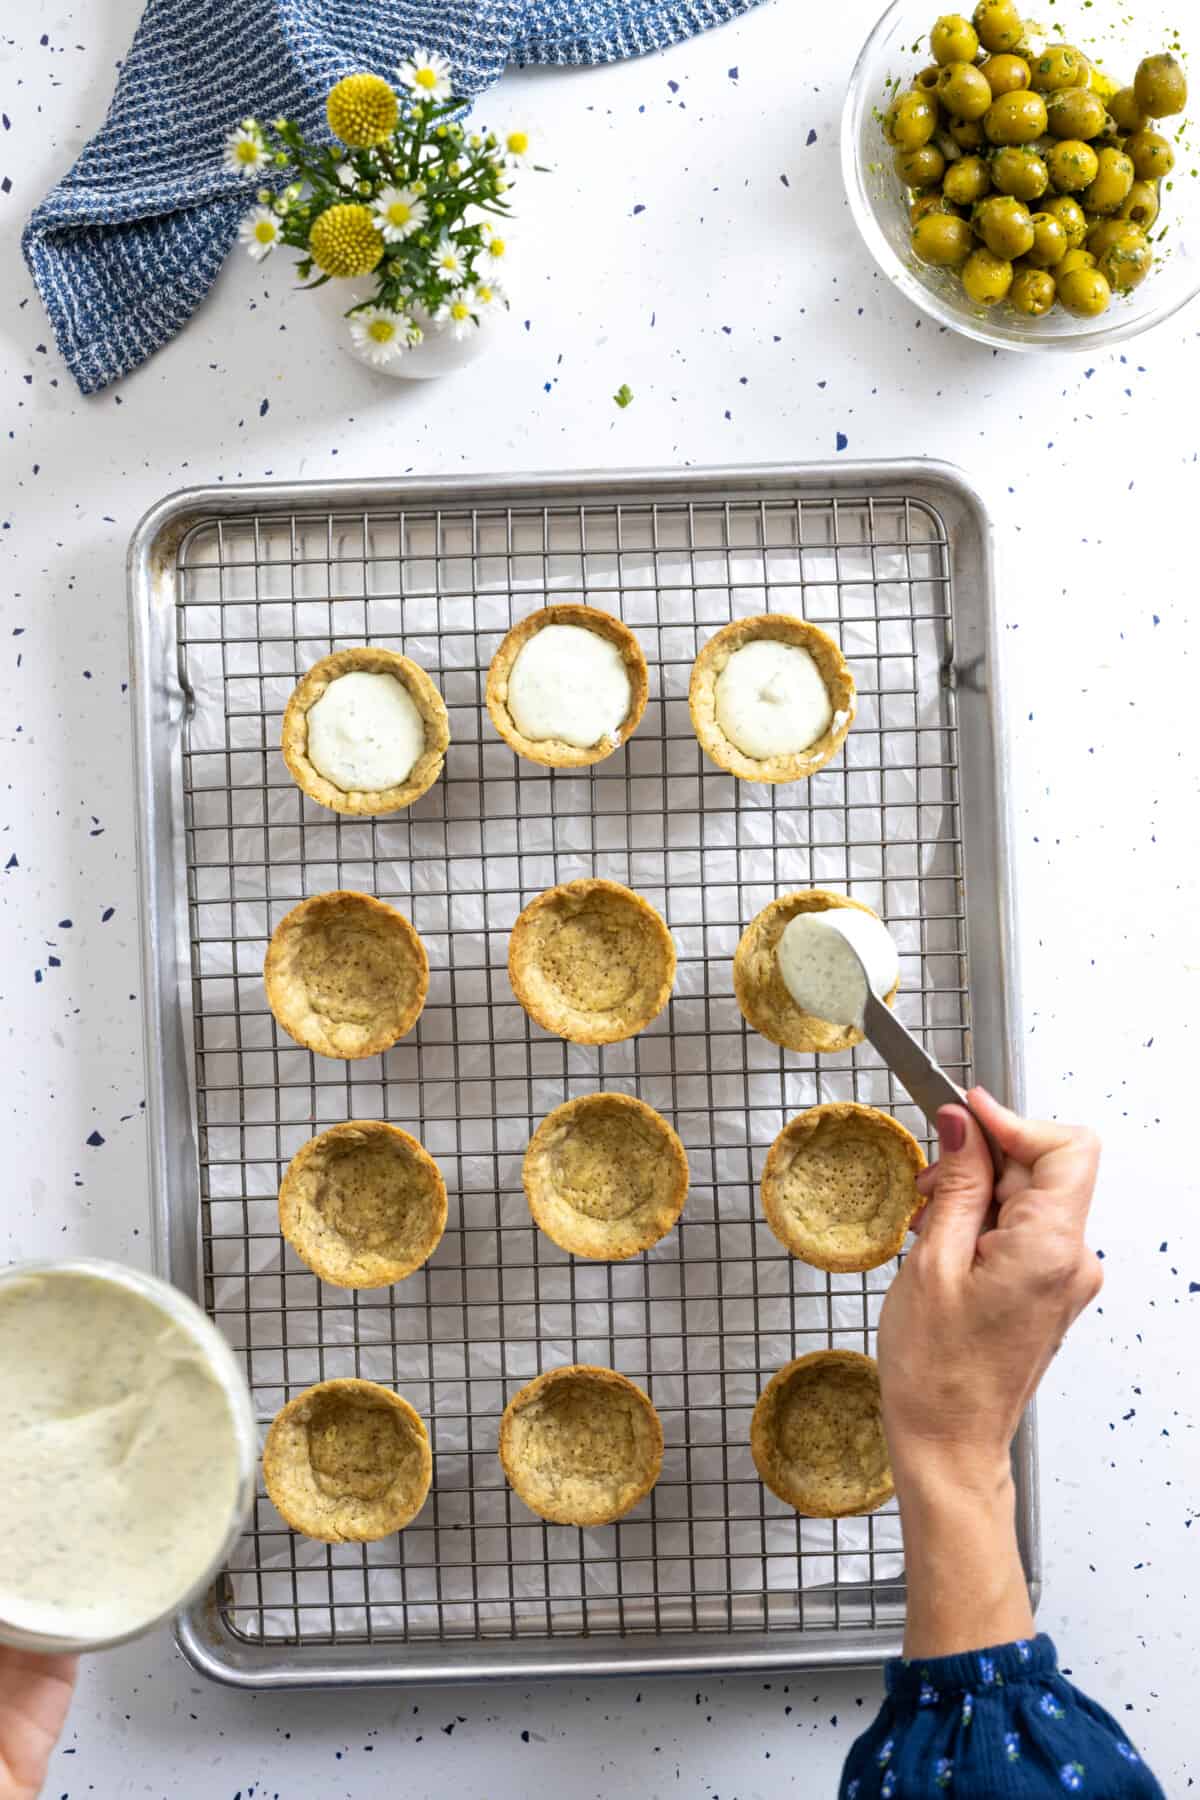
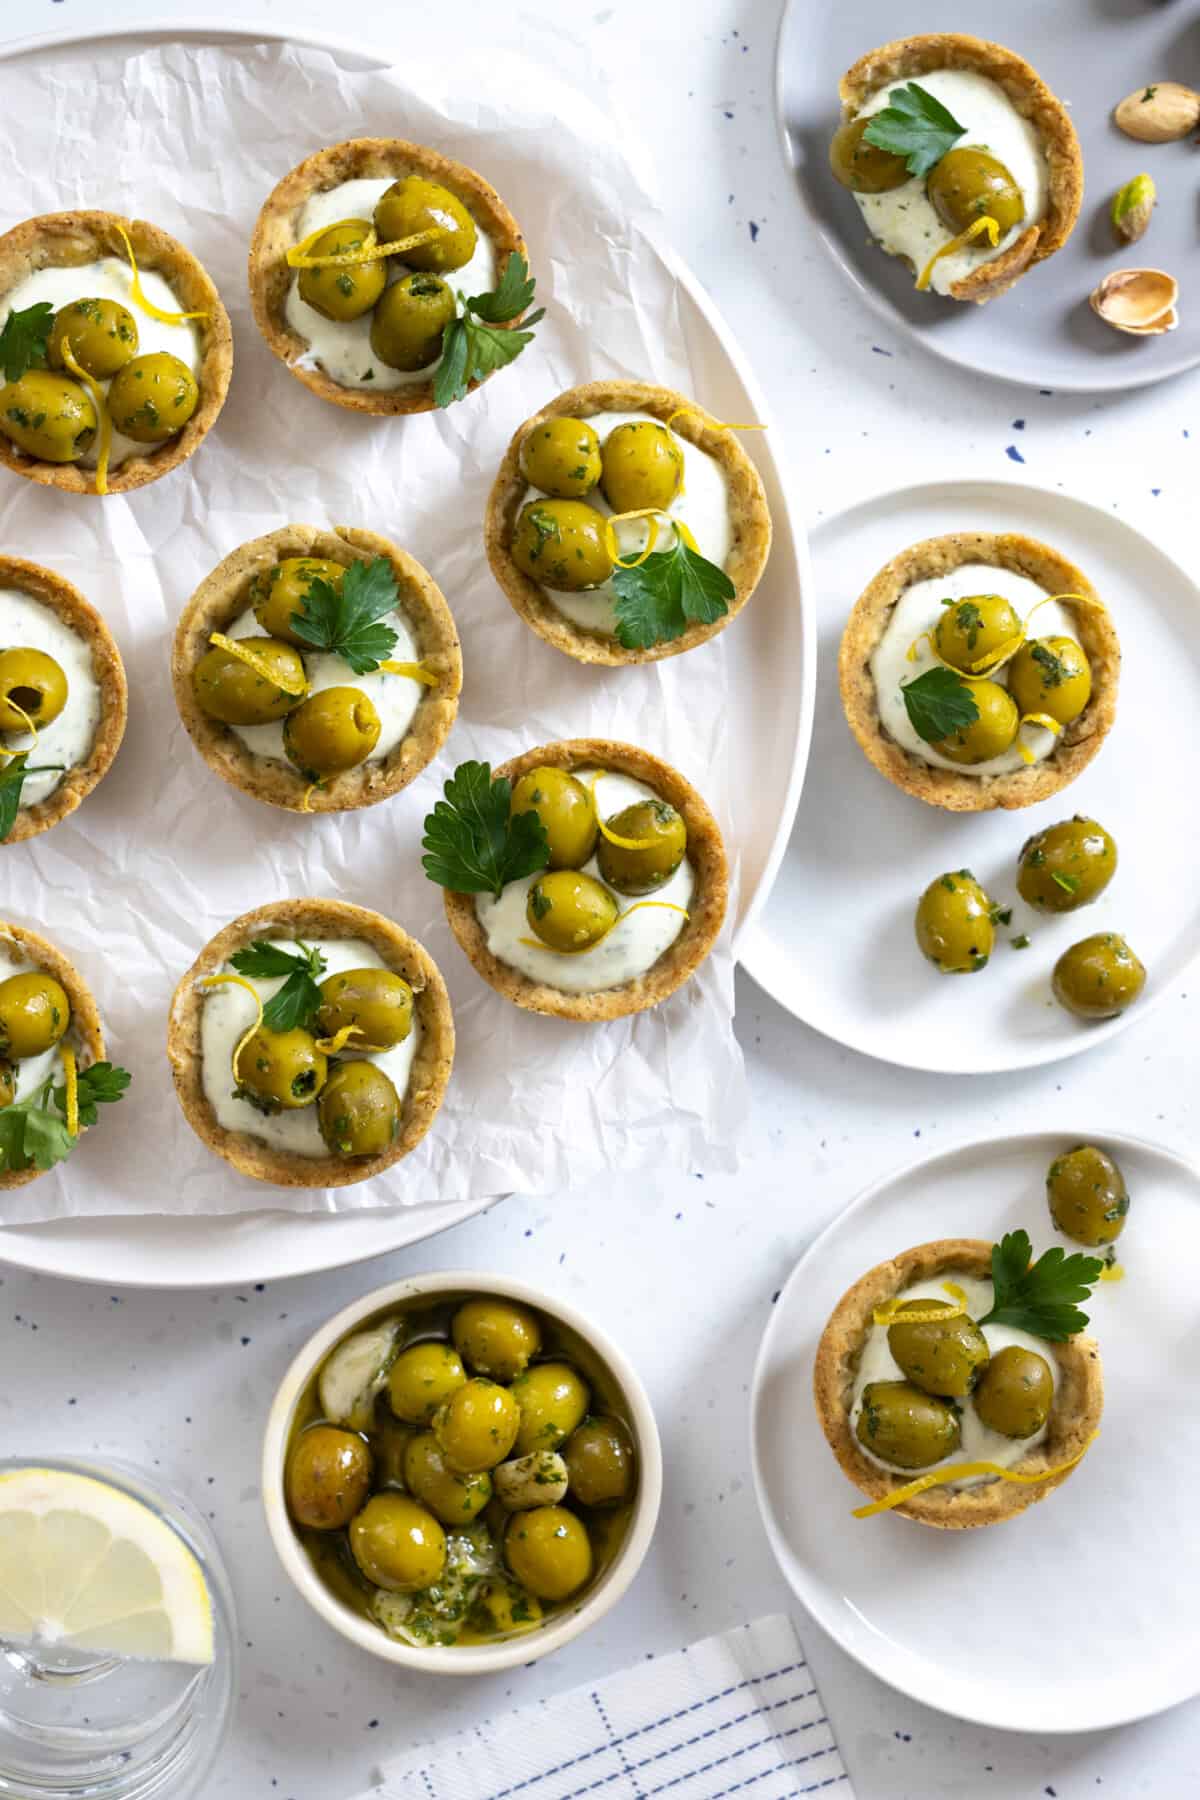
This Savory Tart Dough recipe is ready to serve as a vessel to your savory baking adventures. Try it with my Herby Olive Goat Cheese Tartlet recipe. This is a great shareable recipe to make ahead and bring to parties. It's a balanced act of tangy and creamy herb and lemon flavored filling, topped with zesty herbed green olives all snuggled into mini, individual sized tartlet shells.
Whatever you're baking up in your mind, my Savory Tart Dough is there for you. Enjoy the savory side of baking, friends. I'm glad you're here with me.
PrintRecipe
Savory Tart Dough
- Total Time: 1 hour 30 minutes
- Yield: One 9 ½" round tart shell 1x
Description
This simple Savory Tart Dough bakes up flaky and crisp with just enough salt and a hint or peppery warmth to highlight all kinds of savory tart fillings. It's a versatile tart dough that works for everything from classic 9" tarts to mini tartlets or even as the base of a quiche.
Ingredients
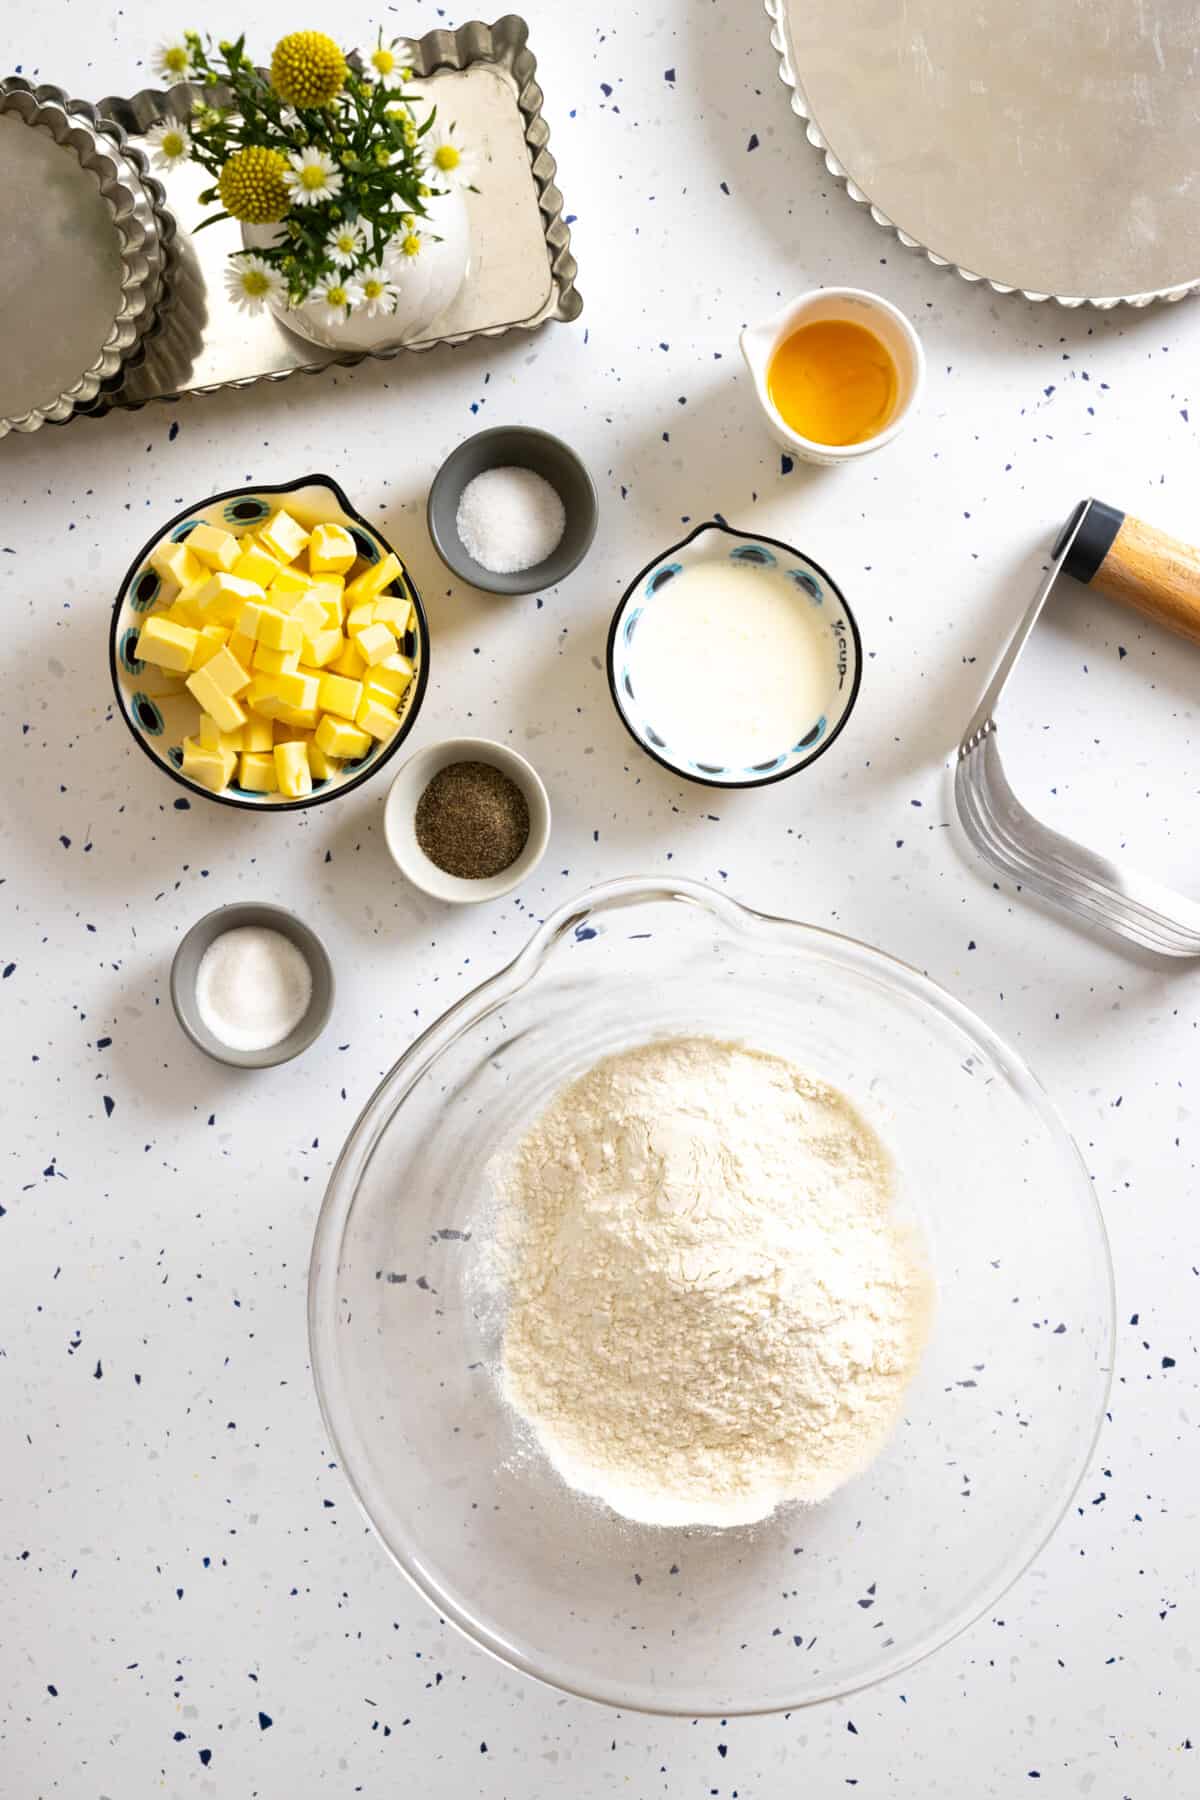
1 egg yolk
2 tablespoons heavy cream or whole milk
1 ¼ cup all purpose flour
1 teaspoon granulated sugar
1 teaspoon fine sea salt
¾ teaspoon freshly ground pepper
½ cup unsalted butter, cold and cut into ½" cubes
Instructions
Mixing Savory Tart Dough
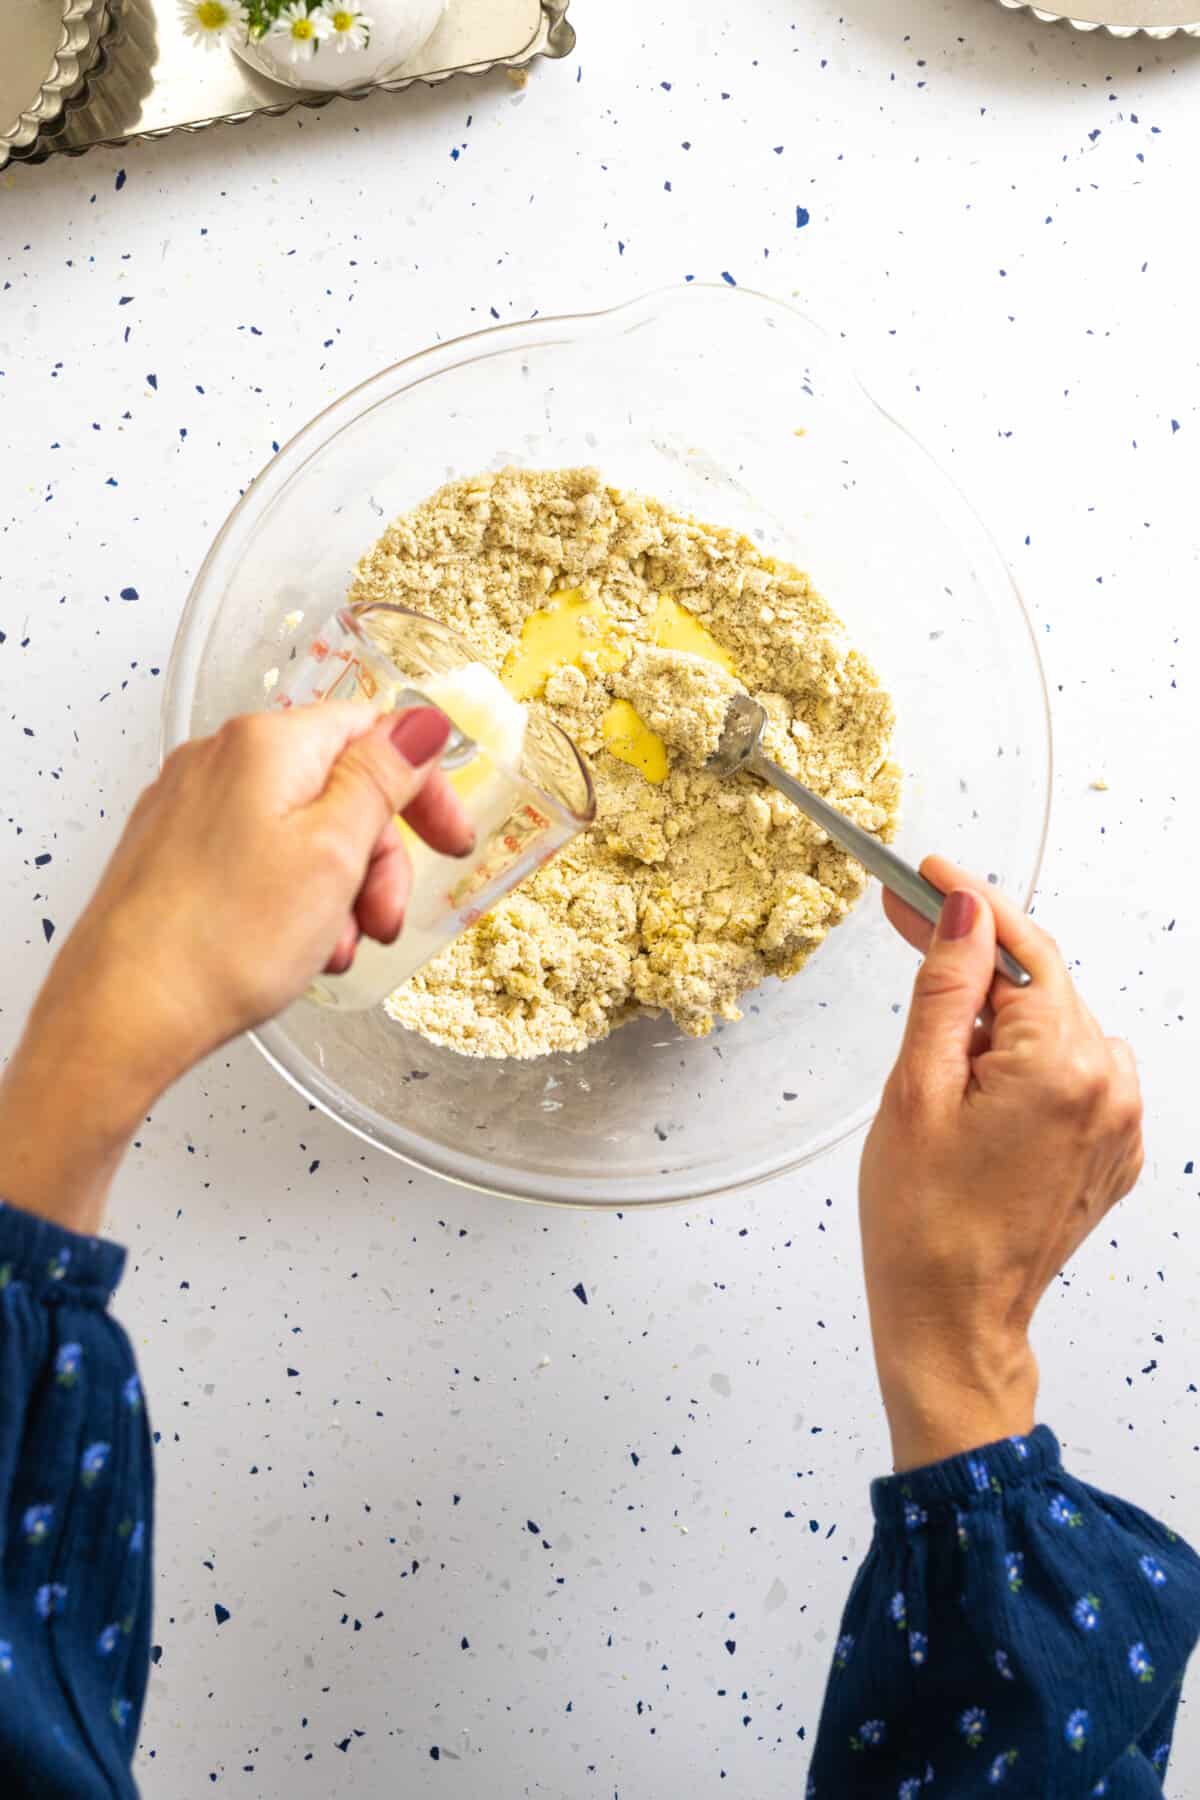
In a small bowl, whisk together the egg yolk and heavy cream, set aside.
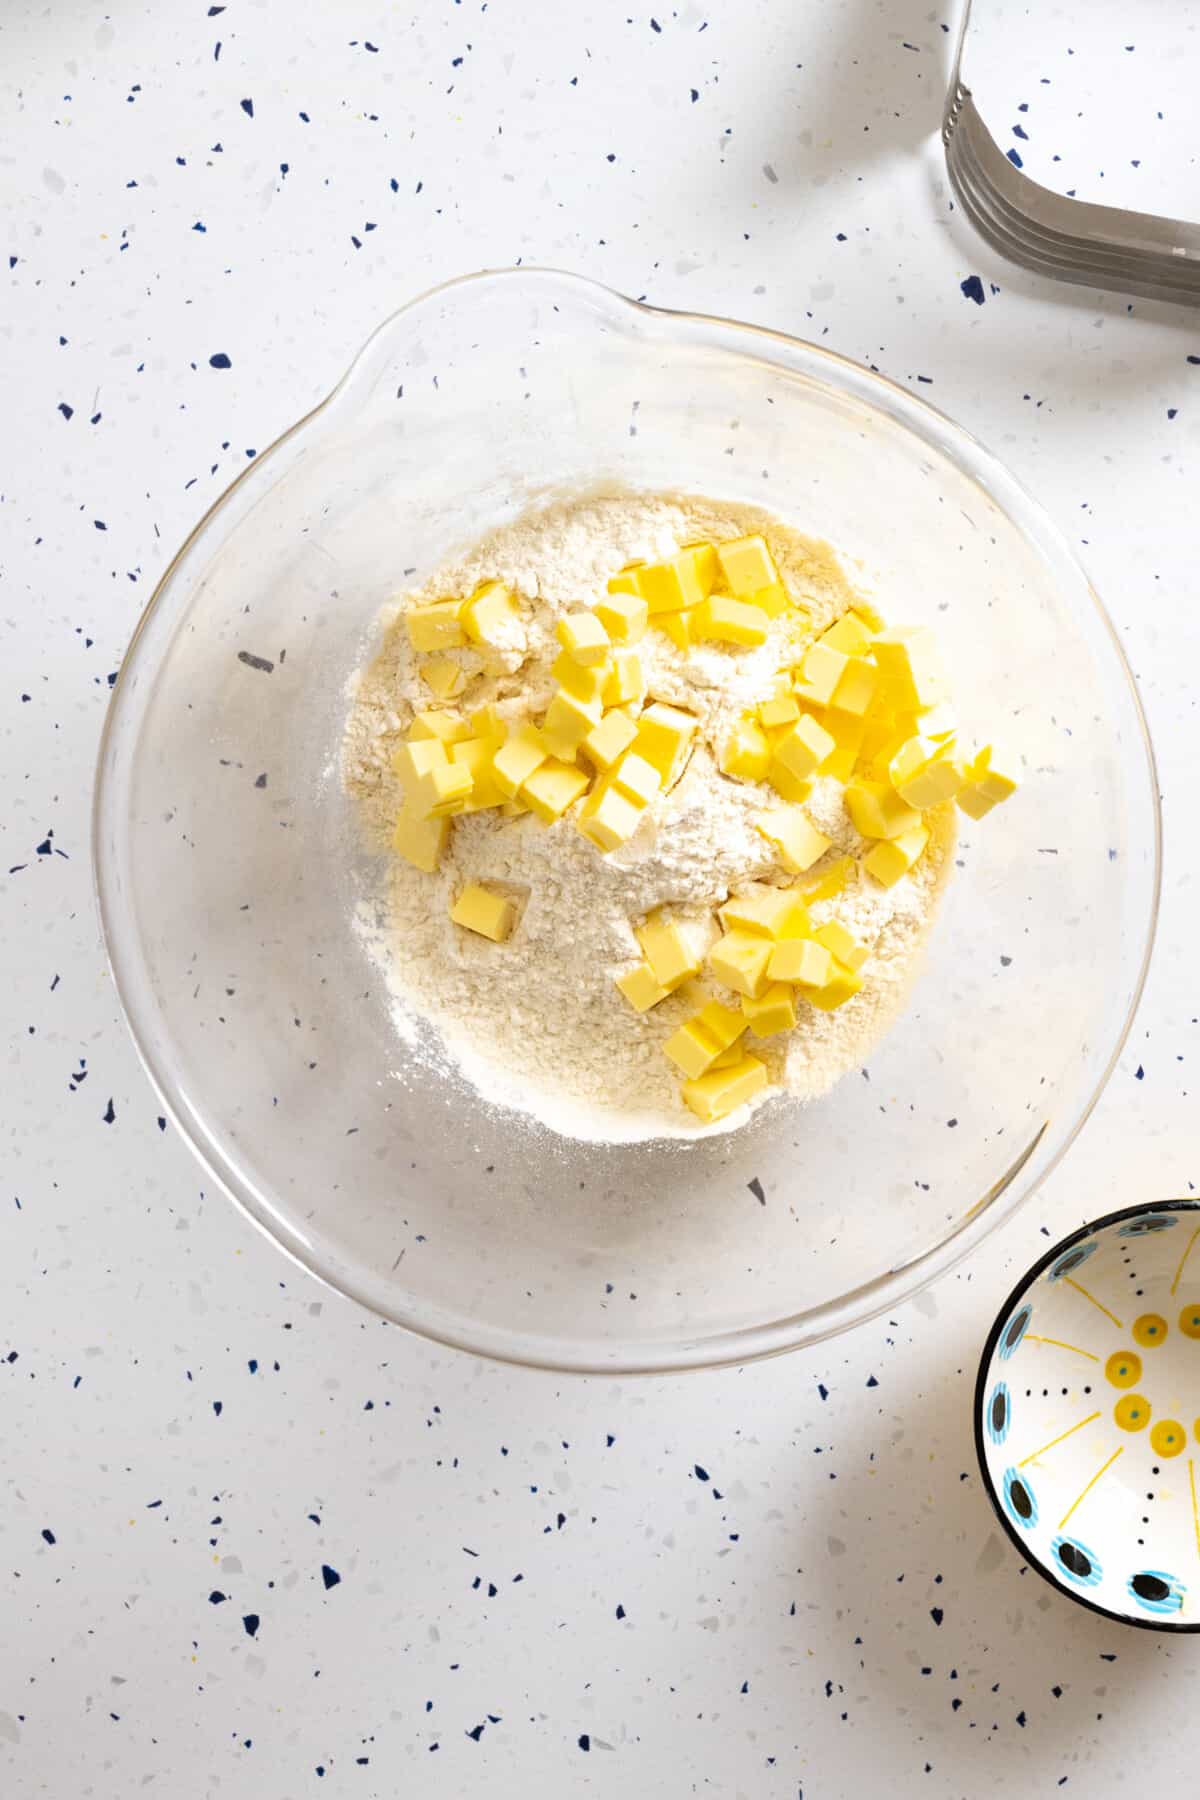
In a large mixing bowl, whisk together the flour, sugar, salt and pepper.
Use either a pastry blender, 2 butter knives or pulse in a food processor to cut the butter into the flour mixture. Blend until the texture looks like coarse cornmeal. The butter chunks shouldn't be larger than the size of peas. But don't over mix, you want some texture here. Alternatively, you can squish the butter into the dry ingredients with your hands. Just be sure to move quickly so the butter doesn't melt.
Add the egg mixture and blend with a fork until the dough just holds together. It should be shaggy. To test the hydration of the dough, gently squeeze small handful. It should hold together but not be sticky. If using a food processor, add the egg mixture and pulse a few times until the dough just starts pulling together into a ball.
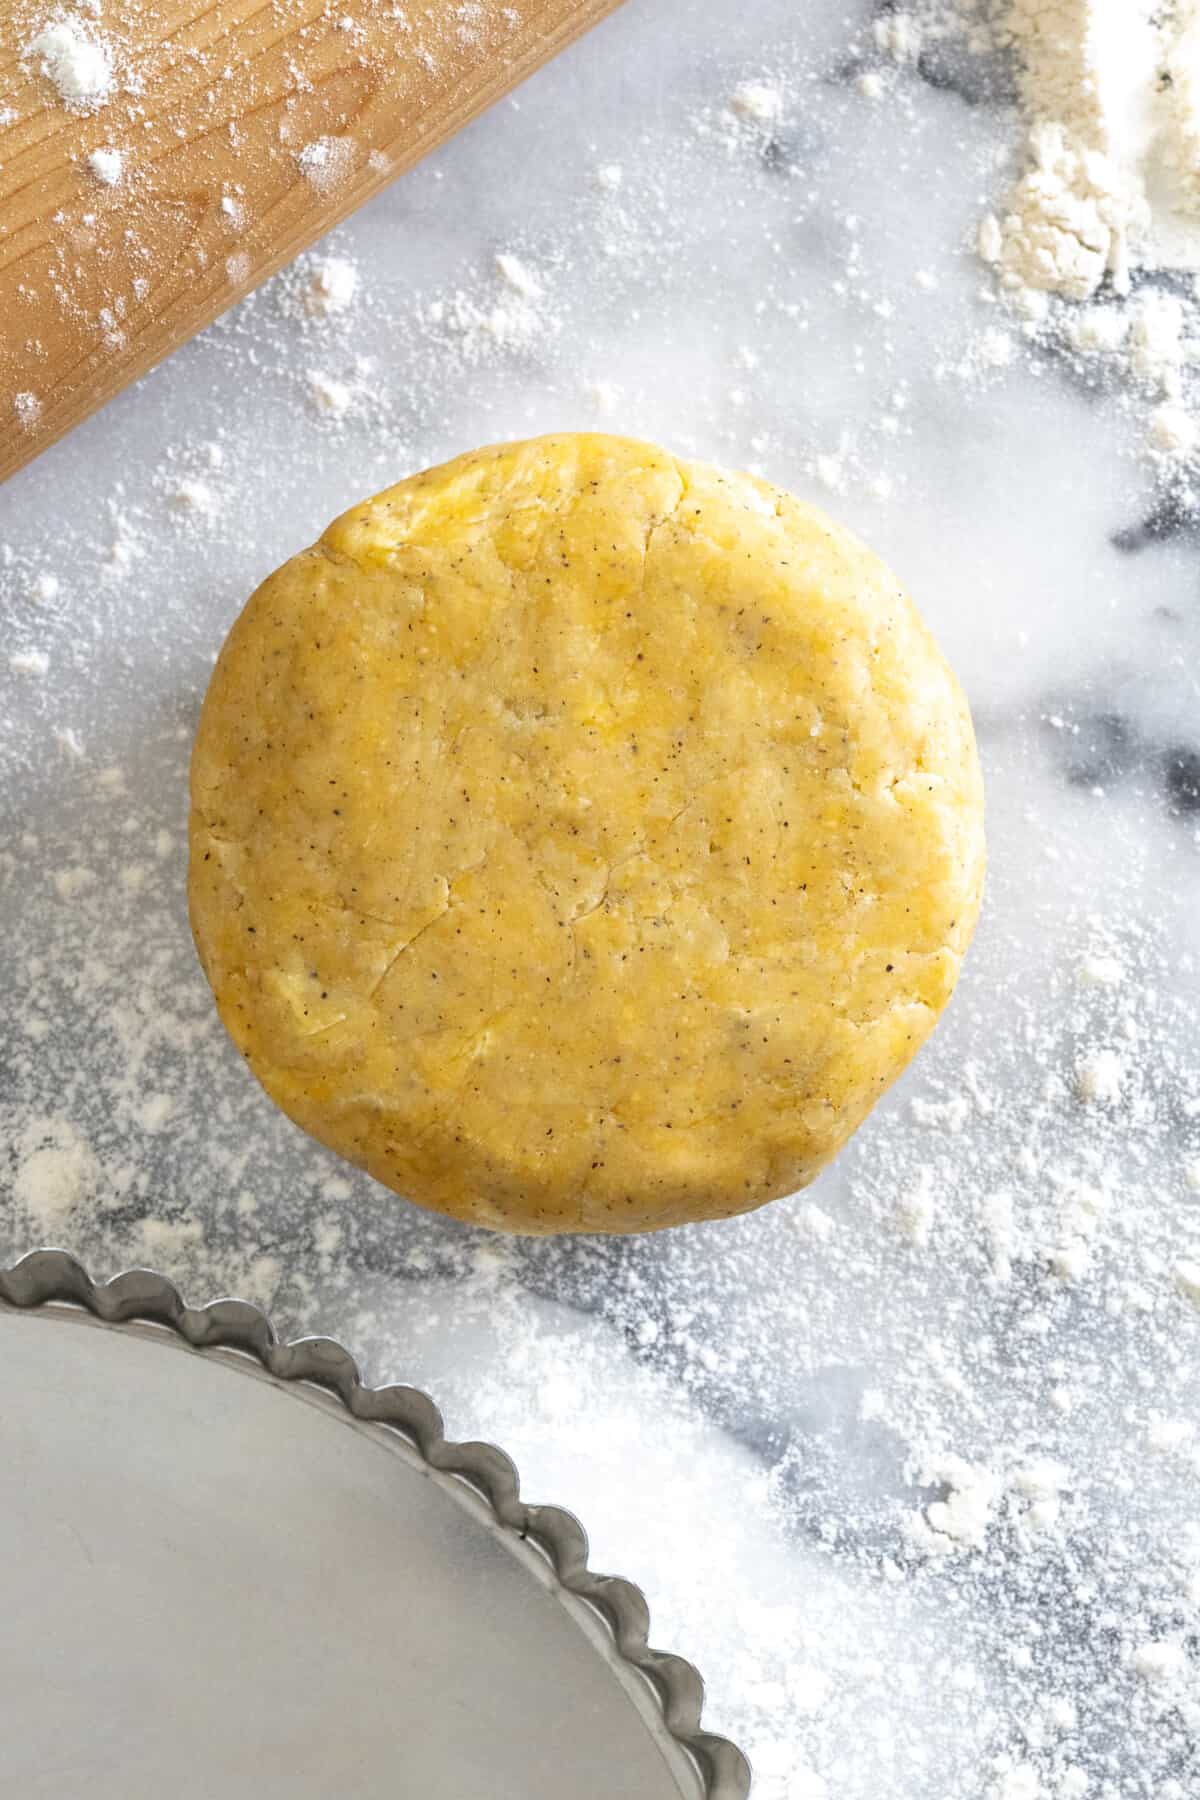
Transfer the dough to a lightly floured work surface, gather the dough into a ball and pat to flatten into a disk. Wrap in plastic wrap and refrigerate at least 30 minutes, preferably an hour, before shaping the tart shell or shells. If not using right away, the dough may be frozen for up 3 months, if wrapped tightly.
Shaping Tart Shell
To roll out, place dough on a lightly floured surface and flatten the disk with a few taps of the rolling pin. Begin by rolling out the dough from the center outward, then lift the dough and give it a quarter turn. Repeat and continue rolling and rotating. Lightly dust the dough with flour as needed to prevent sticking. Roll until the dough is about 1"-2" wider in diameter than your tart pan and between ¼"- ⅛" thick.
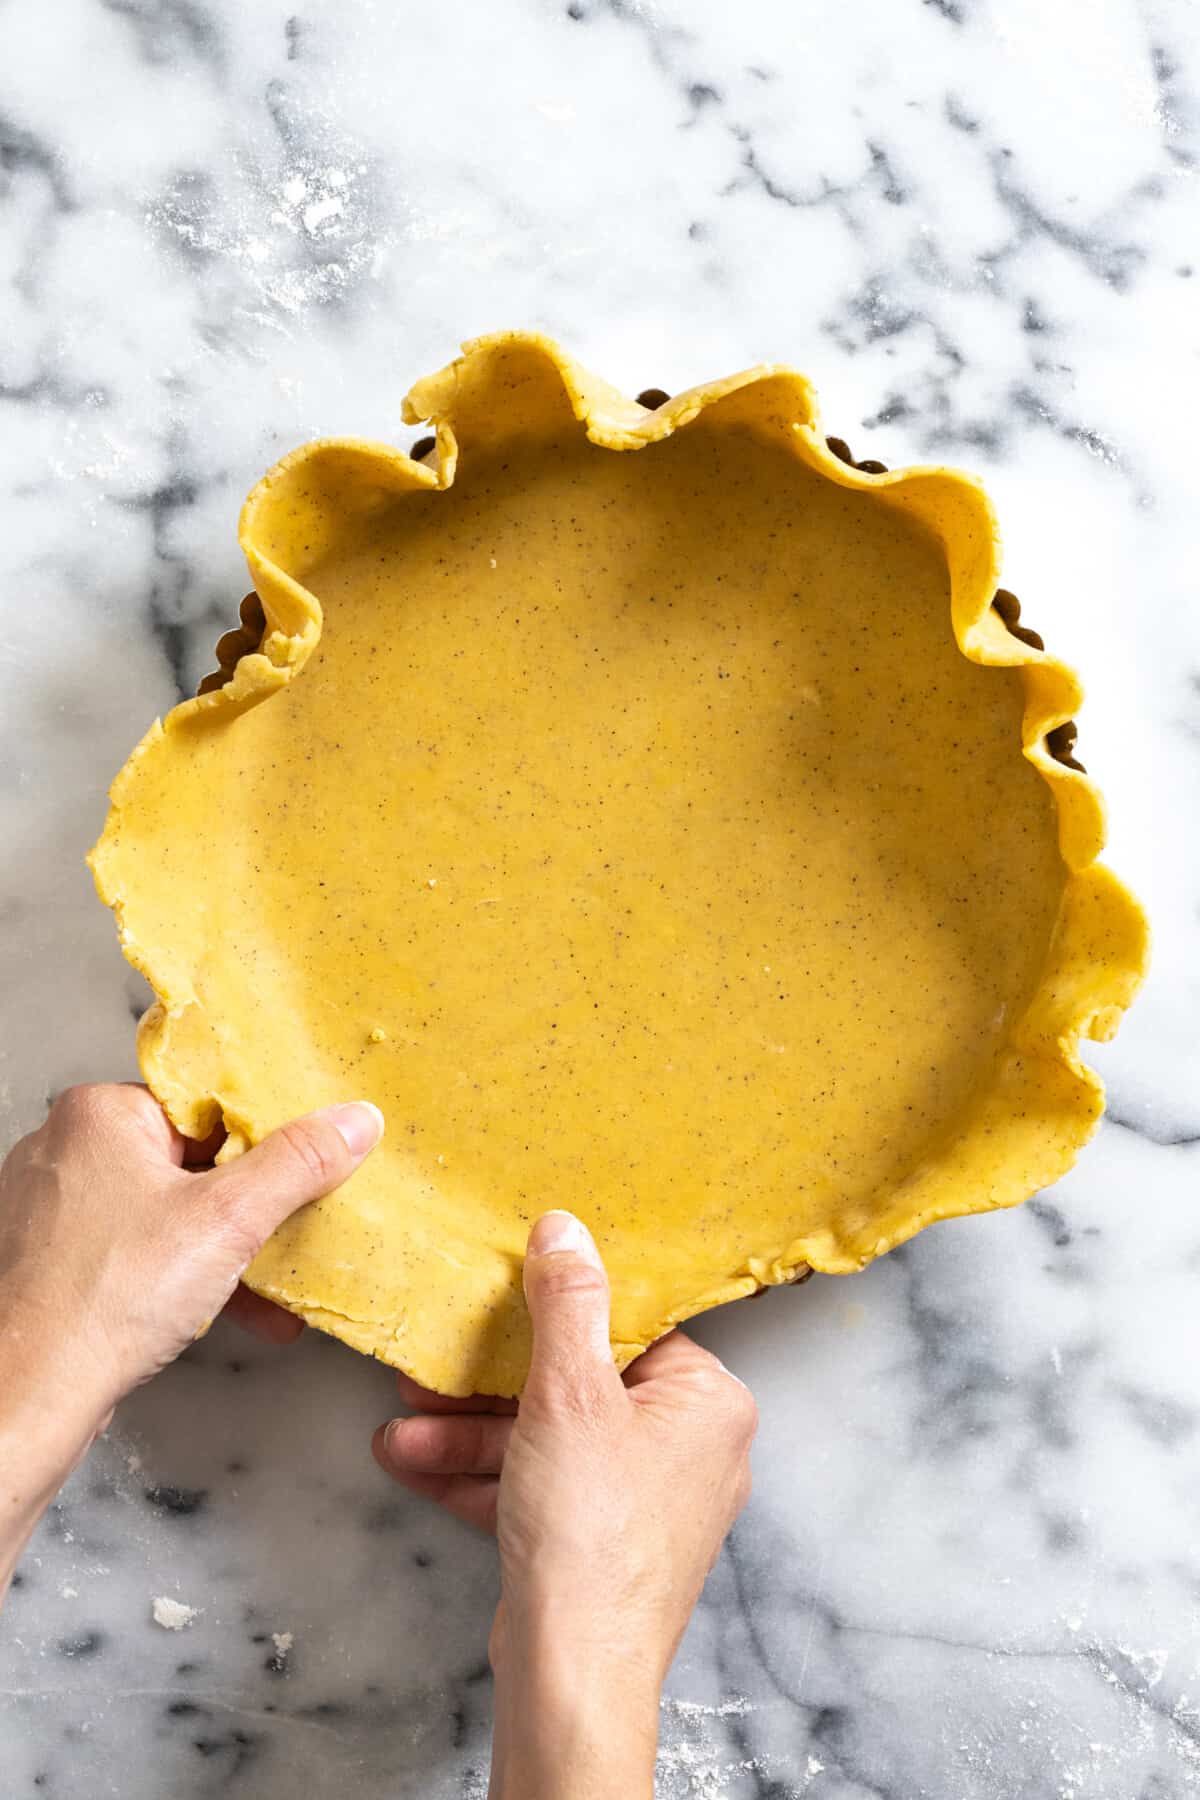
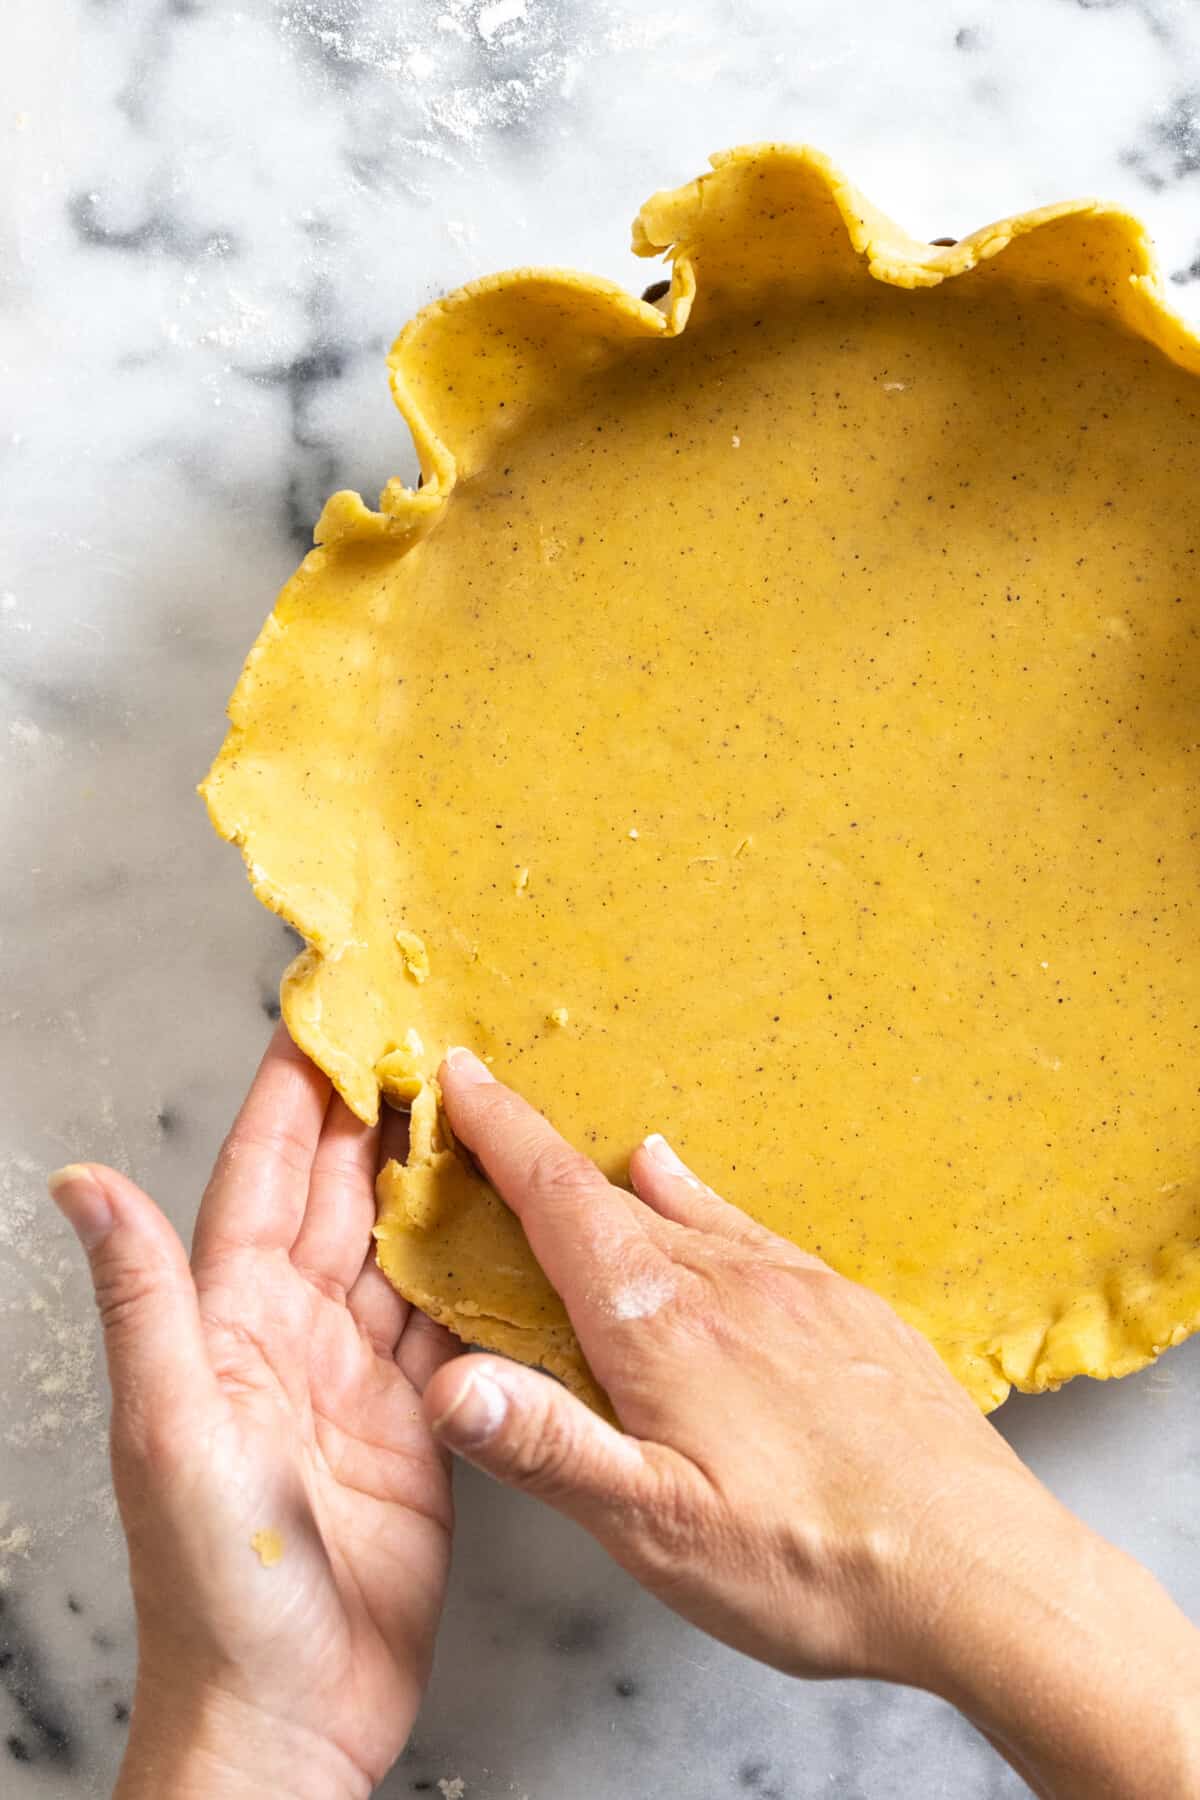
To transfer to the tart pan, roll the dough back around the rolling pin, then unroll it centered over the tart pan. Neatly finish the edges of the tart by rolling the pin along the top of the pan. This will remove the excess dough in a snap and give you a crisp, fluted edge.
Dock or prick the bottom of the tart shell with fork to prevent the dough from puffing up as it bakes. Transfer to refrigerator or freezer to chill while the oven preheats.
Blind Baking Tart Shell
Center rack in the oven and preheat oven to 375°F.
Press crumpled parchment paper or foil tightly against the crust, covering the edges to prevent them from burning. Fill with pie weights, dried beans or uncooked rice, making sure they’re evenly distributed and fill the entire shell.
Bake the crust for 20 minutes, until the foil no longer sticks to the dough and the edges start to look golden. Gently remove weights by lifting the parchment or foil from the pie shell and set aside.
For a partially baked crust - bake for another 5 minutes without the weights until the the crust has a firm film on the top layer. If you are baking a tart with a baked filling, follow the tart recipe. You should be filling and baking at this point.
For a no-bake filling recipe, you need to fully bake the crust. So, bake for about 10 minutes longer until golden brown and dry. Transfer to a wire rack and let cool completely before filling.
Notes
This Savory Pie Dough can be rolled or pressed into a tart pan. See the notes in the above post for more detail.
Since this is a versatile recipe, it can be used for 1 single 9" or 9 ½" round tart, divided into smaller tart pans, divided into 12 rounds for muffin pan mini tarts or used in a square or rectangular tart pan. You've got lots of flexibility here. Just make sure the tart dough is somewhere between ¼" - ⅛" thick.
This tart dough may be frozen for up 3 months, if sealed tightly. Either defrost it in the refrigerator overnight or for 90 minutes to 2 hours on the counter before rolling.
- Prep Time: 20
- Chill Time: 30
- Cook Time: 40
- Category: Baking
- Cuisine: Tart


Sylvia says
I usually quick freeze butter for 20 min then grate it onto pastry, spread all over the top, not in a pile, mixes in quite quickly and gives good flake when cooked
Becky Sue says
This is a great method as well. Thanks for sharing, Sylvia.